We’ve introduced a new, streamlined way to set up SAML 2.0 Single Sign-On (SSO) via our SSO Portal, powered by Descope.
There are no changes required for organizations that have already set up SSO.
This article walks you through:
Setting up SSO (SAML 2.0) for the first time: How to configure SSO for 6sense application, if you’re setting it up for the first time
Updating your existing SSO configuration when there are changes to the settings at your Identity Provider (IdP).
Reconfiguring SSO when your organization switches to a new Identity Provider.
Removing SSO configuration if your organization decides to remove SSO and revert to Basic authentication.
Things to consider before you begin
Review the following information before you start the integration:
To set up or make changes to SSO, you must be an administrator. Configuration is done through the SSO setup portal. You will need to make updates in your IdP console. If you don’t have access to your IdP’s admin console, work with your IT administrator to complete the setup.
Security and JIT Provisioning: Because the integration uses just-in-time (JIT) provisioning, access to the SAML application should only be granted to the appropriate personnel.
By default, 6sense does not sync all users that have access to the platform. The integration uses JIT provisioning upon user login. 6sense creates a user when they initially log in to the 6sense platform.
Set up SSO for the first time
Follow the steps below to set up SSO (SAML 2.0) for the first time using the SSO setup portal.
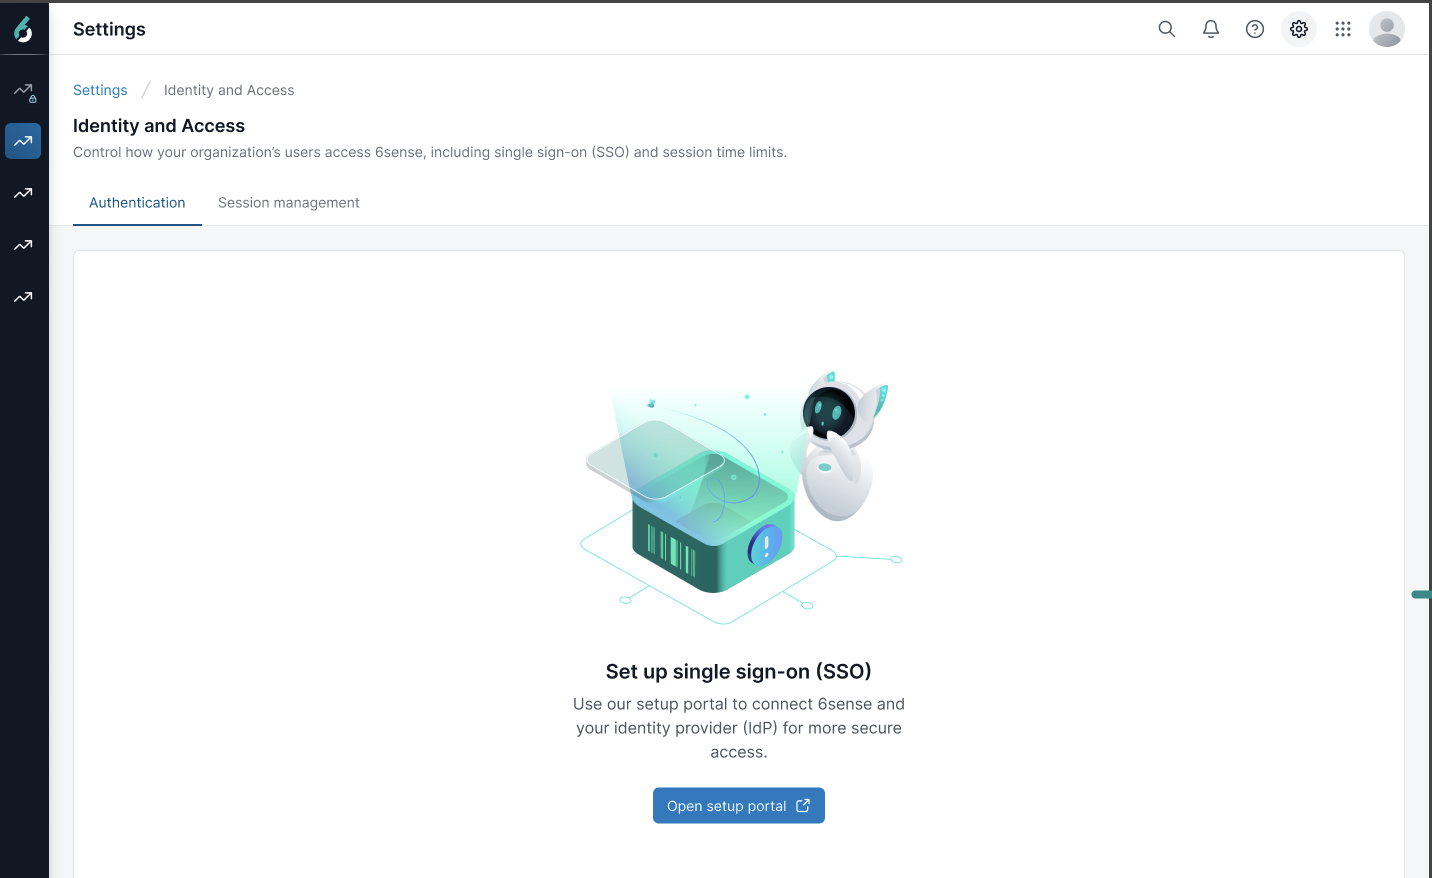
Step 1: Access the SSO setup portal
Log into 6sense.
Navigate to Settings > Security & Compliance > Identity and Access > Authentication.
Click Open setup portal and you will be redirected to the SSO Portal for your organization.
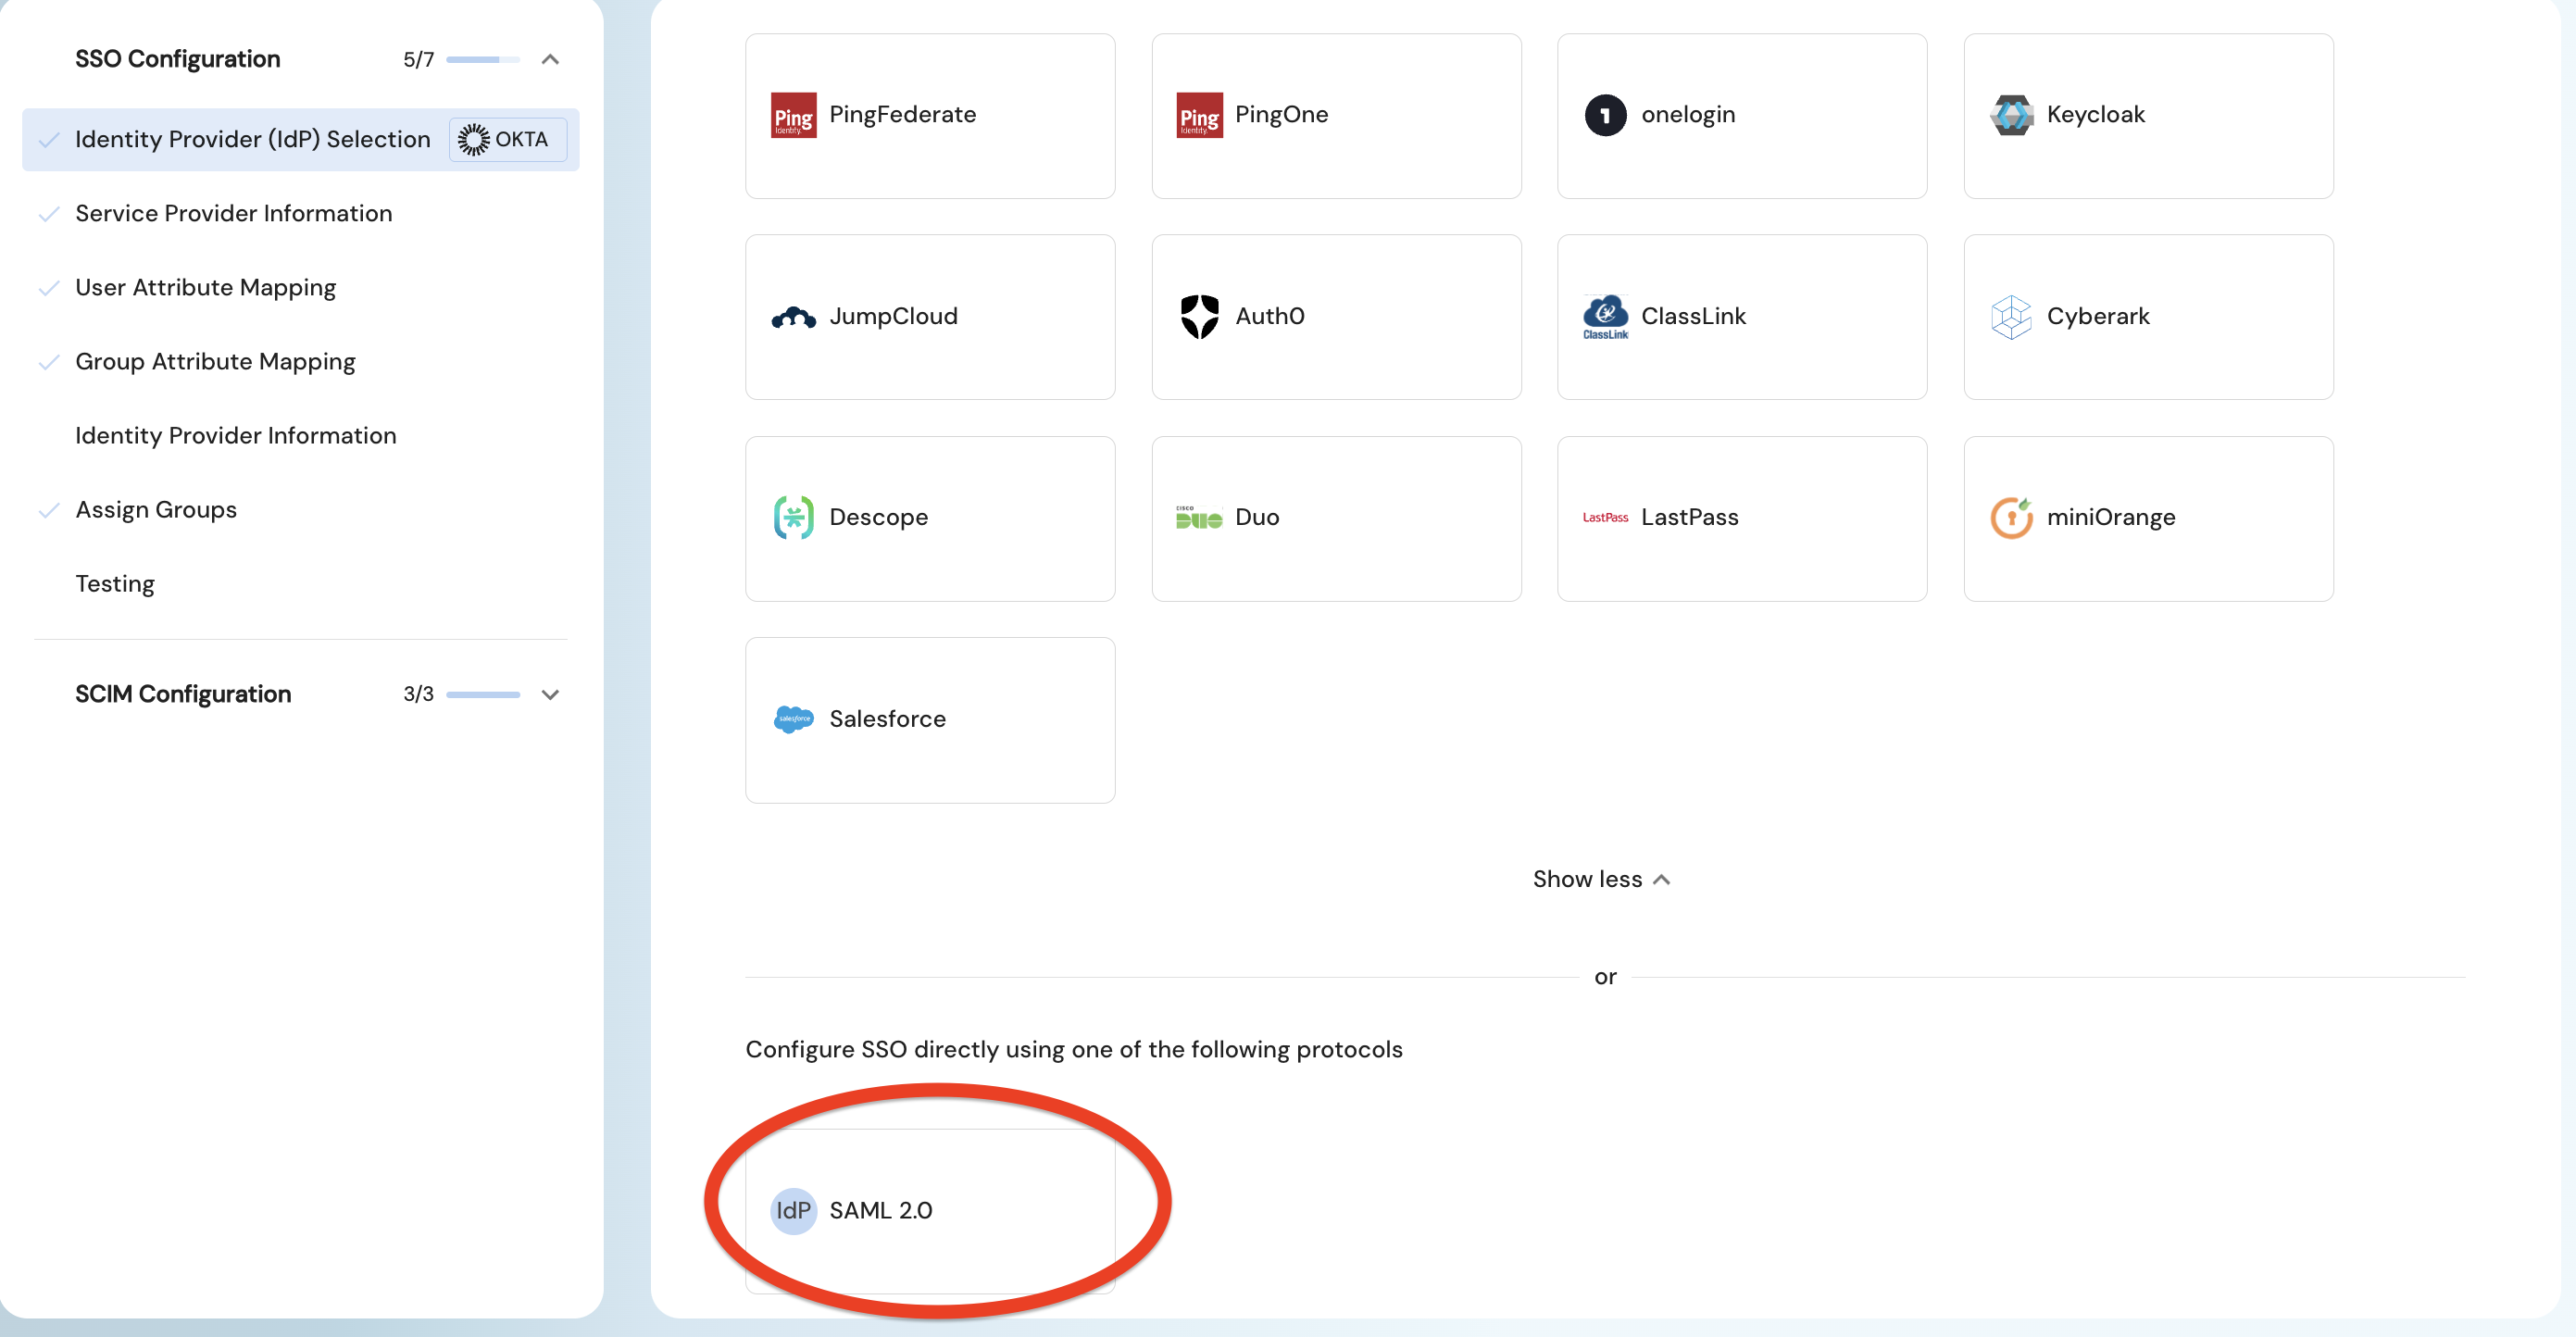
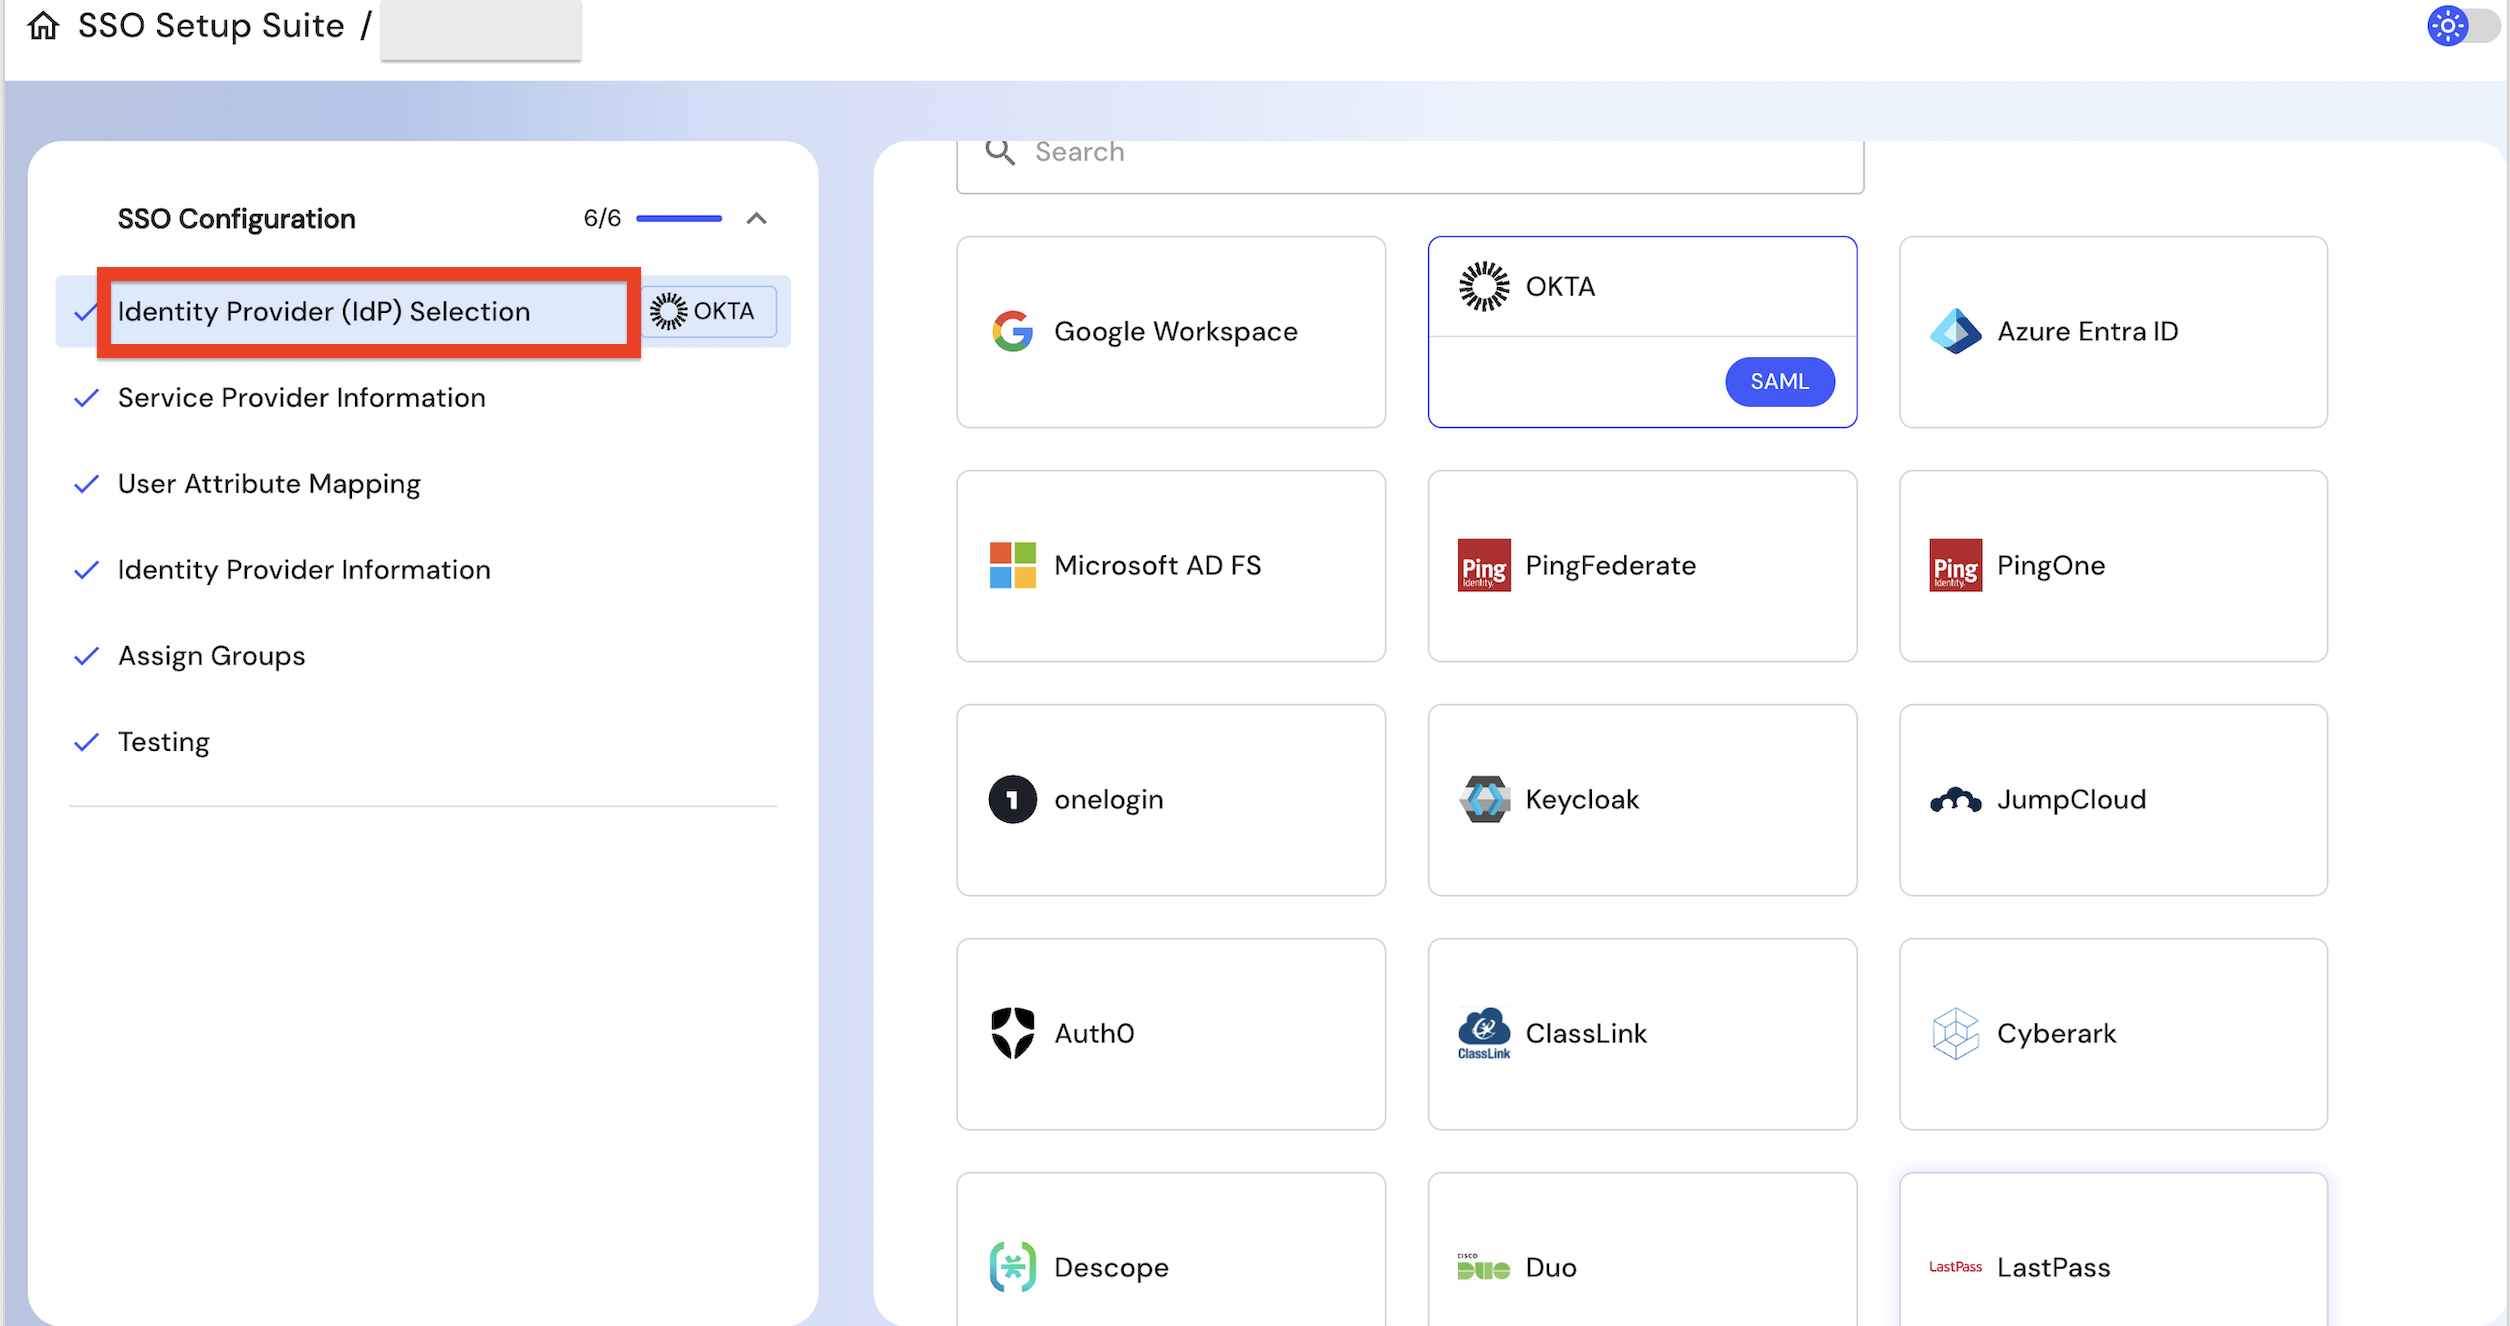
Step 2: Choose Your Identity Provider (IdP)
Click on the tile to select your IdP from the list (e.g., Okta, Azure AD, Google Workspace, etc).
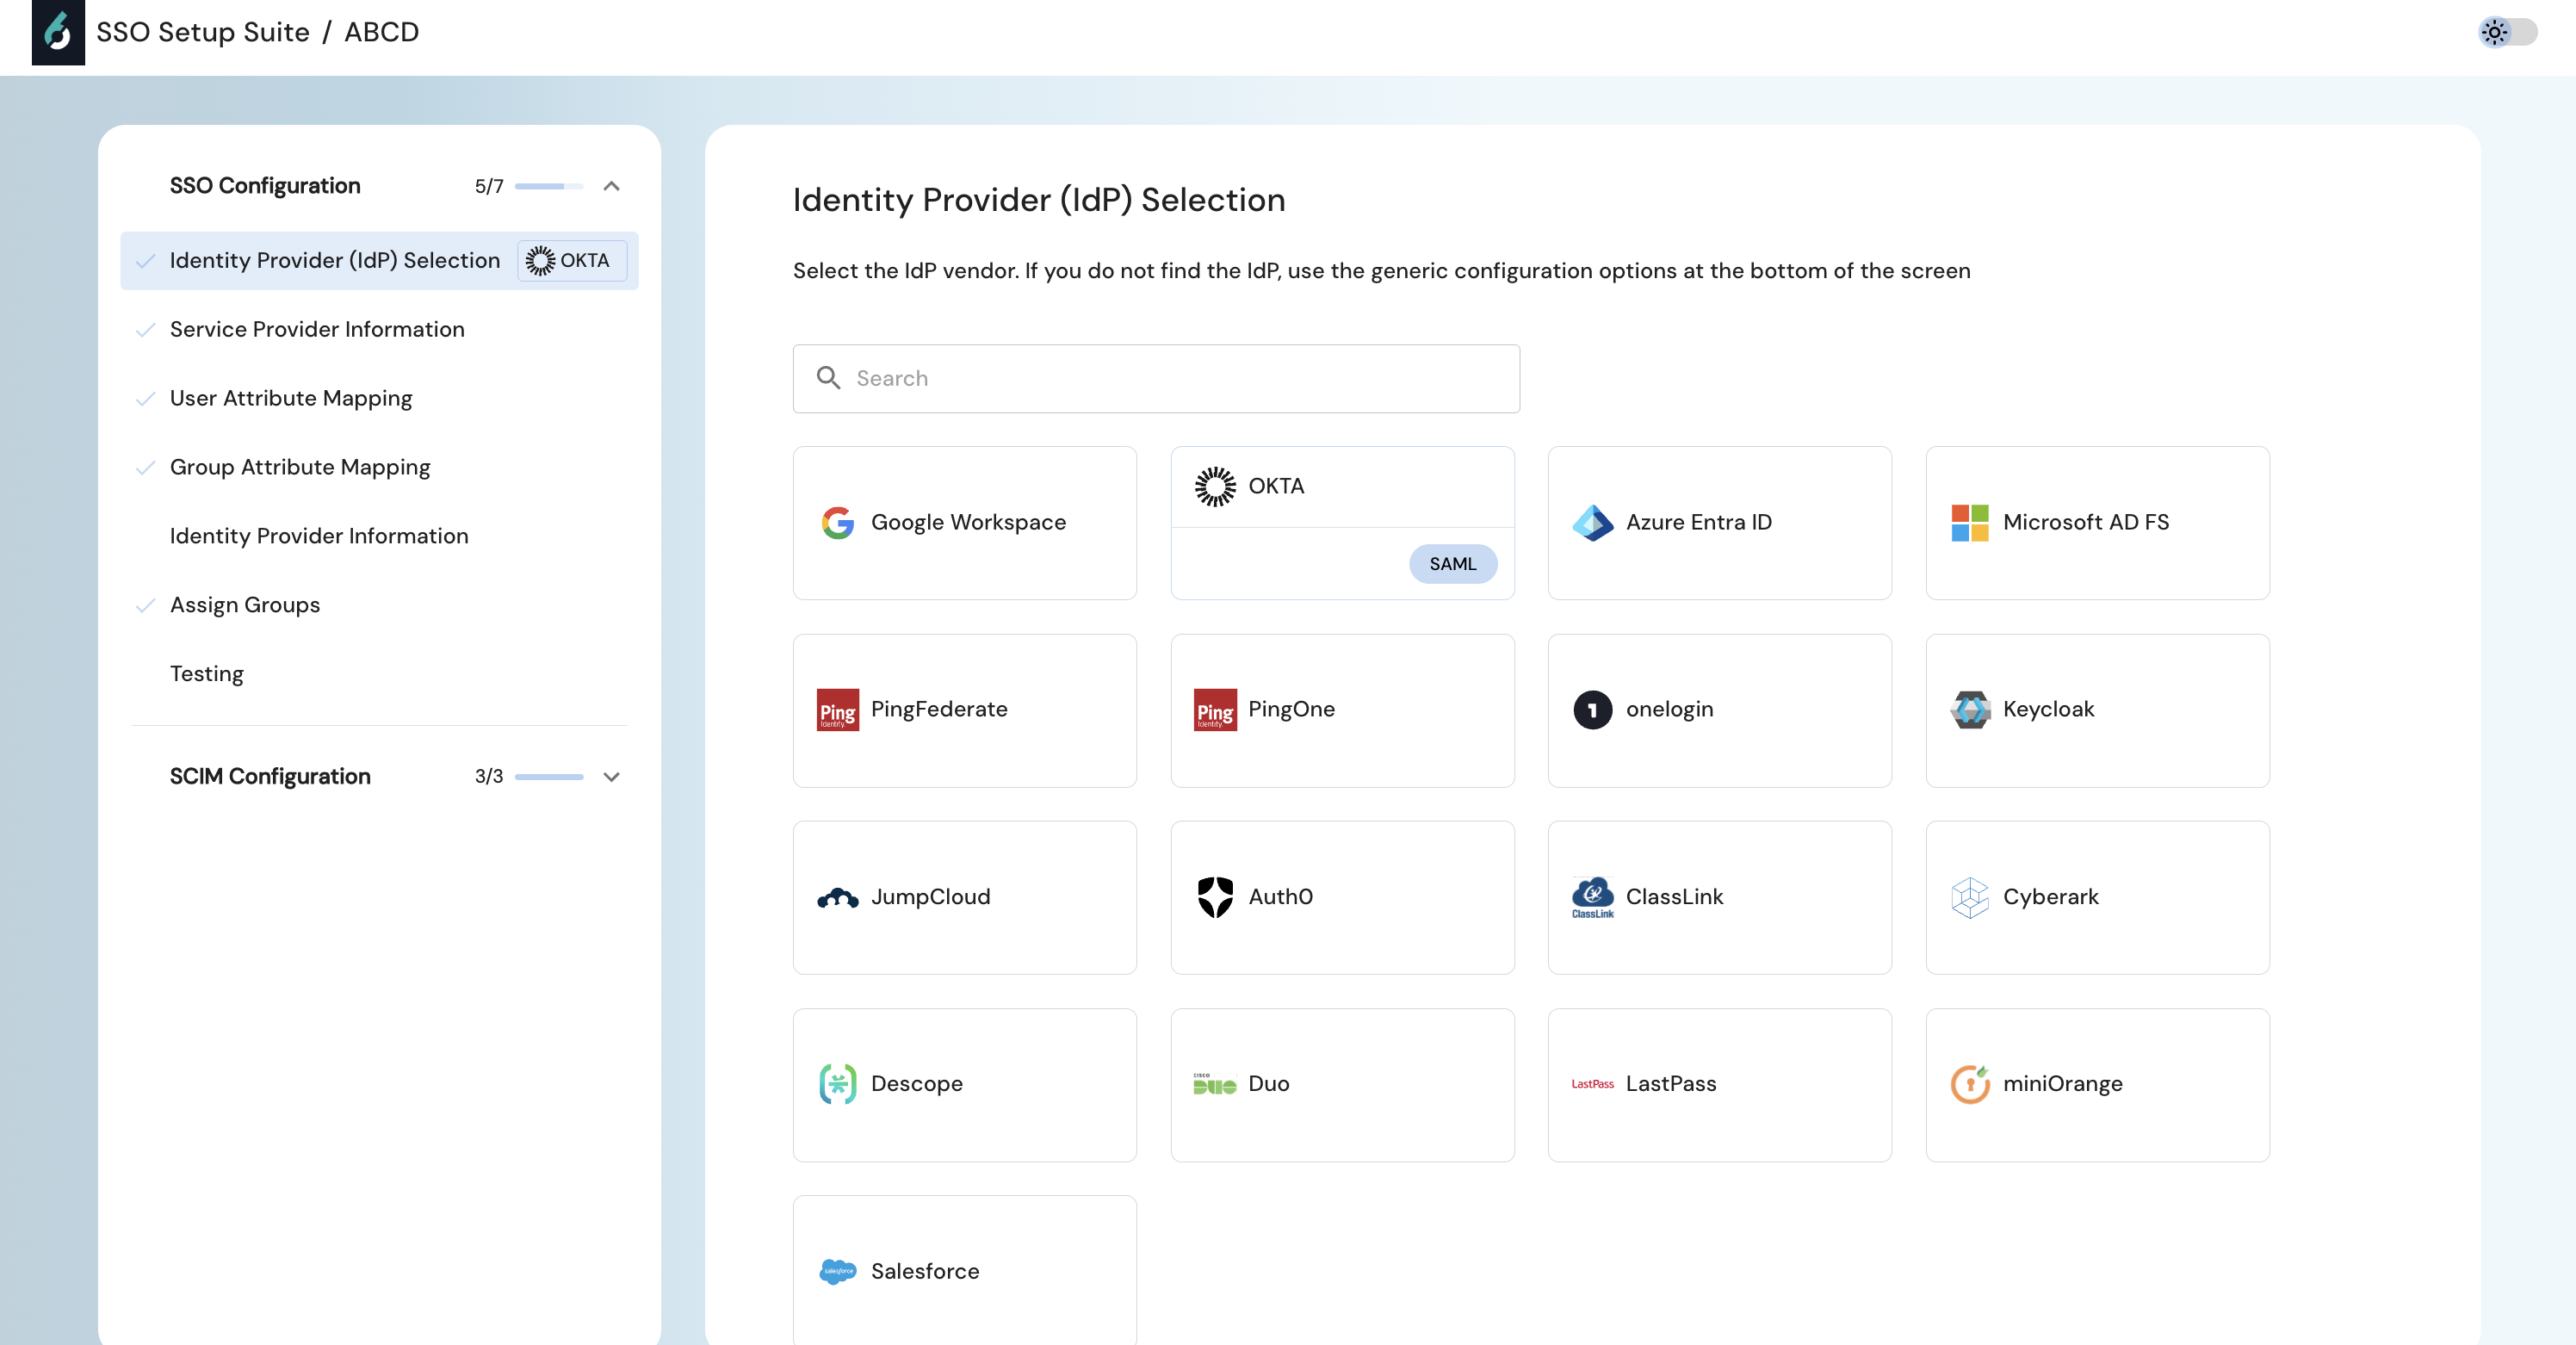
If your IdP is not listed here, select the custom integration setup shown by idP SAML 2.0 below.
Follow the step-by-step instructions shown in the portal.
These steps are tailored to your chosen IdP.
Follow them to enter the metadata URL, upload metadata, or configure manual fields for your IdP.
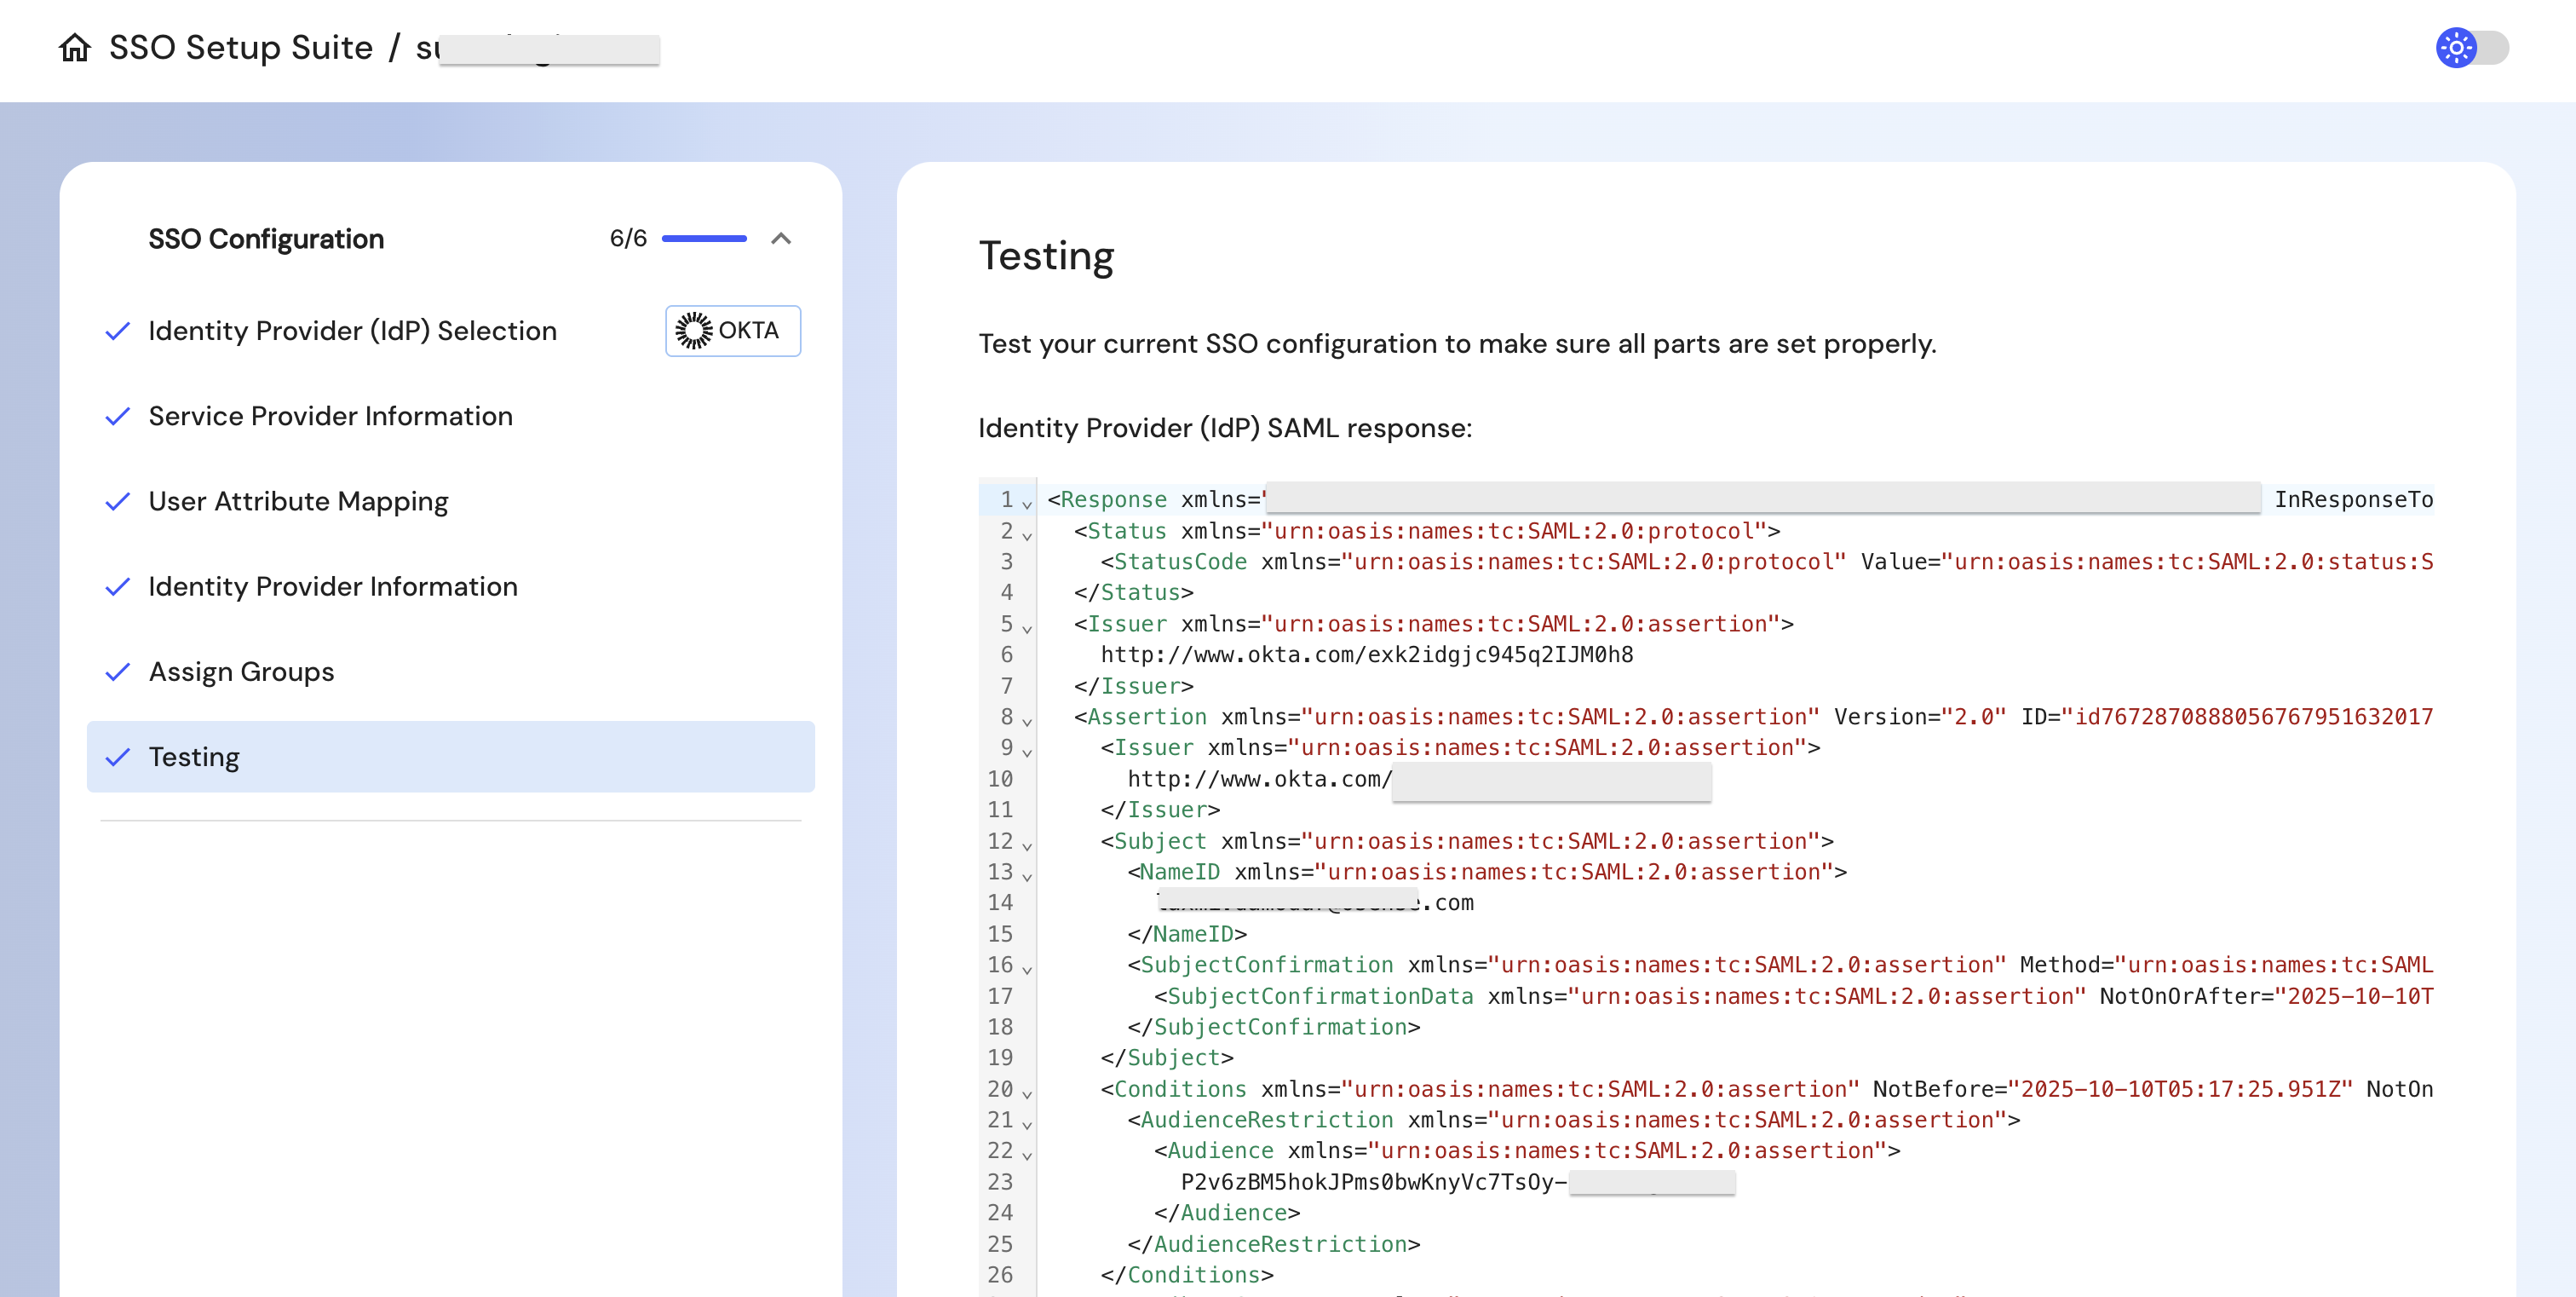
Step 3: Verify & Test
Once configuration is complete, click on the Testing option in the portal.
If the configurations are not correctly done, it will indicate a failure message. If it is a success, you will see a SAML response below.

Update SAML Configuration for existing SSO connections due to change in settings in your IdP
If your IT team makes changes in the IdP admin console, you may need to update your SSO setup in 6sense to keep login working smoothly. These IdP settings could be such as certificate rotation or updated endpoints.
Step 1: Access the SSO setup portal
Log into 6sense.
Navigate to Settings > Security & Compliance > Identity and Access > Authentication.
Click Open Setup Portal and you will be redirected to the SSO portal powered by Descope.
Step 2: Edit SSO configuration
Click on the existing SSO configuration tile and select Edit.

Navigate to the IdP information step if you want to make updates to the data.
Important:
Ensure that the ACS URL and SP Entity ID displayed in the SSO portal exactly match the values shown in your Identity Provider (IdP) console.If they do not match, update the IdP configuration based on the information provided in the new SSO portal.
Note: The step to update the Audience URI or SP Entity ID is required only the first time metadata is updated. This does not apply to customers who set up SSO for their organization directly through the new SSO portal.
Step 3: Verify & Test
Once configuration is complete, click on the Testing option in the portal.
If the configurations are not correctly done, it will indicate a failure message. If it is a success, you will see a SAML response below.
Reconfigure SSO when your organization switches to a new IdP
If your organization changes its IdP (for example, migrating from Okta to Entra ID), your SSO configuration in 6sense must be updated to reflect the new IdP settings. Failing to do so may result in authentication errors and prevent users from logging in.
Important: Make these changes during a planned window to avoid login disruptions for your users.
Step 1: Access the SSO setup portal
Log into 6sense.
Navigate to Settings > Security & Compliance > Identity and Access > Authentication.
Click Open setup portal and you will be redirected to the SSO portal.
Step 2: Update to the new IdP
Select the existing configuration in the portal and click on Edit.

Click on Identity Provider (IdP) Selection and select the IdP you plan to switch to.
Follow the step-by-step instructions for the chosen idP.
Test the settings and confirm that no error is received.
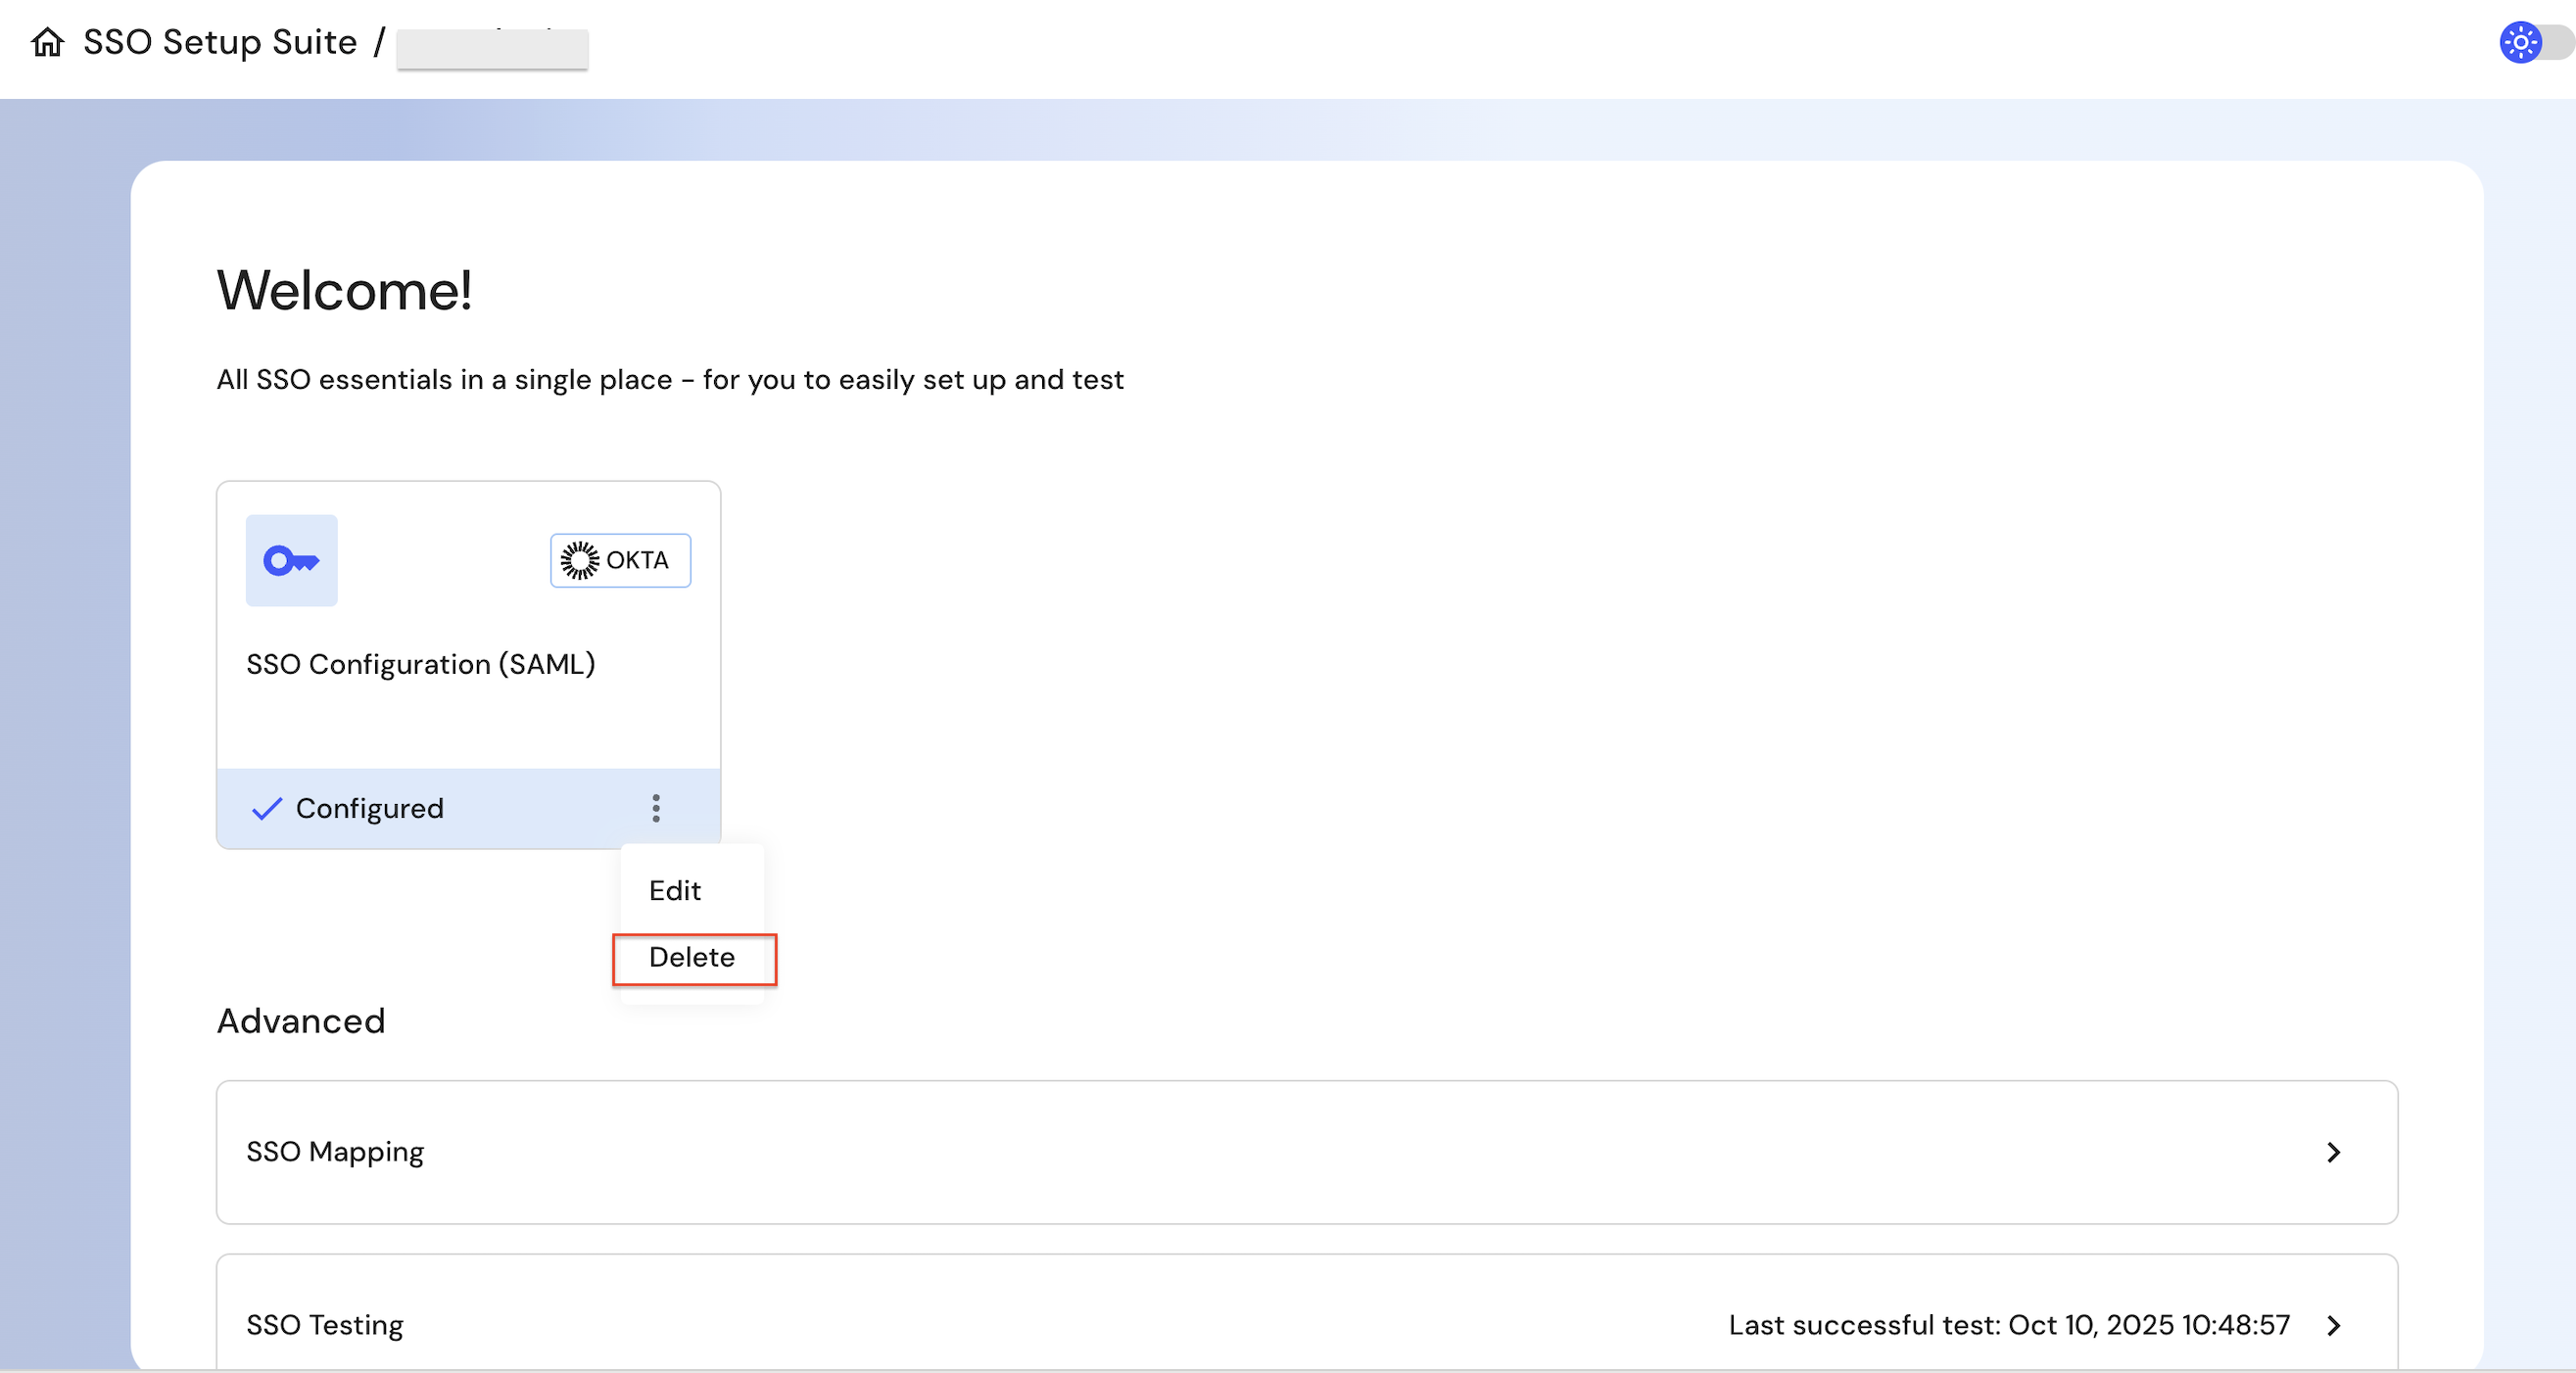
Remove SSO configuration
If your organization decides to remove SSO and revert to basic authentication, you can now do so directly through the SSO Portal.
Step 1: Access the SSO setup portal
Log into 6sense.
Navigate to Settings > Security & Compliance > Identity and Access > Authentication.
Click Open setup portal and you will be redirected to the SSO portal.
Step 2: Remove the SSO configuration
Select the existing configuration in the portal and click on Delete.
FAQ
Do I need to be an admin to configure SSO?
Yes, only organization administrators can access and make changes to the SSO settings on 6sense platform.
What if our Identity Provider (IdP) changes?
If your organization switches IdPs (e.g., from Okta to Azure AD), you’ll need to update your SSO configuration in the SSO portal with the new metadata, ACS URL, and Entity ID. You can use the SSO portal on the 6sense platform which has guided steps tailored per your chosen idP.
What happens if I don’t update the metadata after a certificate change at my idP?
If your IdP rotates its certificate and you don’t update the metadata in the SSO portal, authentication may fail, and users won’t be able to log in. Be sure to keep the SSO portal configuration at 6sense platform in sync with your IdP.
How can I test if SSO is working correctly?
The portal includes a Testing feature to verify the configuration before enabling it for your users. Always test after making any changes.
Can I disable SSO after setting it up?
Yes. Admins can delete the SSO configuration from the portal if needed. However, all the users will then have to reset their passwords using the forgot password flow to login using the Basic two factor authentication logins.
Is SCIM provisioning available?
We have paused all new SCIM enablement until Q4’26 as we work on introducing a more standardized SCIM solution, offering enhanced features and functionality. We'll notify you once it's live.
Which IdPs are supported?
The portal supports major IdPs including:
Okta,
Azure Entra ID
Google Workspace
PingOne
PingFederate
Microsoft AD FS
Onelogin
Keycloak
Jumpcloud
Auth0
Classlink
Cyberark
Descope
Duo
Last Pass
Salesforce
miniorange
For unsupported IdPs, you can choose the General SAML 2.0 option and configure as per the instructions provided in SSO portal.
What attributes should I map in my IdP?
Currently, we support mapping email, First Name and Last Name for better user profile management. The SSO portal will guide you based on your IdP selection.
I’m locked out due to SSO misconfiguration or certificate expiry. What should I do?
Please create a case with 6sense Technical Support by visiting the RevCity portal and we will resolve the issue (instructions here).
I just uploaded a new metadata certificate for my idP, but while testing it gives me an error. What could be wrong?
Please work with your IT admin and confirm if the SP entity ID and ACS URL at your idP admin console are reflecting the same information as guided in the SSO portal for your chosen idP.
I have set up SSO. How do I add an agency user outside of my organization?
The agency user would need an account in your organization’s identity provider when SSO is in use. The username can be their agency email if their identity provider authorizes that agency user’s access to the platform.