In this doc we will go over the native configuration of the 6sense web tag within Adobe Launch which requires a basic understanding of software code, and the ability to make basic JavaScript changes.
Native Configuration within Adobe Launch
Copy and paste code configuration required
More management overhead
May give some organizations the control they like
The 6sense web tag will enable the automatic tracking of visitor events on your website. For more information on this, please visit 6sense JavaScript Beacon Web Tag.
Installation
Adobe Launch Configuration
By leveraging native configurations within Adobe Launch, you can call the 6sense Web Tag Beacon asynchronously to de-anonymize web visitor data within the 6sense ABM platform.
Because of the nature of client-side integrations and asynchronous API calls, this integration must be allowed to fire as soon as possible so that all web activity may be captured.
There are additional modifications that can be made to the web tag to support cookie consent and other custom configurations. Please reach out to your CSM, Customer Support, or other 6sense Contact for more information and assistance.
6sense places a JavaScript web tag on your website to help you track and identify intent on your website. This can include lots of different domains depending on your configuration.
Here is a rough outline of the approach:
Deploy 6sense Web Beacon on your page using Adobe Launch
Create a rule
Create an event
Deploy 6sense Web Beacon using Adobe Launch
Log on to Adobe Launch. Go to your Library.
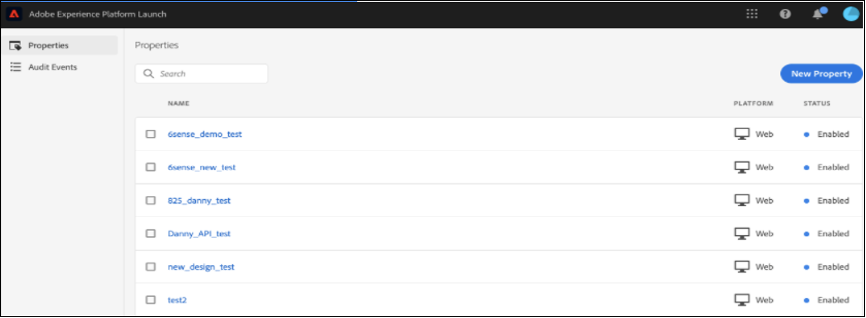
Create a new Property or edit an existing Property which is used for your website. Click here to learn more about Companies and Properties in Adobe Experience.
Click on Rules on the left sidebar.
Create a rule to add 6sense Web Tag Beacon, name it something like ‘Load 6sense’.
This will enable pages to be tracked using 6sense web tag.
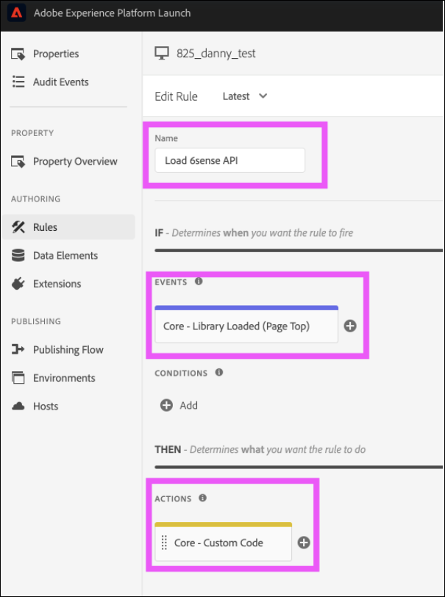
Create an event. This is the trigger. Ensure this runs as early as possible.
Select Core – Library Loaded (Page Top).
Create an action. This will perform the action when the above event is triggered.
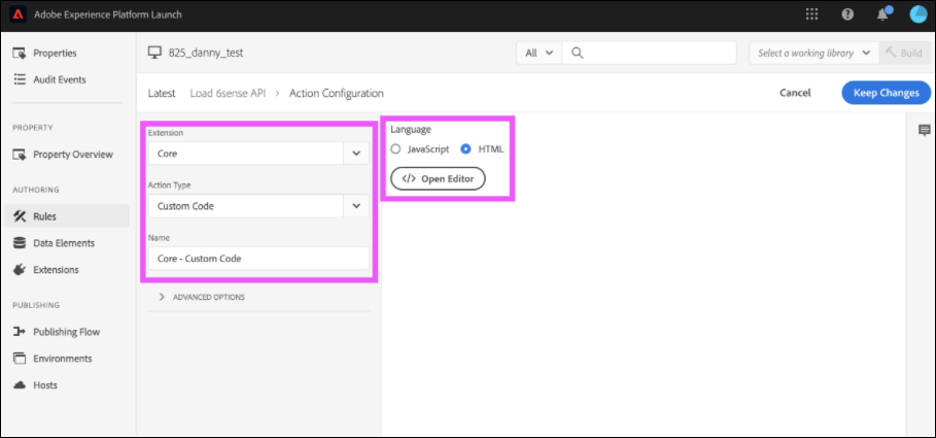
Action Type – Custom Code
Name – Core – Custom Code
Select HTML
Open Editor and paste the following:
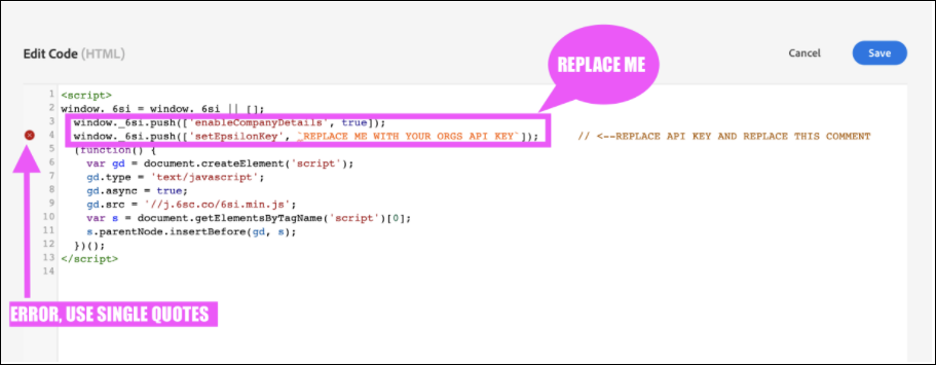
<script>
    window._6si = window._6si || [];
    window._6si.push(['enableEventTracking', true]);
    window._6si.push(['setToken', '<INSERT CUSTOMER TOKEN>']);
    window._6si.push(['setEndpoint', 'b.6sc.co']);
    (function() {
        var gd = document.createElement('script');
        gd.type = 'text/javascript';
        gd.async = true;
        gd.src = '//j.6sc.co/6si.min.js';
        var s = document.getElementsByTagName('script')[0];
        s.parentNode.insertBefore(gd, s);
    })();
</script>
Replace <INSERT CUSTOMER TOKEN> with your organizations Web Tag token. This can be found when viewing the web tag in Settings in the ABM platform.
Did you replace your Customer Token? (Found when viewing the web tag settings).
When copy and pasting code between mediums, unintended formatting errors can arise.
In this case, it is most likely the difference between the backtick symbol `, also known as acute, and a single quote ‘.
For the purposes of this configuration, you should always use single quotes.’
Publishing Flow -> Install the Library you just built using standard Adobe protocol. You can then deploy this Configuration to any of your websites by copy and pasting the script and placing it inside the <head> of your website document. This script contains all the configurations you just made above and will automatically execute the 6sense API upon page load.