This step-by-step guide explains how to integrate 6sense with Outreach. Integrating 6sense with Outreach allows users to add contacts to an Outreach Sequence through 6sense Sales Intelligence.
This 6sense integration connects 6sense with your production Outreach instance so that 6sense has sufficient permissions to sync with your Outreach on a regular basis.
There are two stages to this integration, integration and enablement.
A 6sense admin performs the first phase of integration, described in the section below, which must be completed before beginning the second phase.
The second phase of integration is performed by an Outreach platform’s admin. The latest instruction can be found in Outreach’s support documentation.
Integrate Outreach
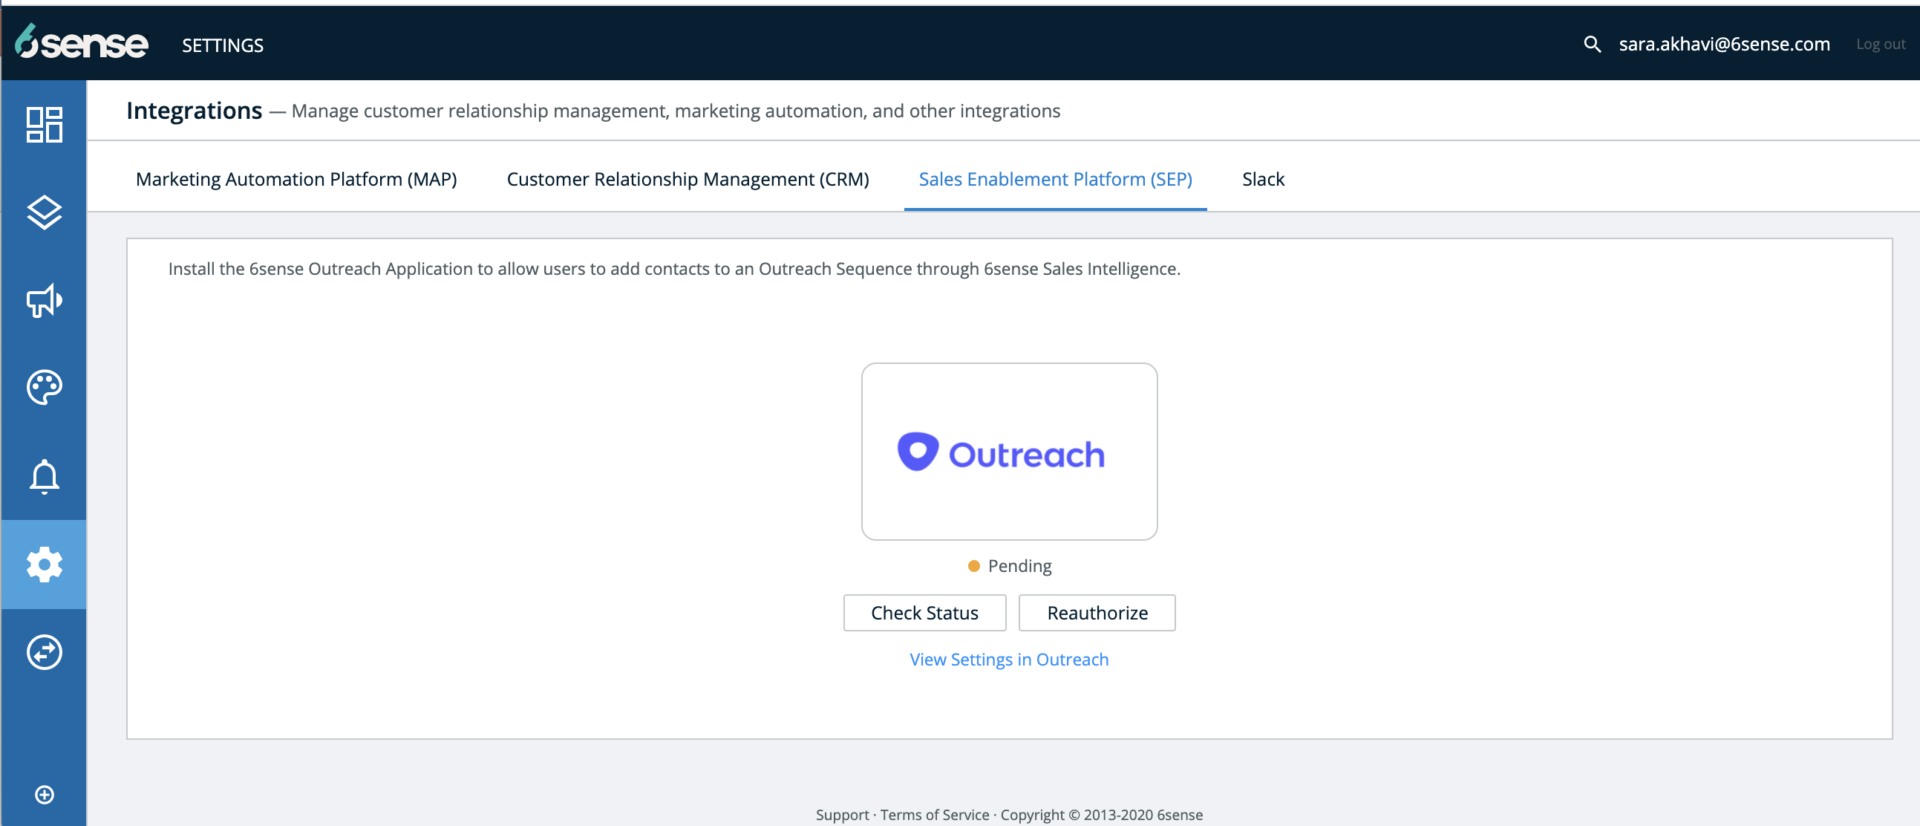
Navigate to Settings and select the Integrations section.
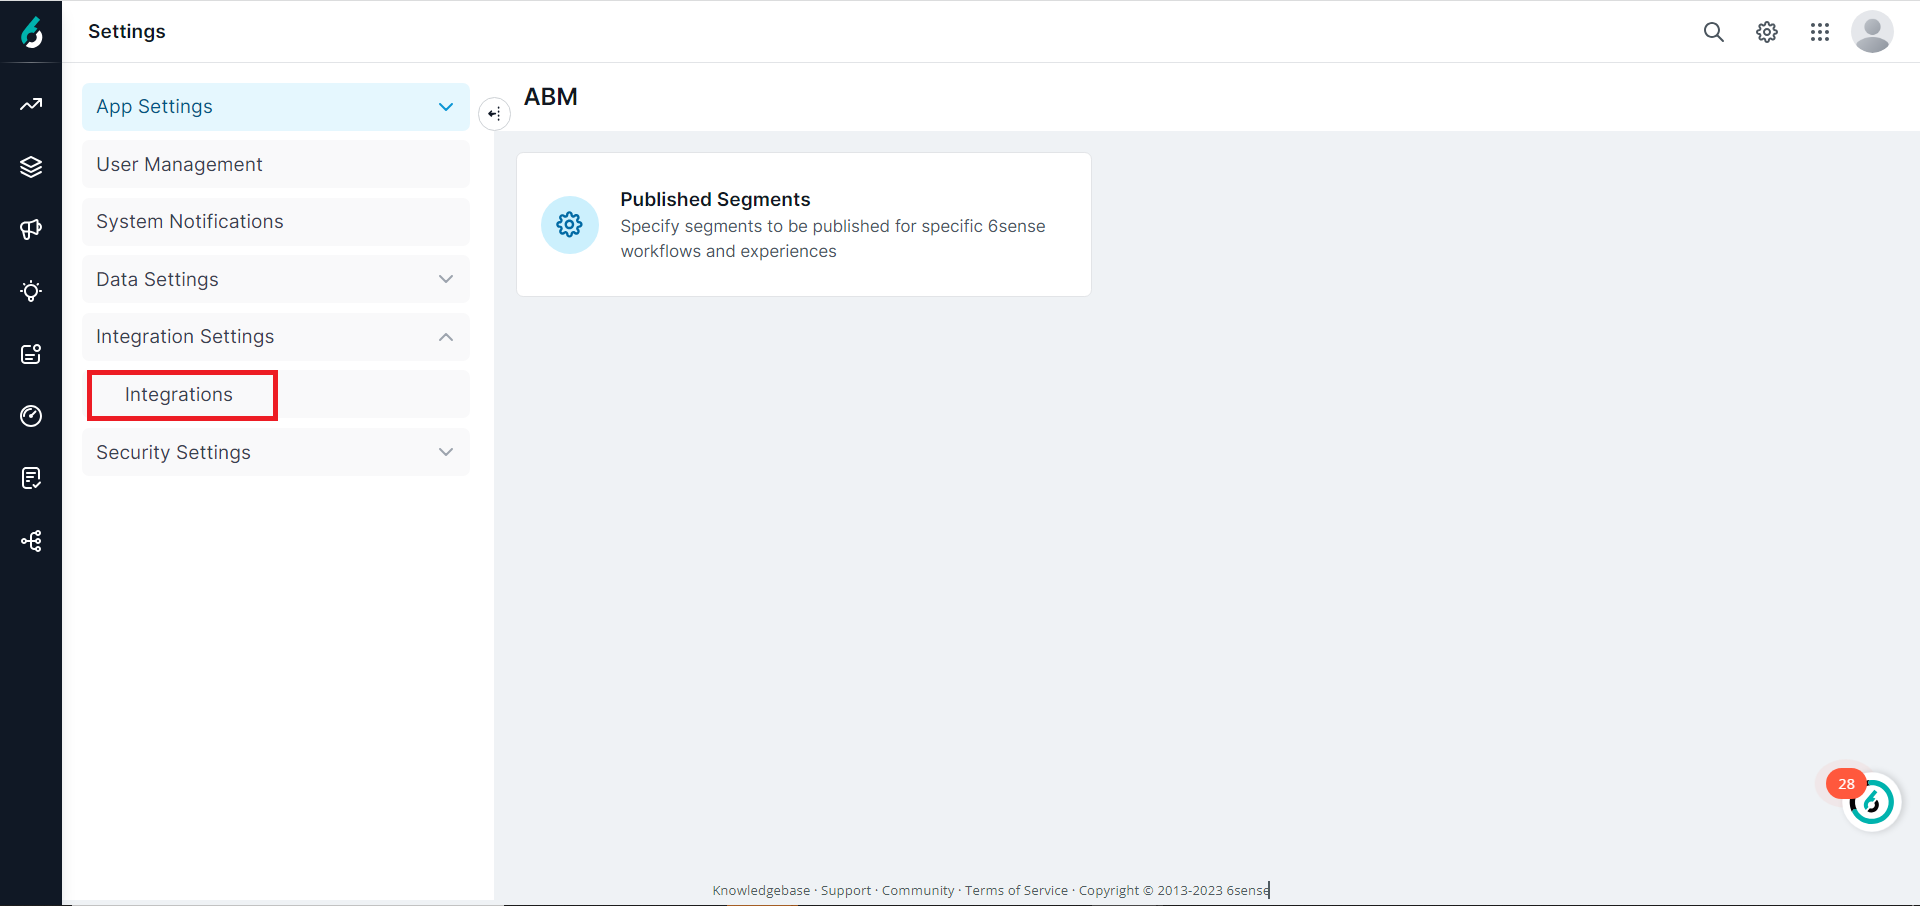
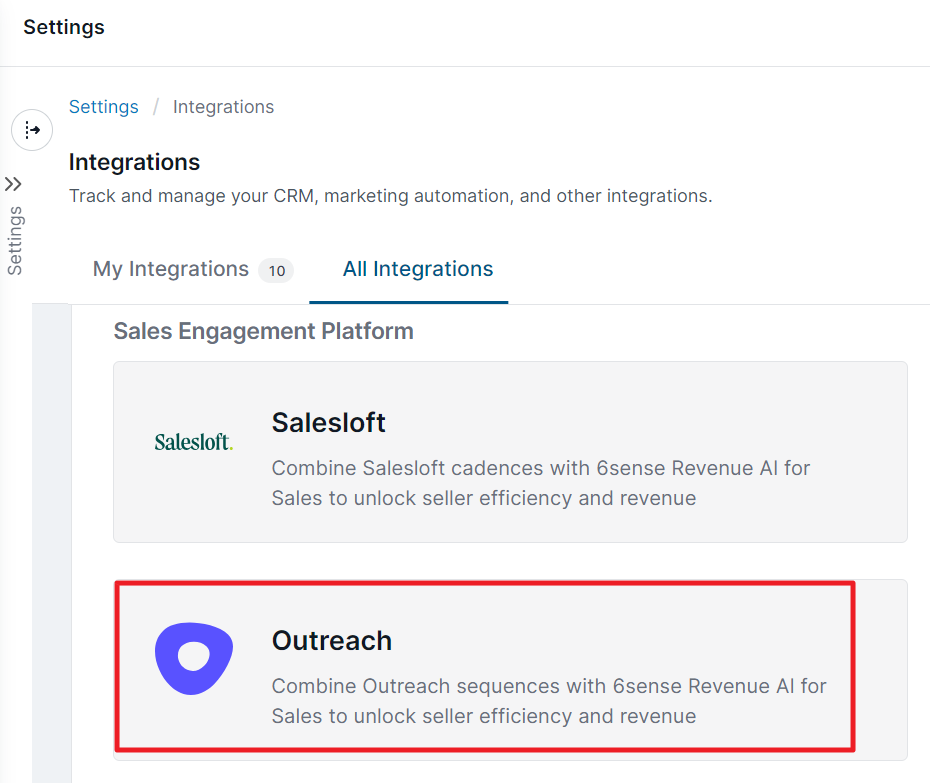
Select Outreach from the list of Sales Enablement Platforms (SEP).
At this step you must connect and authorize the 6sense platform to the Outreach Application to allow users to add contacts to an Outreach Sequence through Sales Intelligence or via Orchestrations:
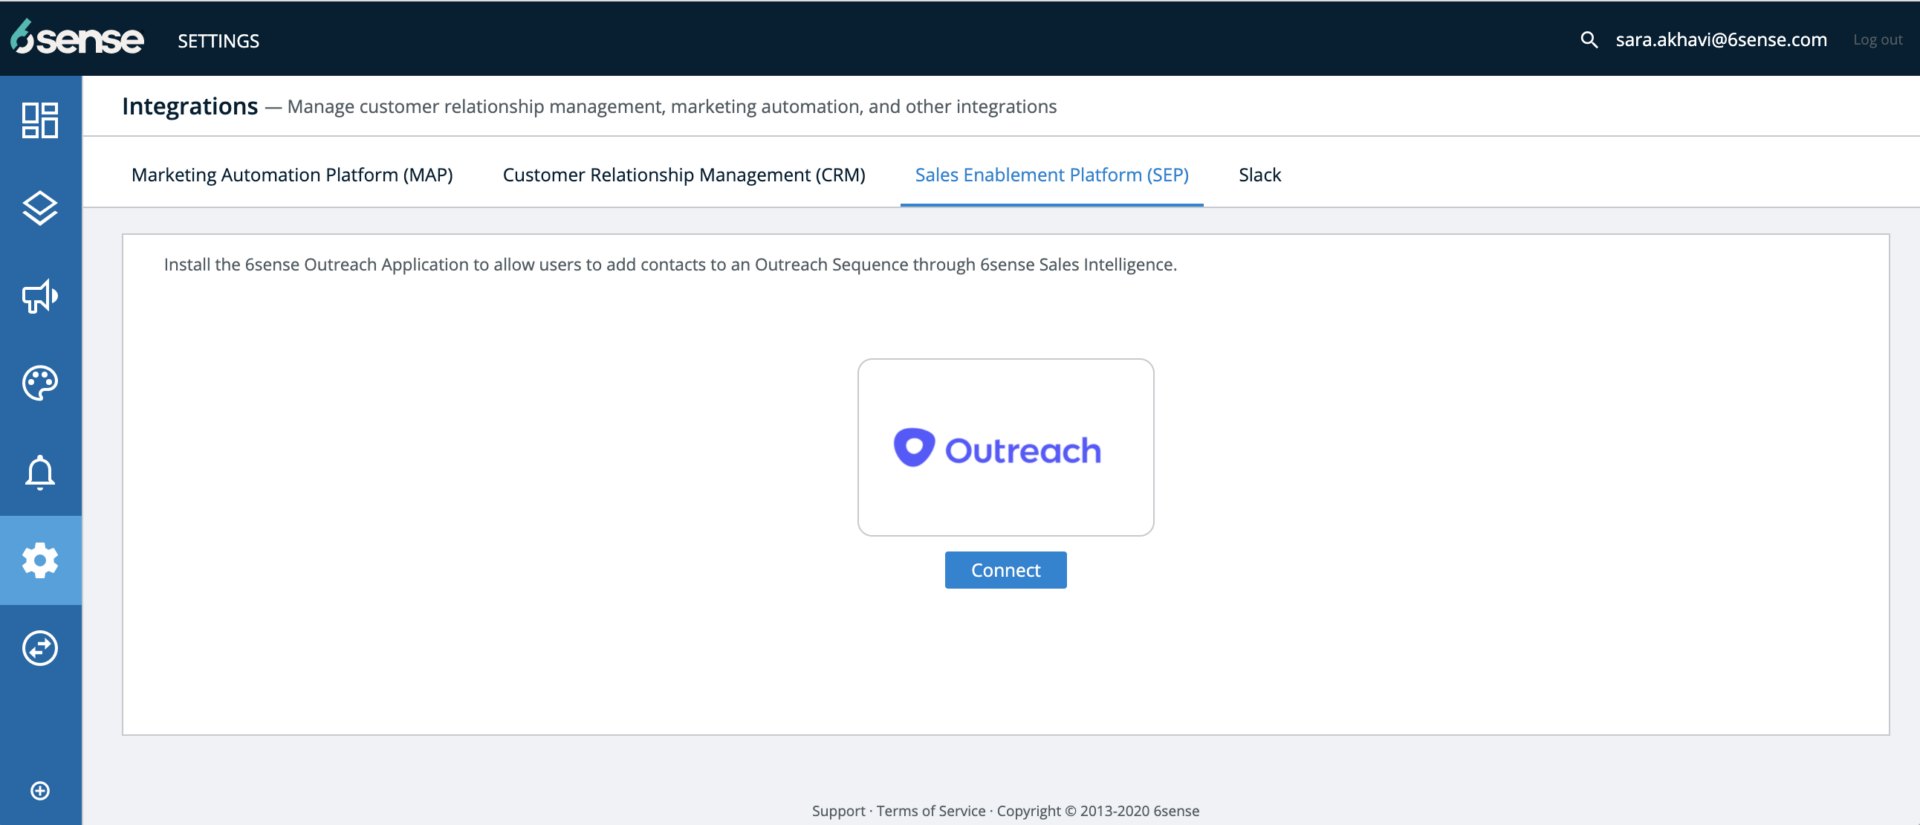
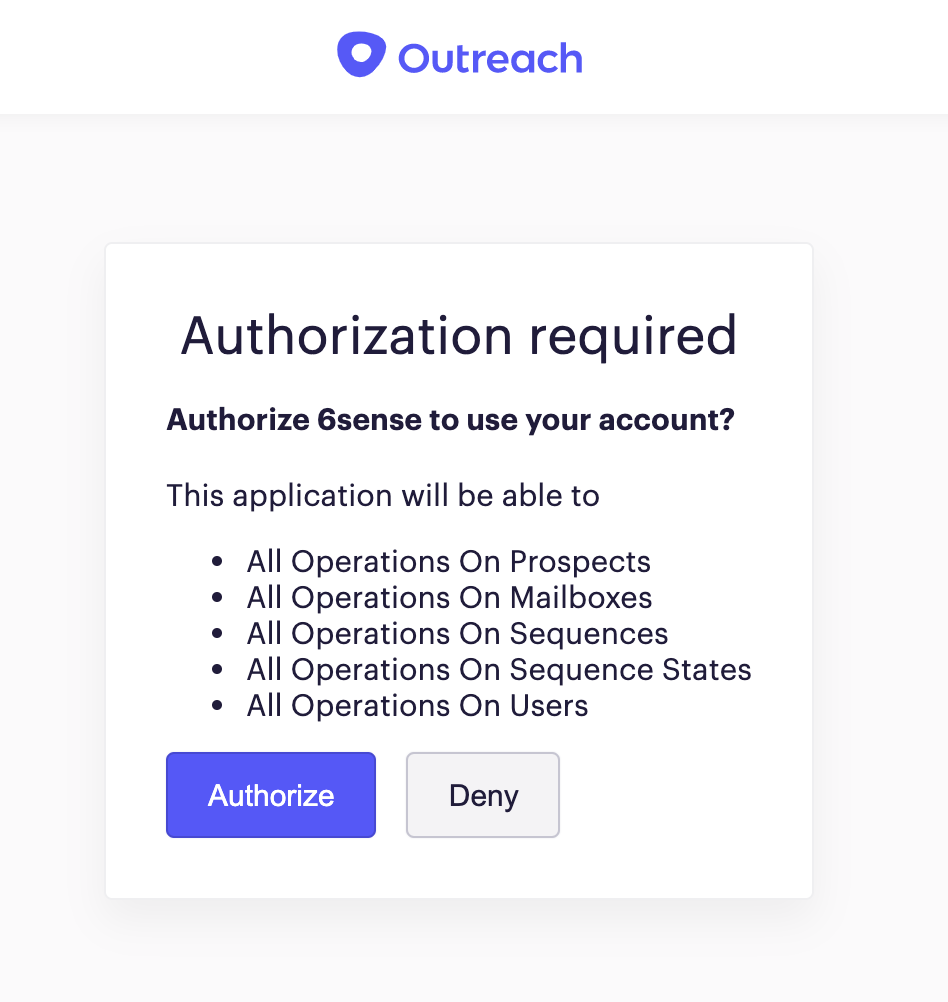
Send a request to the Outreach application to Generate authorization using OAuth on the Outreach.io website by clicking on the Connect button. You will be prompted to log in to the Outreach application’s settings to authorize the connection (screenshot below). Please note an Outreach application’s admin can authorize the 6sense application on the Outreach application’s Setting at this step.
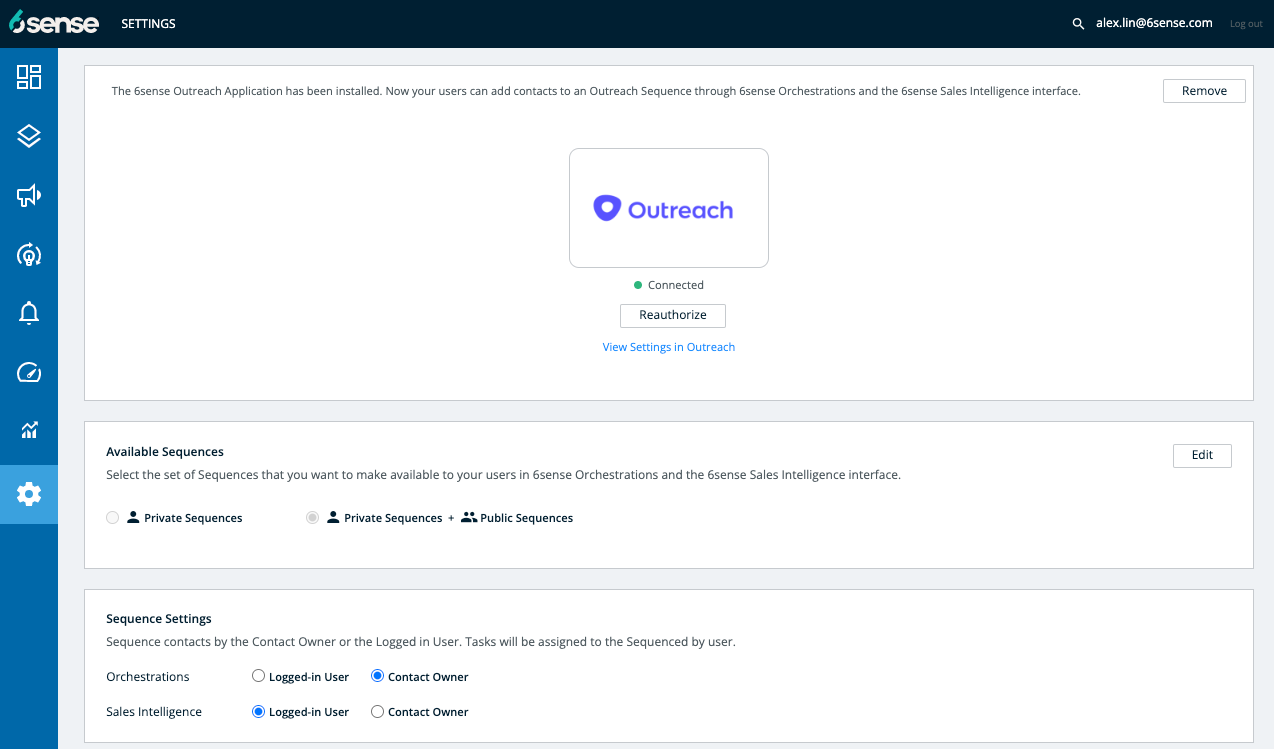
Back on 6sense ABM Settings, once the permissions are granted you will see the following screen and always have the option to remove the connection.
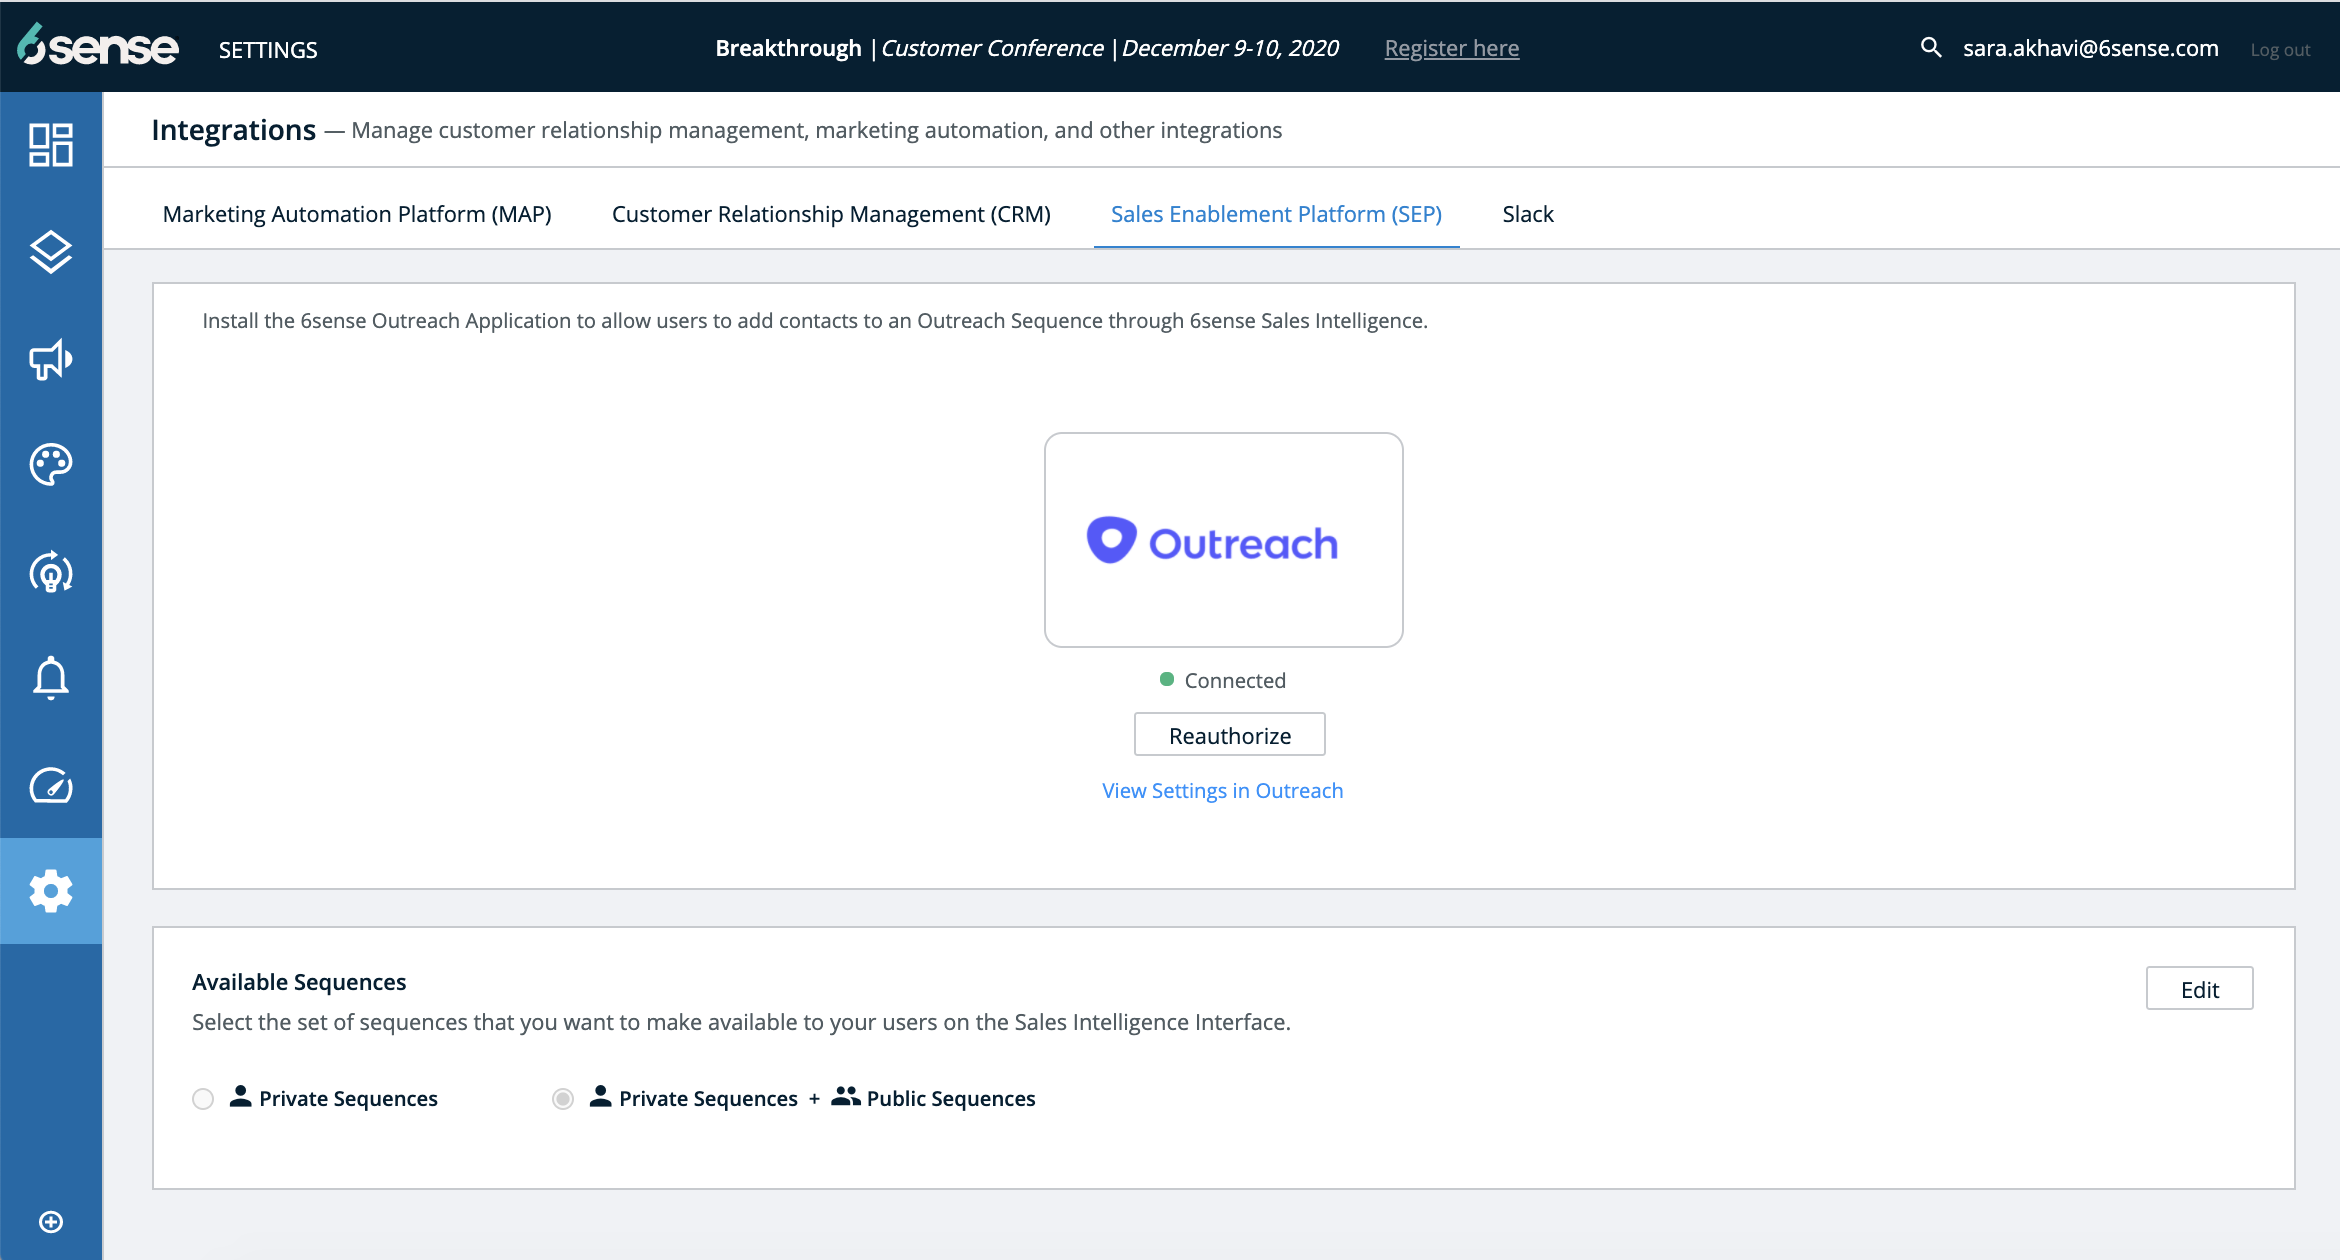
At this point, you can edit and select only to display the Private Sequences or keep the default selection of Private + Public Sequences.
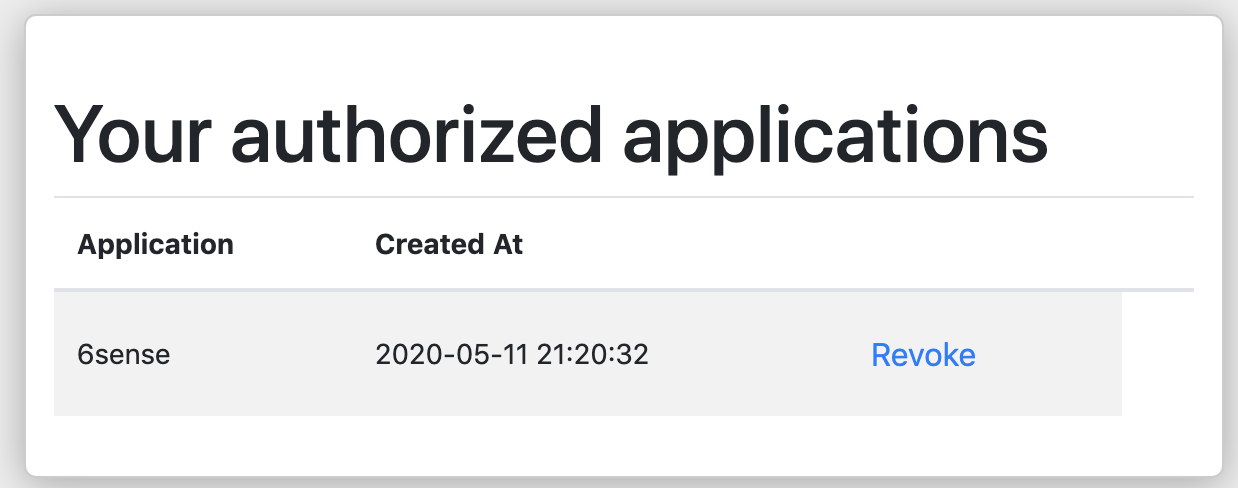
You can also revoke token/access to Outreach at any time at: https://accounts.outreach.io/oauth/authorized_applications
Configure the Sequence Settings. When you add leads to Outreach via Sales Intelligence or Orchestrations, you can choose to Sequence them by the logged-in user or the contact owner. That user will be assigned subsequent tasks in Outreach. When this setting is changed, the behavior will reflect immediately.
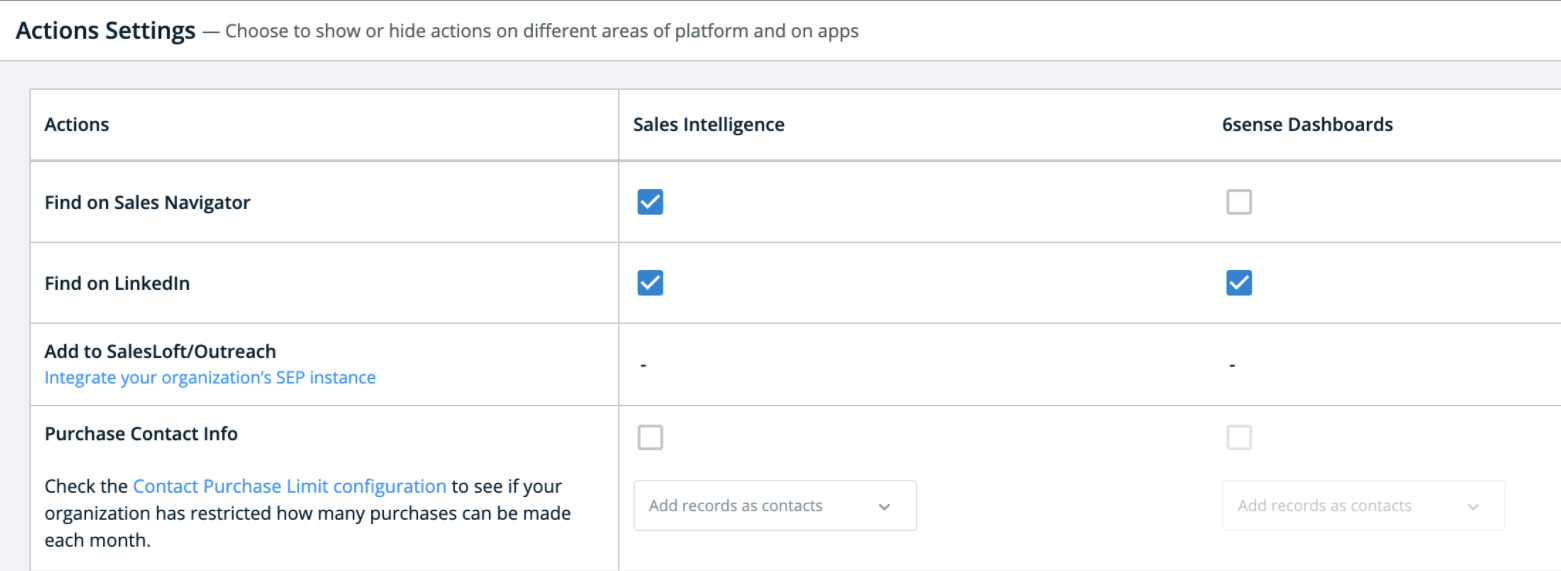
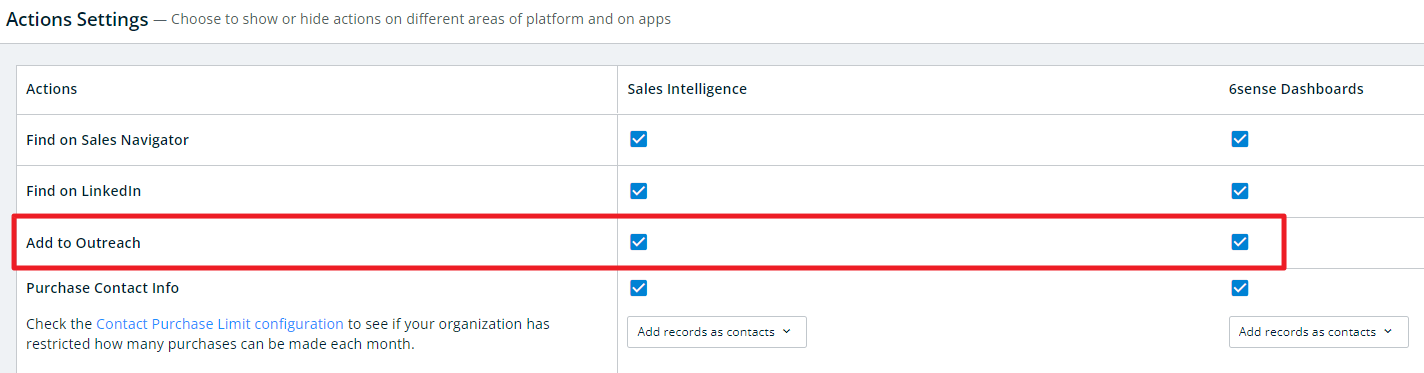
The last step is to toggle the checkbox for Add to Outreach under Sales Intelligence, for Add to Outreach action to show up on Sales Intelligence and/or on 6sense Dashboards. To do so, navigate to Settings > App Settings > Sales Intelligence. Select SI Actions Settings from the cards on the right.
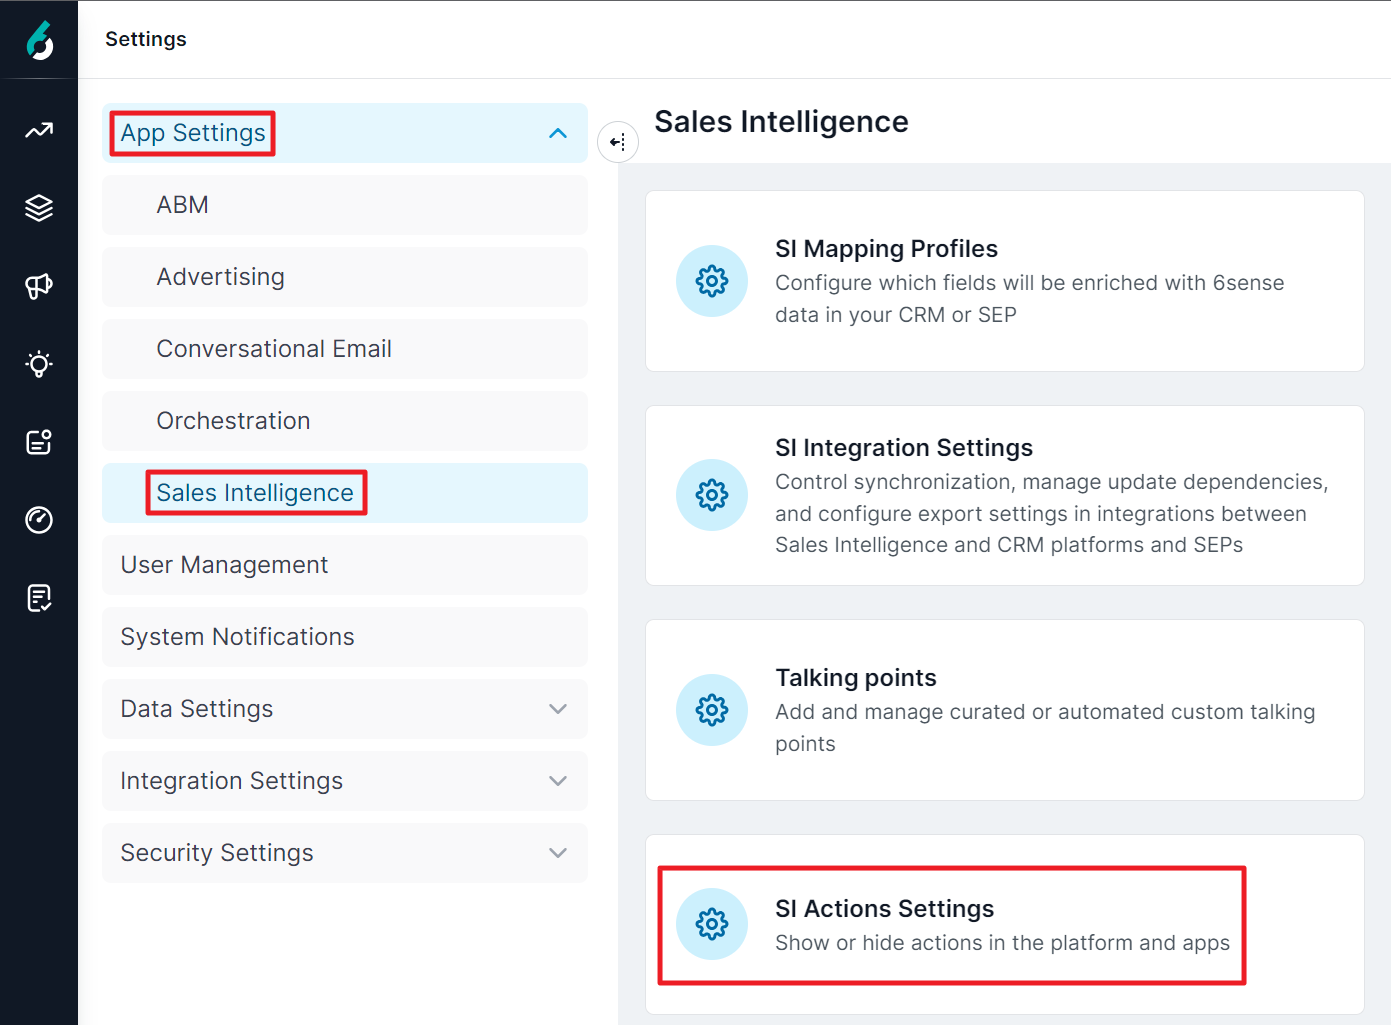

If you have not yet completed the integration described in step 1 above, this option displays Integrate your organization’s SEP instance. Click that link to begin the integration process described in step 1 above.
It may take up to one hour before the Add to Outreach button appears in Sales Intelligence after checking the boxes above.
Enable Sales Intelligence in Outreach
Simplify your workflow by bringing 6sense Dashboards directly into the Outreach UI in the left navigation and making Sales Intelligence available on the Account tab and Prospect tab. This change allows users to:
View 6sense Dashboards in the left navigation.
View Sales Intelligence on the Account tab and Prospect tab.
Add new contacts to an associated account in Outreach.
Add contacts to a Sequence in Outreach.
Enablement steps
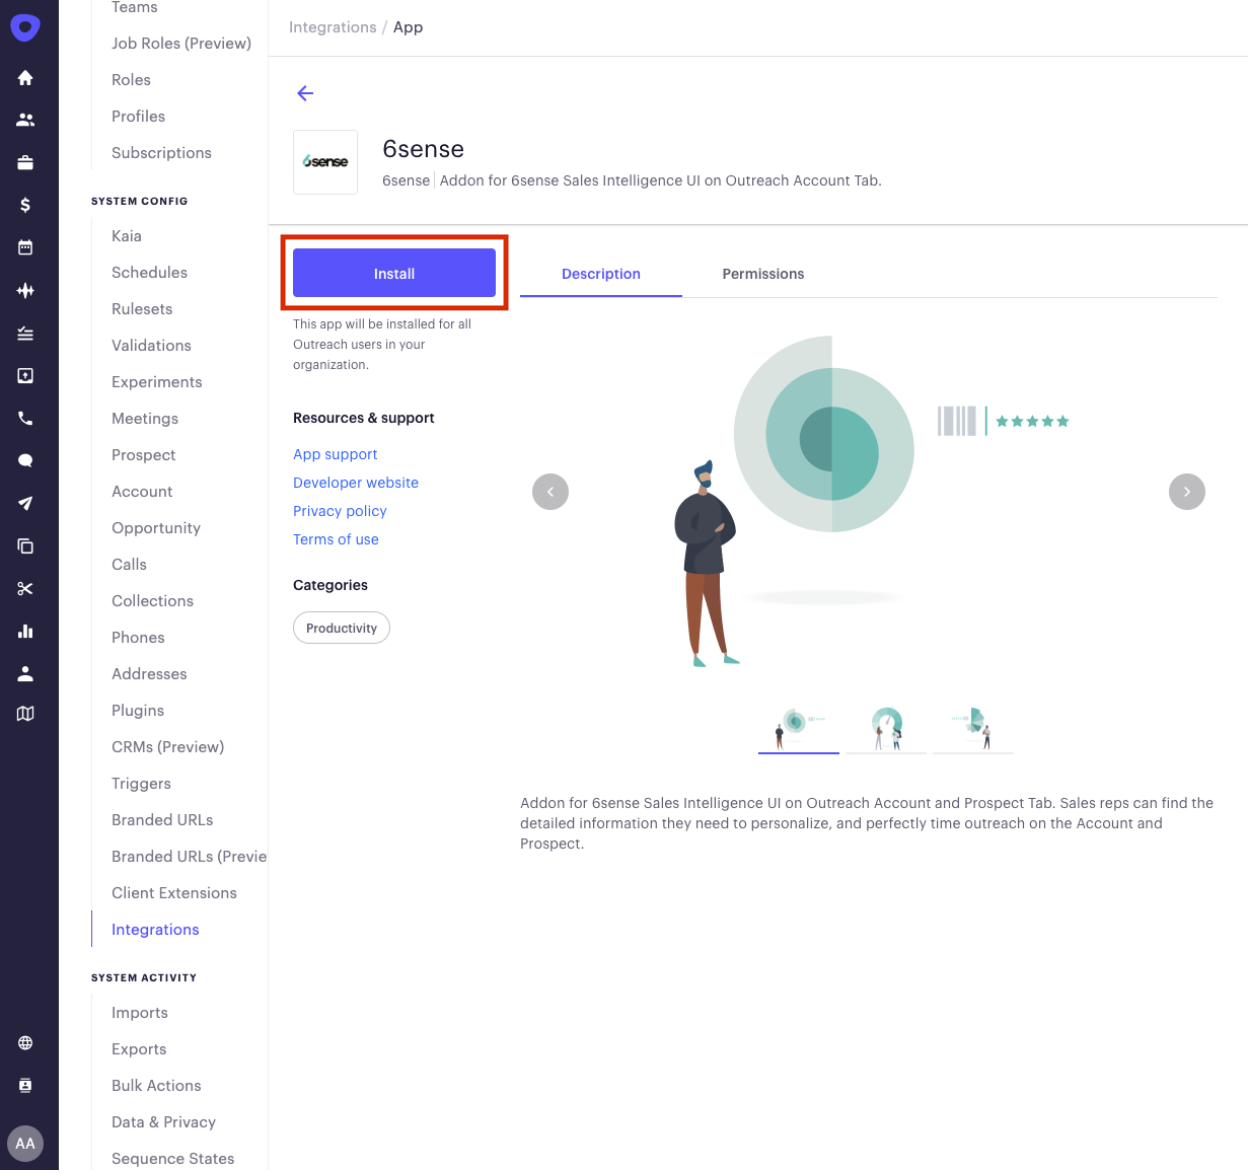
Access the Outreach Platform, click Settings, and then Integrations.

Search for the 6sense app.
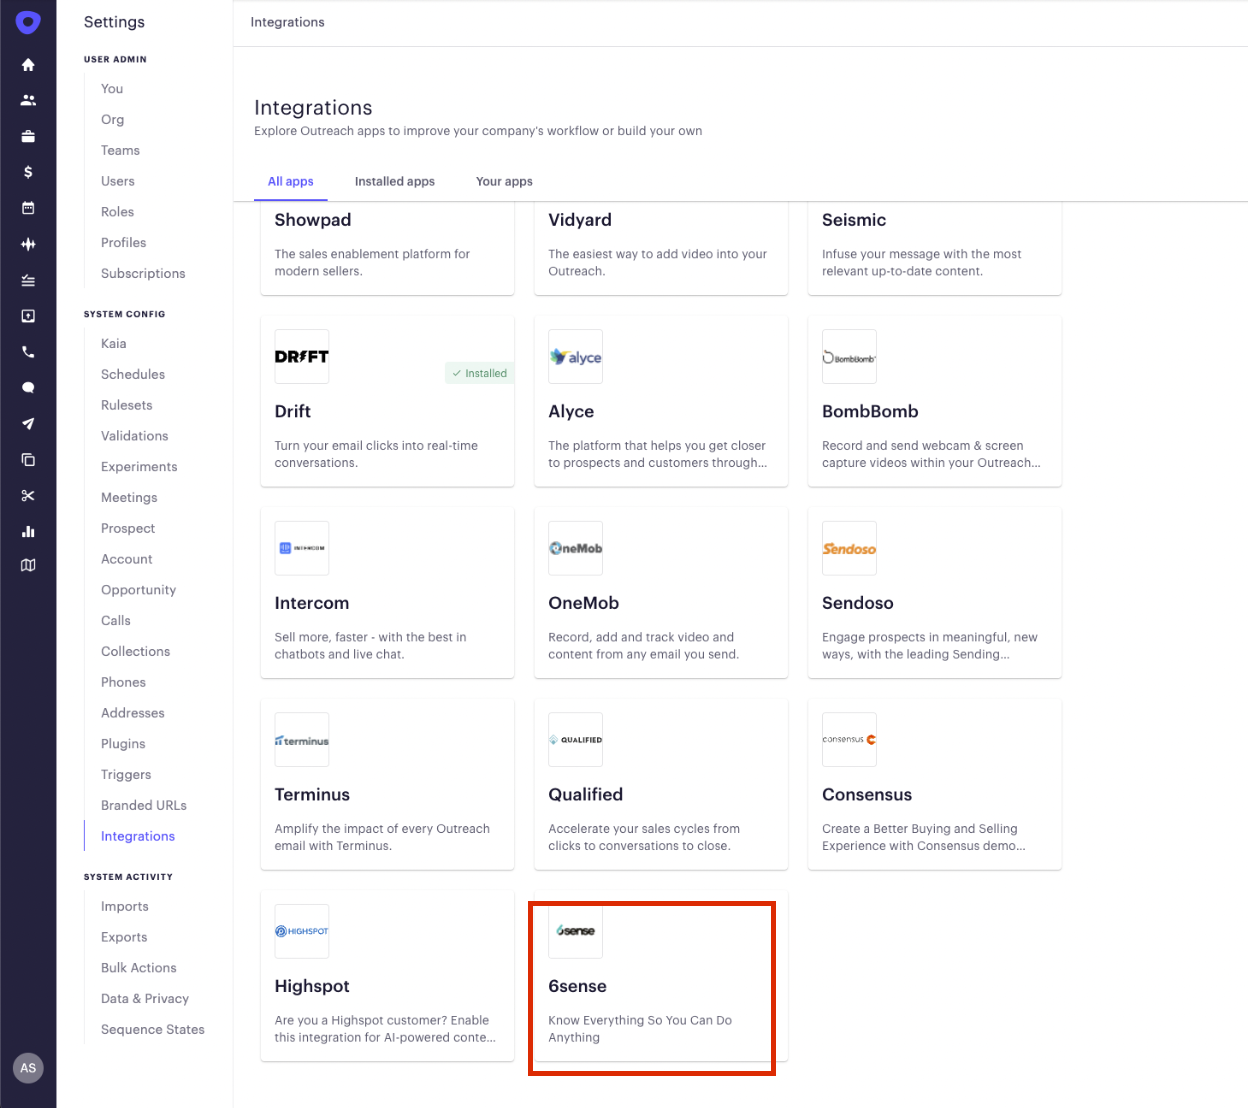
Click Install.
Input the 6sense API key into the prompt. Find your 6sense API key by navigating to Settings > Integrations > API Token.
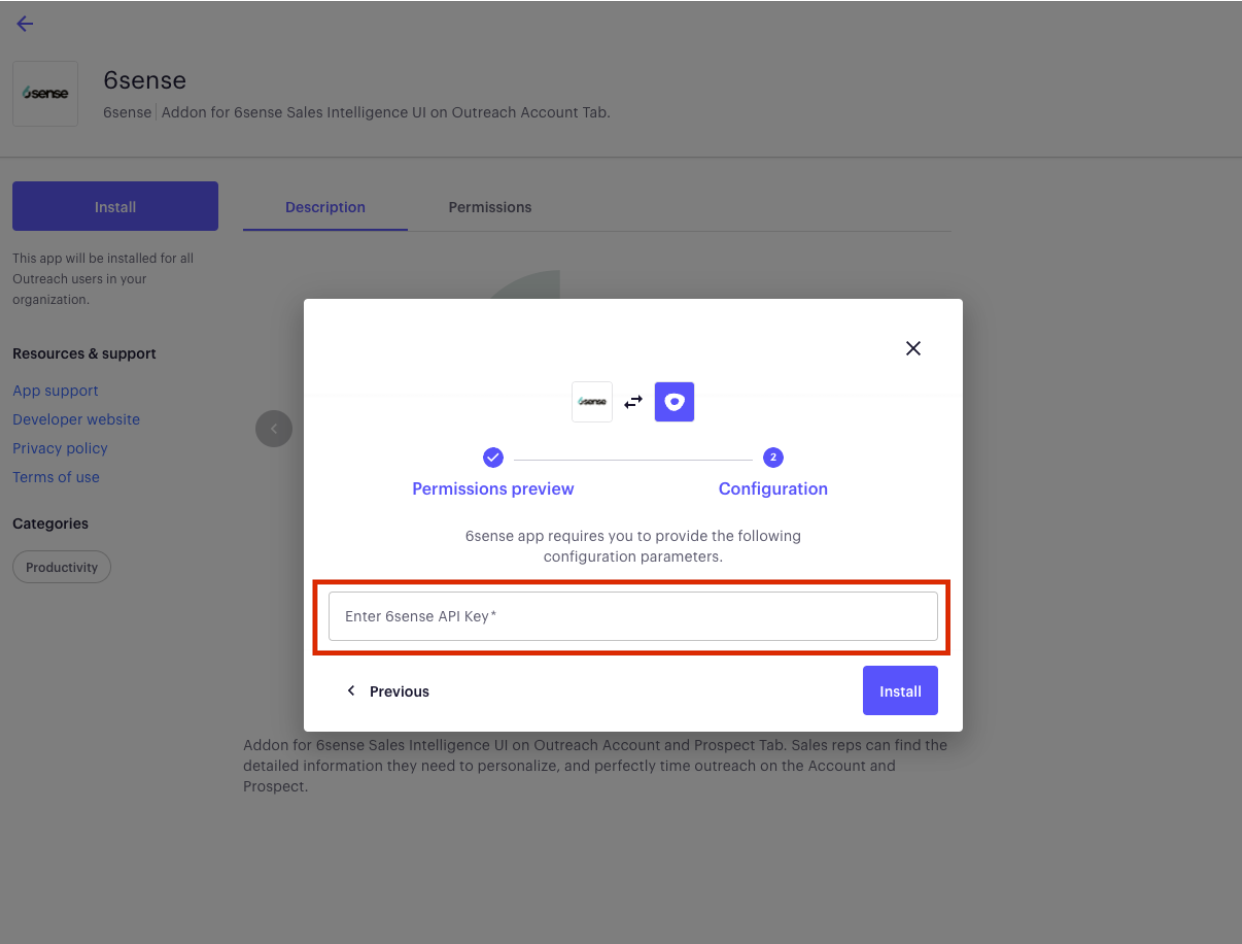
After adding the 6sense API key, click Install to configure the integration.
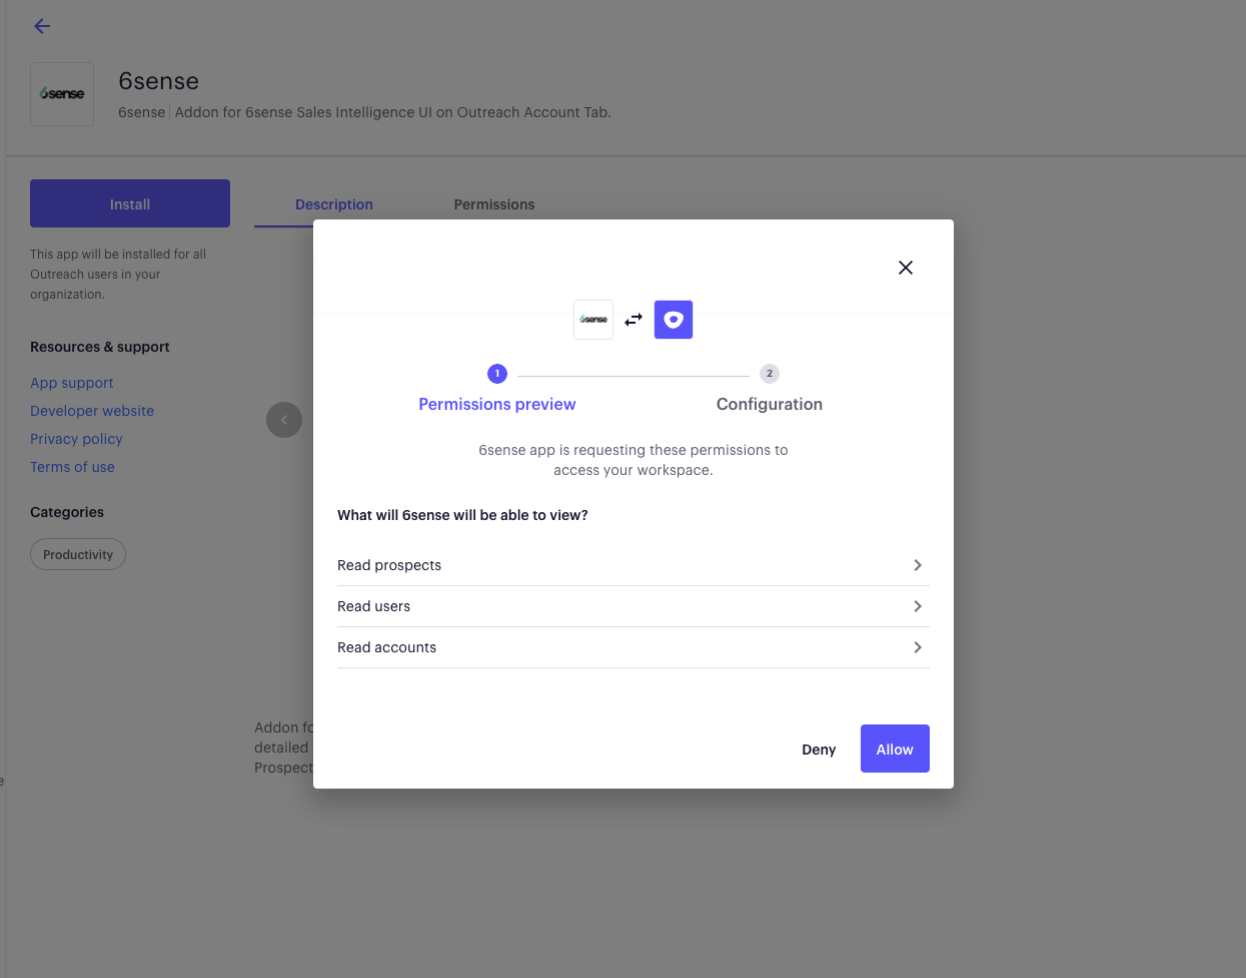
Steps to Control who can access the 6sense Sales Intelligence iframe:
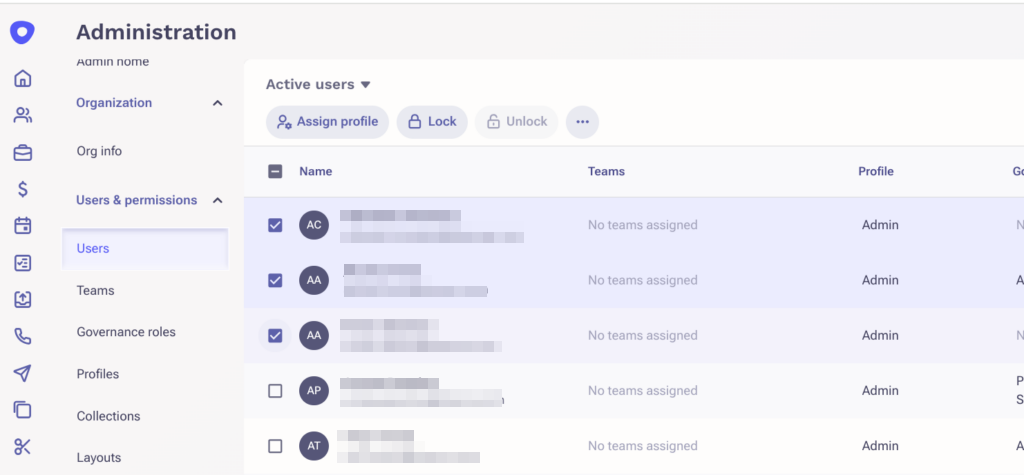
Once the integration is set up the admin can create a user profile (eg: 6sense_User) using the profiles option.
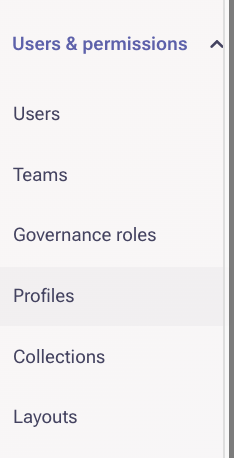
Next step is to click on Users to either create new users, or assign profile to existing set of users. In this step the recently created profile 6sense_User can be assigned to the users.
Next click on Apps and select the 6sense app.

Inside the selected app, in the Access section, chose the profile 6sense_User for which the app can be installed.
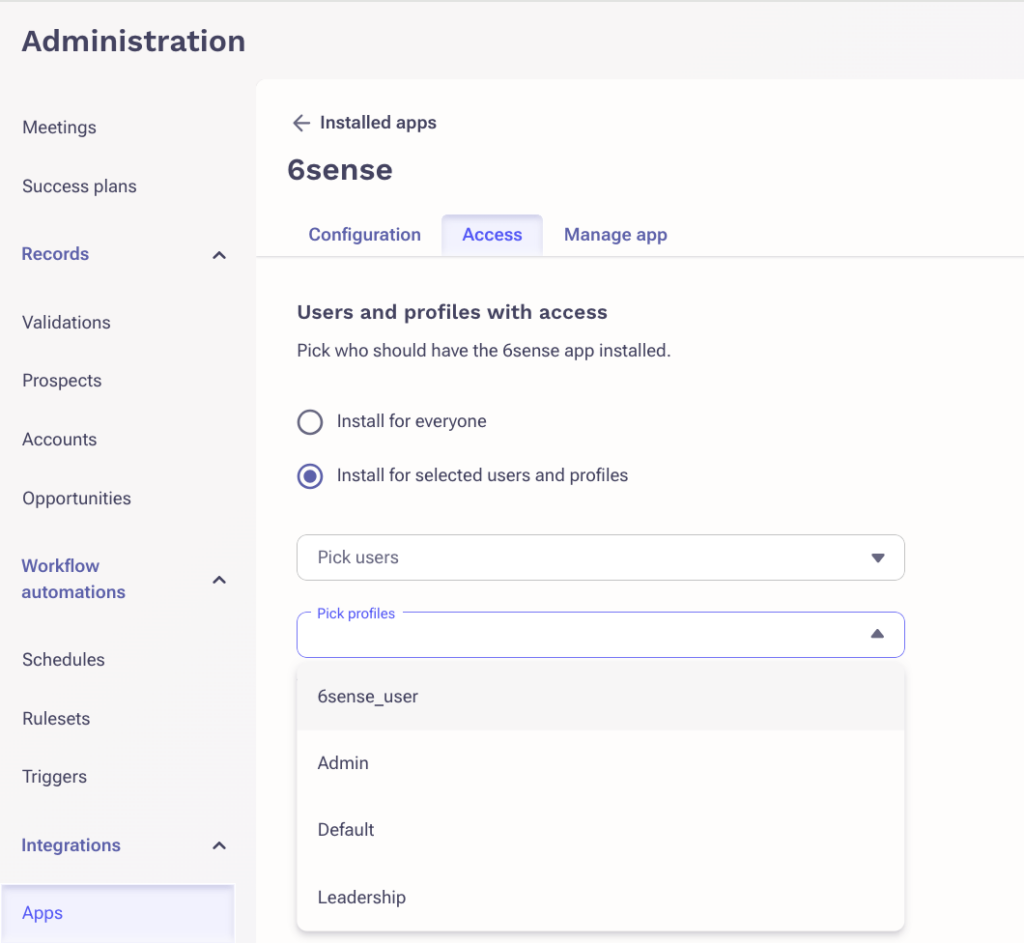
This will ensure only select users get access to Sales Intelligence.
Note: This does not tie back to the actual contracted/registered users.
Export from SI to Outreach
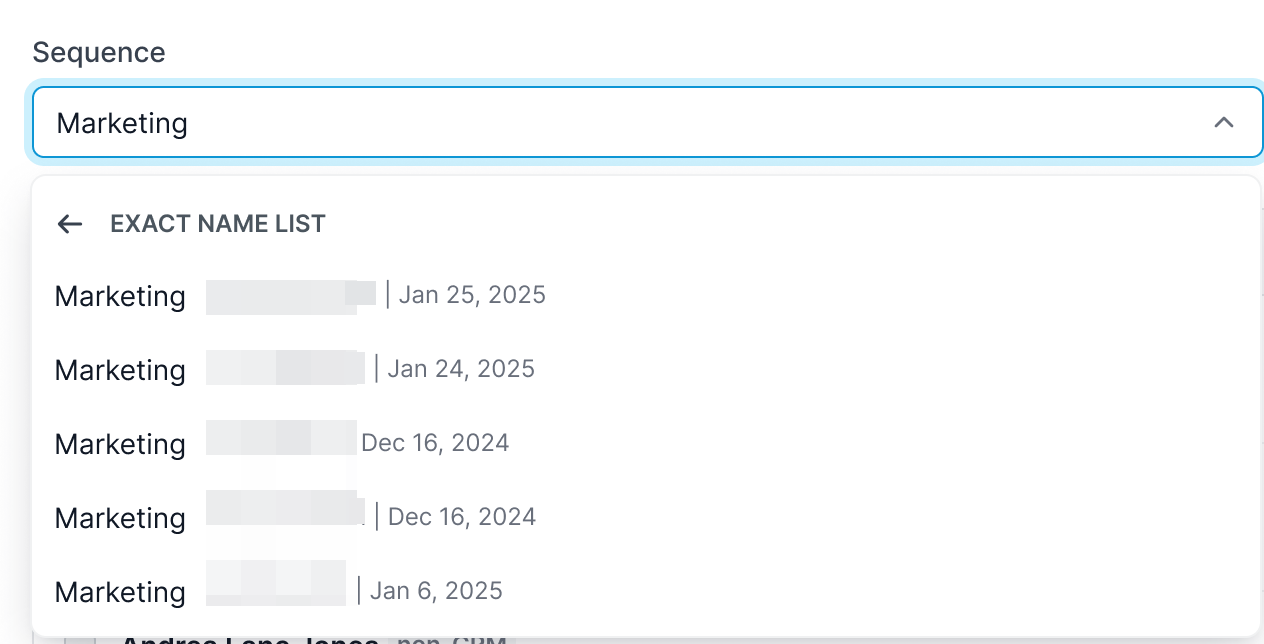
When exporting from SI to Outreach you can search your Outreach Sequences to export to.
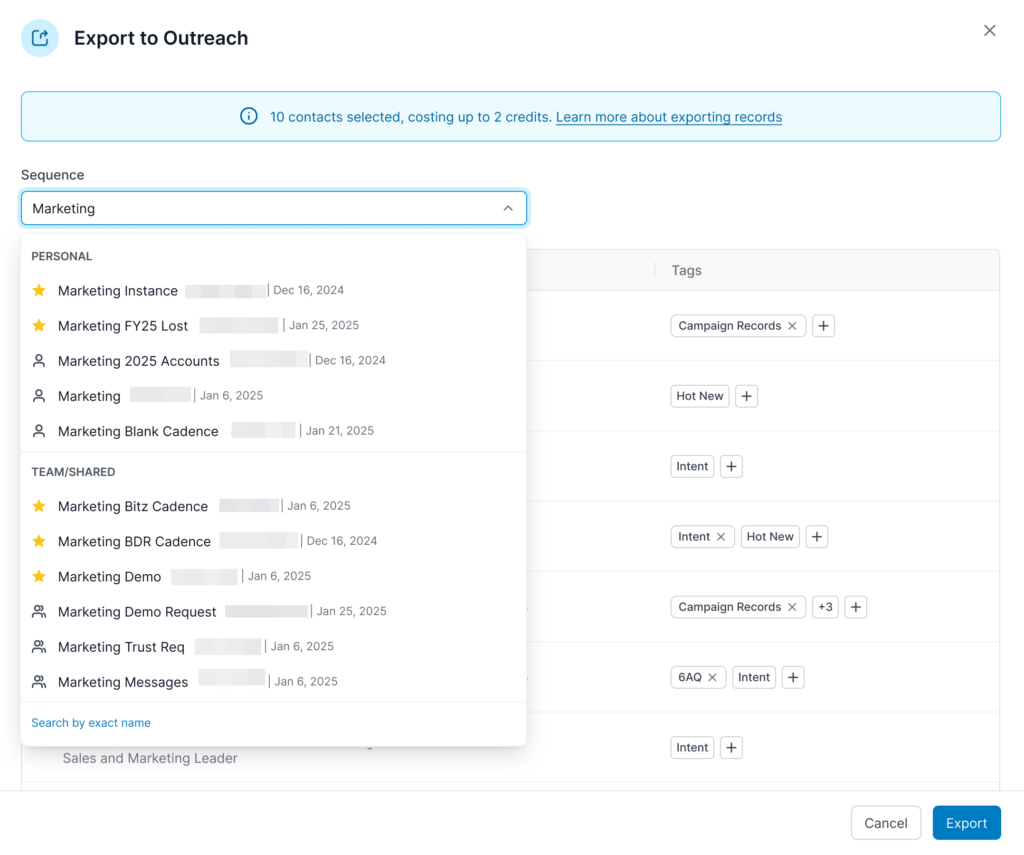
Favorite Sequences: Your favorite sequences will be displayed alongside all other sequences in the sequence list and indicated by a star. This makes it easier for users to identify and prioritize key sequences.
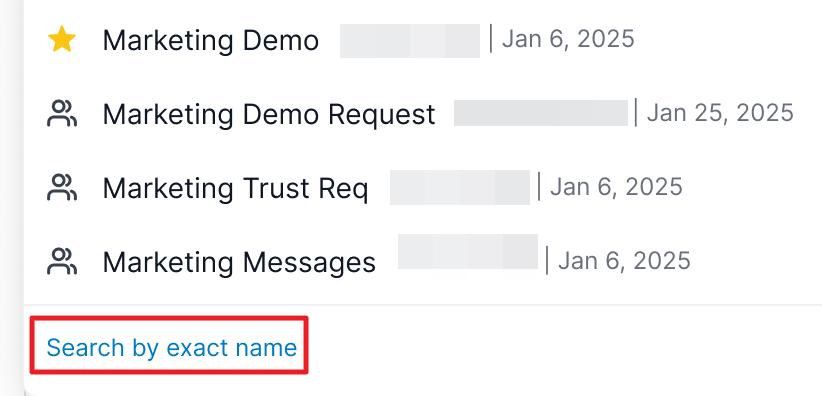
Exact Name Search: If you want to search for sequences by their exact name, click the Search by exact name text at the bottom of the list. Previously, only partial searches were available, and the search result was limited to 500 sequences.
Add custom tags
When exporting from SI to Outreach you can add custom tags to records or batches during export. This will make it easier to organize, track, and segment your data, improving overall usability and reporting.
Custom Tags: Users can now apply tags to records or batches of contacts during export, allowing for better organization within CRM/SEP systems.
Batch Identification: These tags will help identify records that belong to specific campaigns, target groups, or any other relevant segmentation.
Seamless Integration: Tags will integrate seamlessly with existing CRM and SEP systems, so there’s no extra setup required.
When viewing the list of contacts for export, tags will be shown on the right. Tags will be added by default, but these can be removed by clicking the x beside the tag.
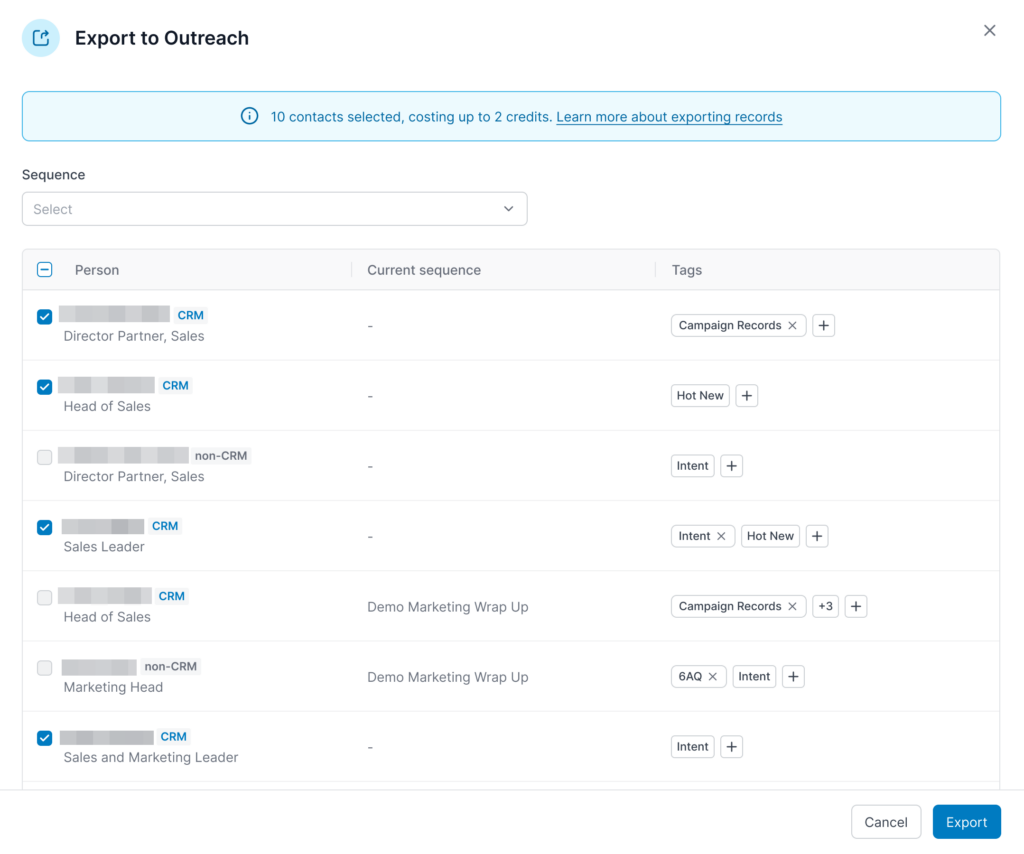
To add new tags click the + icon. A dropdown will open where you can search for tags.
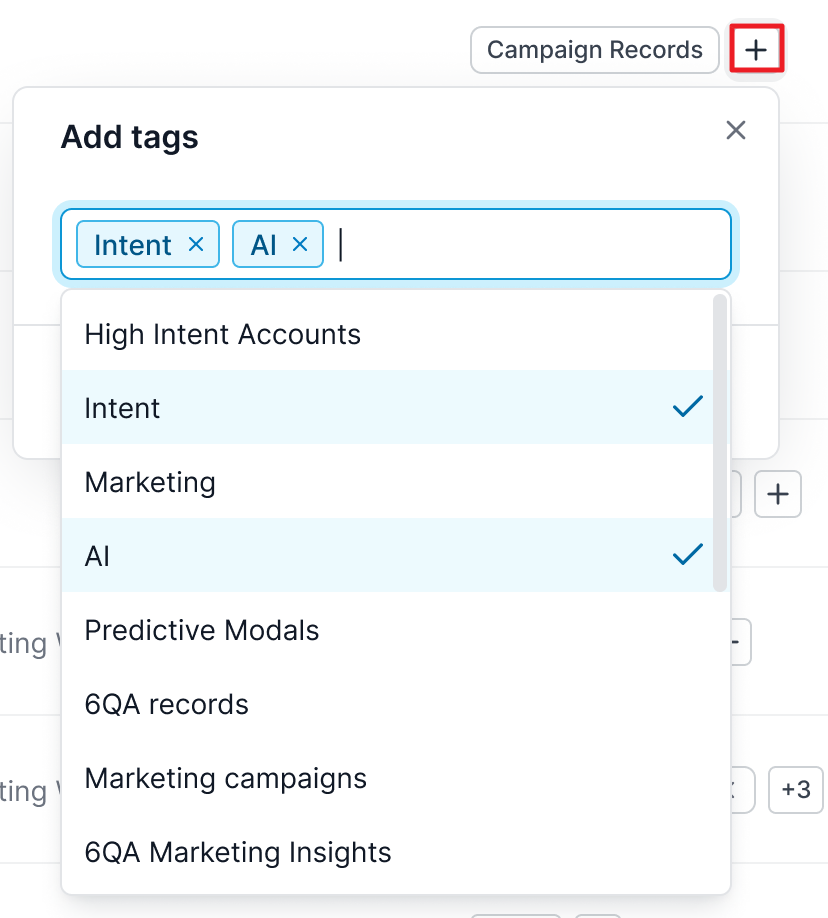
Select the tags you want to add and click Add. You can also check the box beside Add to all to add this tag to all contacts in the export.

Troubleshooting FAQ
Q: After installing Sales Intelligence in Outreach, why am I not seeing the 6sense icon on the left hand navigation panel in Outreach?
A: Per Outreach support, this can happen if you’re using a certain screen resolution, or the zoom level on your browser is set too high. Please see the article below from Outreach support for more information.
I’m not seeing some of the pages and icons on the left-side navigation bar
Q: When I add prospects to sequences, why do prospects show as added by “userName” (6sense integration user) instead of the actual user who added it?
A: This is expected behavior. The Outreach integration shows the prospect was added to the sequence by the integration user by default.
Q: I had to reauthorize the Outreach Integration in 6sense with a new user. Now when I view Sales Intelligence, the Add to Outreach icon no longer appears. How do I fix this?
A: Try this:
Navigate to Settings, select Sales Intelligence under App Settings, and select SI Actions Settings.
Toggle the checkbox off and on for the option Add to Outreach.
Log out of Outreach and then log back in.
If this does not work, try clearing your browser cache.