Checklist
Prior to publishing your new workflow, check that it follows these best practices. Confirm that:
The workflow schedule is set how you intend it to run when published (On-Demand, Weekly, or Daily).
The segment used in a workflow has accounts in it.
If you plan to purchase contacts and/or create new accounts, ensure you have allocated the appropriate amount of data credits to Audience Workflows. The creation of new records will fail if you have insufficient credits.
Nodes have descriptive names so that it’s easy for others to understand decision points, timers, and engagement actions.
All nodes are connected by paths (branches). Check the canvas to make sure no node is outside of the workflow.
Run a preview to ensure the node configurations are set to return the correct audience.
All nodes are fully configured. Check the canvas to confirm that no nodes have yellow or red outlines.
For Purchase Contacts action nodes: If you intend to activate newly purchased contacts by pushing them to an action node (applies to People activation channels only), add a timer node after the Purchase Contacts and Save Contacts nodes, to give time for your CRM’s internal validation. (In this order: Purchase Contacts > Save Contacts > Timer.)
A Remove Audience node is included after decision or timer nodes.
Decision nodes are set up properly.
Action nodes are set up properly.
When using 6sense Advertising:
Ensure that the ad campaign is configured and launched in Advertising.
Ensure that the schedule of the ad campaign coordinates with the schedule of the workflow.
Detailed best practices
Confirm the schedule
Confirm that the workflow schedule is configured appropriately.
On-demand: only runs when you manually trigger the execution
Weekly: data in the workflow will only refresh on a weekly basis.
Daily: recommended for most workflows
Start and End Date: configured to match the intended use case.
If you do configure a specific date, ensure you put start and end dates on your calendar as a reminder!
Ensure accounts in segment
Ensure that the starting segment for the workflow has enough accounts in it.
For most use cases, we recommend that the segment is fairly static, such as a firmographic ICP segment, with all behavioral filters (such as intent keywords researched, 6sense Buying Stages) are configured within the workflow.
Use preview
Confirm, using the Preview option, that the workflow returns the expected audience.
The following nodes always return a set of accounts to action on:
Decision nodes
Conditional timer nodes
Account-level channels
The following nodes always return a set of people to action on:
People-level channels
Purchase Contact node
A Remove Audience node always remove an audience at the account level. It’s not possible to remove a particular person from a people-level action channel. The Remove node removes all people from the account that qualifies for removal.
Decision node settings
Confirm that:
All decision node branches are connected to an action node.
An account can only be pushed through one branch of a decision node, so ensure your decision configuration reflects your strategy.
Action node settings
For action nodes in general, check the following.
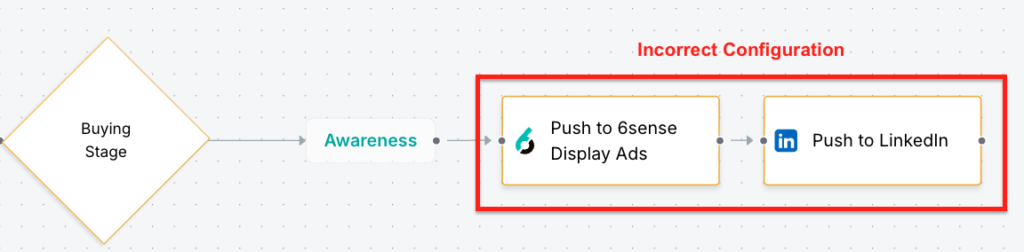
Parallel actions
For actions that you want to run in tandem, make sure that two action nodes are not placed back-to-back, but rather in parallel.

Accounts and people records can exit a campaign
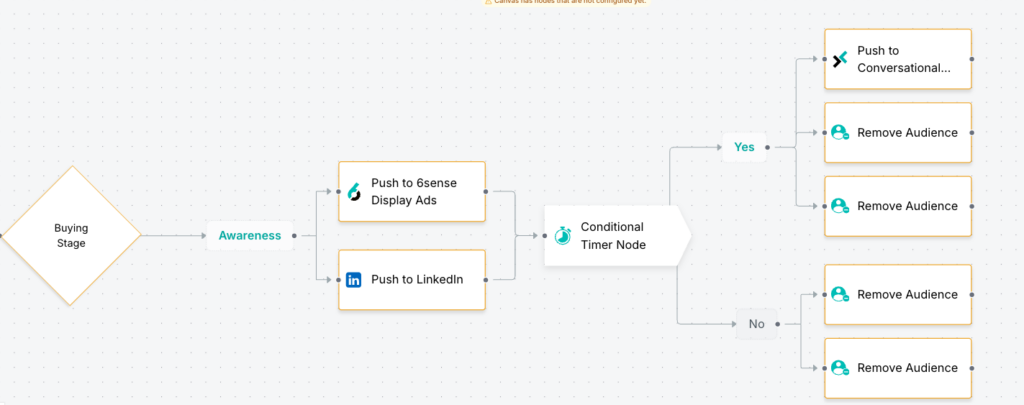
Ensure all accounts and people have a way to exit a campaign. You can do this in the action node itself, and/or by placing a timer node with a Remove Audience node, depending on your use case.
Option A: within each action node
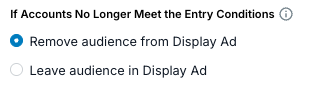
Option B: Use a basic timer with a Remove Audience node
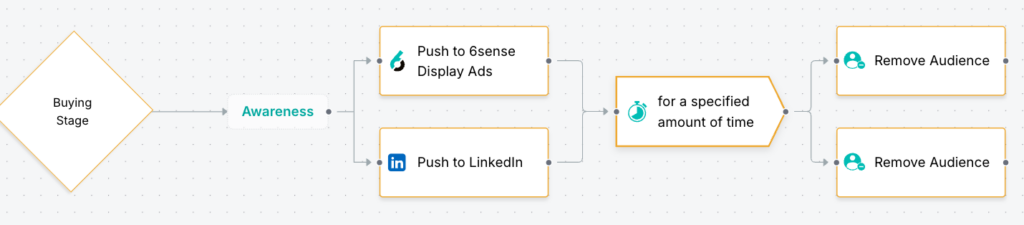
Option C: Use a conditional timer with a Remove Audience node
Segment syncs
Ensure you have enough segment syncs available to publish your workflow if you are pushing accounts to LinkedIn, Meta or Google.
Conditions for selecting personas
Check that all people-level action nodes have conditions configured to select the correct personas intended.
For any people-level action node where the customer indicates what personas they are targeting, be sure to check that the personas you're looking to add are set up properly. By default, no Job Title and Job Function persona combinations are selected. If your workflow targets specific personas, configure the appropriate conditions to specify the desired personas. Otherwise, 6sense may select existing contacts or leads that do not align with the intended personas.
If you have a people-level action node, such as Push to Salesloft, following a contact purchase node, note that only the newly acquired contacts will be pushed into the destination system. Because of this, you will not need to configure conditions to select the correct personas.
Advanced options
Check that the advanced options are configured. Examples of things to check include:
The maximum number of people per account you want to push each time the workflow runs.
The frequency of accounts being processed.
Save Purchased Contacts nodes
For Save Purchased Contacts nodes:
Review the mapping profile.
Contact your CRM or MAP administrator to discuss any CRM or MAP data requirements to ensure you won’t have any issues with saving new records to the destination system. For example, if your administrator has set up your system to require a certain field such as Lead Source, ensure that your mapping profile has been configured appropriately.
Account Creation nodes
For Save Purchased Contacts nodes:
Contact your CRM administrator to discuss any restrictions or requirements to ensure you won’t have any issues with saving new accounts to the destination system.
Configure custom match rules to prevent duplicate accounts from being created.