For any records that you purchase or enrich from Sales Intelligence (SI) and create in your CRM, you need a mapping profile that tells SI which fields you want to send data to within your CRM.
Mapping profiles
A mapping profile represents a saved set of mappings between an SI field (such as Industry, Revenue Range, Country, and so on) and a field in your CRM or MAP.
You need a mapping profile for the following use cases:
Enrich existing records with firmographic and technographic data.
Purchase new contacts and then create them in CRM or MAP.
Export Predictive Scores to existing Account, Lead, or Contact objects in your CRM or MAP.
Enriching existing Account, Lead and MAP objects with Published segment names.
Create new Accounts in Salesforce.
Mapping profiles are unique to each object (CRM account, CRM contact, CRM lead, MAP lead) and the production or sandbox environment.
You need to set up a mapping profile to export records from SI, and activate Enrichment, Contact Purchase, and Account Creation in Intelligent Workflows.
The same mapping profile can be used for both Sales Intelligence and Intelligent Workflows.
Multiple mapping profiles
You can have up to five mapping profiles per System Object. This allows you to create different mapping profiles for different types of enrichment activities.
For example, ensure that accounts with record type “Partner” receive enrichment on the shipping address fields, while those with type “Sales” are enriched via billing address fields.
Prerequisites
Write Access Required:
To allow 6sense write access to the objects and the associated fields you wish to update, you must provide 6sense with write access to the fields associated with the objects (in other words, Salesforce Accounts, Contacts, and Leads objects).
Access mapping profiles
To access mapping profiles:
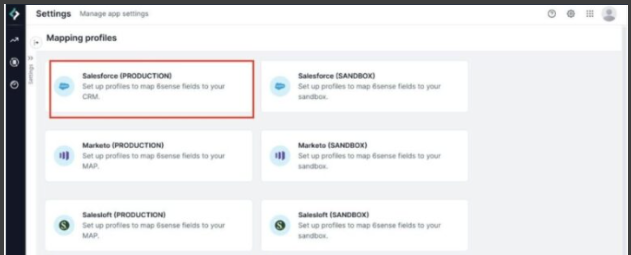
In ABM, go to Settings > Data Settings > Mapping profiles.
Select the target CRM or MAP system where you want to create a mapping profile.
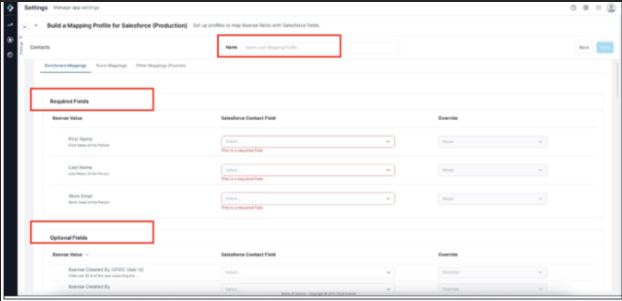
Create a mapping profile
To create a mapping profile, you configure various fields as follows.
Set up the required fields
After selecting the target system from Settings > Data Settings > Mapping profiles, select the object.
Select Create.
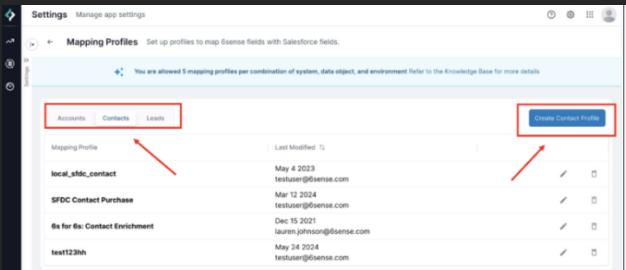
Name the mapping profile.
Map the SI field to the CRM field.
Required fields and optional fields are grouped together as shown below.
Review the complete Data Dictionary for a description of each field and data types.
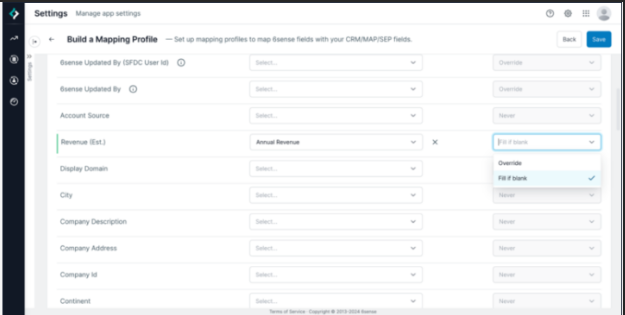
Go to the row for an SI field you want to enrich.
In the drop-down under System Field {CRM Object}, select the field on your target object that you want to enrich.
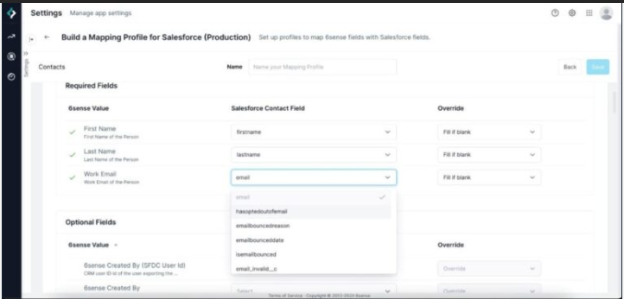
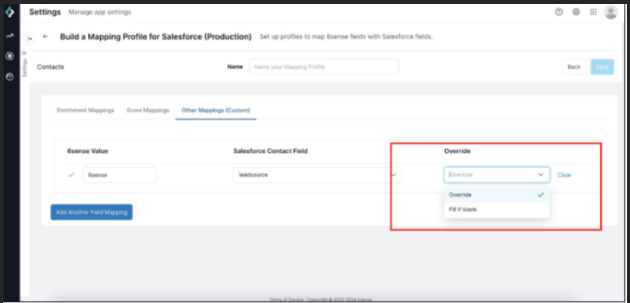
Select an Override Setting, either:
Override: SI will overwrite a value for this field if there is a new value. For example, if the revenue range for an account changes, and you have it set to Override, then SI will overwrite that with the latest value.
Fill if Blank: SI will only fill this field if it is blank. 6sense will not overwrite any existing values.
Set up the Technologies field
The Technologies field has some additional settings to configure.
Select the Pencil icon next to Technologies.
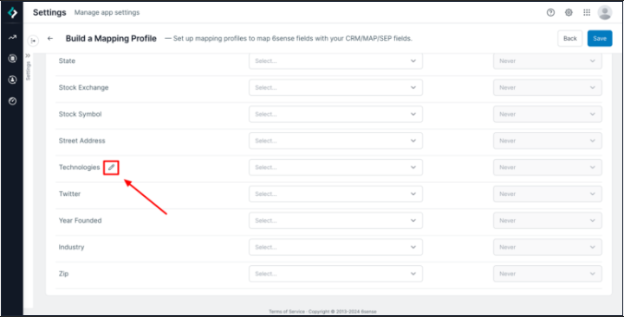
Under Push Technographic Data to your CRM, select the Technologies that you would like to enrich.
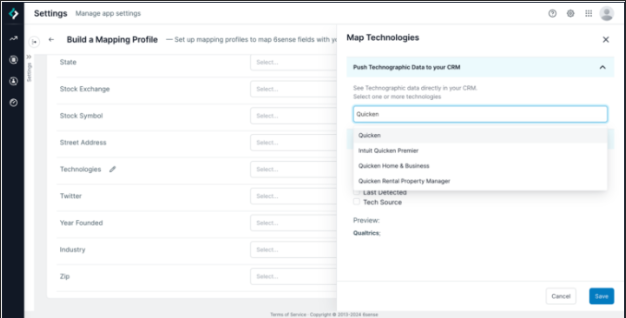
Configure additional details:
Technology: The name of the technology used.
Confidence Score: This describes 6sense’s confidence in the account’s usage of the technology (0-100).
Last Detected: The date when 6sense last detected that the account used the technology.
Tech Source: The type of signal 6sense used to determine the technology used.
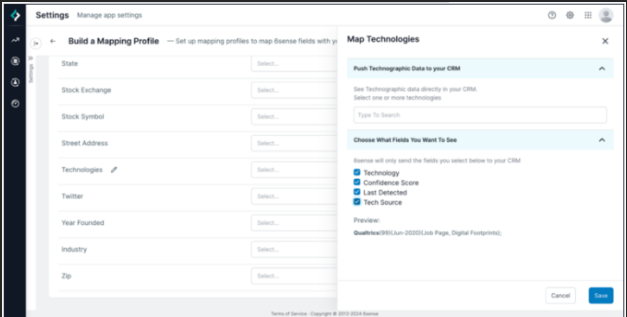
If there are multiple technologies that qualify to be enriched, each is separated by a new line in the mapped field. 6sense allows you to have up to five separate mapping profiles per object. There may be scenarios where you would like to export a single technology used per mapping profile and set up multiple mapping profiles to enrich different fields with a single technographic when available.
Identify records created or modified by 6sense
You can track which records were updated or created through 6sense in a few ways through the mapping profile.
Default 6sense fields
Source: Fixed value “6sense”. (Currently only available in Intelligent Workflows)
Source Type: Fixed value “6sense Workflows”. (Currently only available in Intelligent Workflows)
6sense Created By: Email ID of the user exporting the record from 6sense. This field will not be updated if the record already exists in CRM and record is updated by 6sense.
6sense Updated By: Email ID of the user exporting the record from 6sense. This field will always be updated whether the record is updated or newly created by 6sense.
6sense Created By (SFDC User ID): CRM user ID of the user exporting the record from 6sense. This field will not be updated if the record already exists in CRM and the record is updated by 6sense. This is only available for Salesforce.
6sense Updated By (SFDC User ID): CRM user ID of the user exporting the record from 6sense. This field will always be updated whether the record is updated or newly created by 6sense. This is only available for Salesforce.
6sense Last Updated at: Date and Time when a CRM record is updated by 6sense.
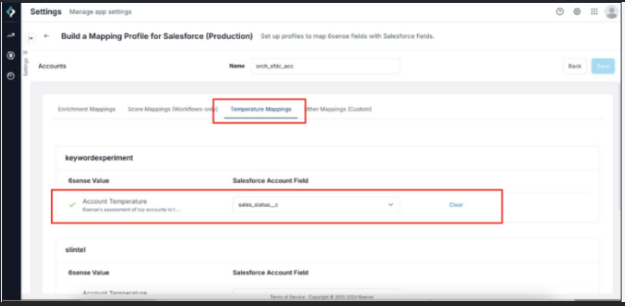
Temperature mappings
Account Temperature mappings are required for exporting Account Temperature to CRM from SI. Also, these mappings are used in Workflows to regularly update Account Temperature in the CRM.
To set up mappings:
Go to the account.
Select the Temperature mappings tab.
Map the desired CRM field to Temperature field.
Optional mappings
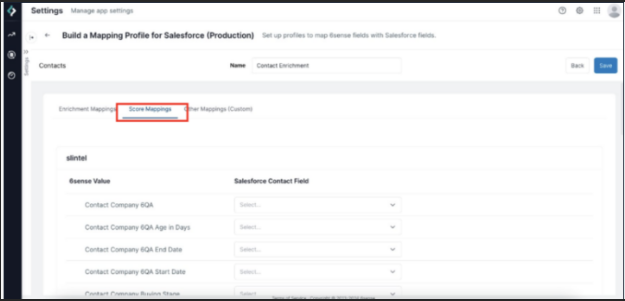
Score mappings
Score mappings are available with the Predictive package.
You can map score fields to push 6sense predictive scores into your CRM.
Other mappings
Other mappings allow you to push any string value to a field in your CRM.
In the mapping profile, select the Other mappings tab.
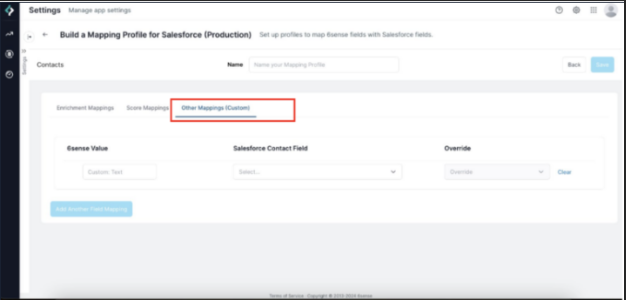
Select Add Another Field Mapping.
Enter the value for 6sense to populate and the field to update in your target object.