Data Workflows decision nodes allow you to split workflows based on conditions you specify. There are two types of decision nodes:
Boolean (True/False)
Branching
Boolean decision node
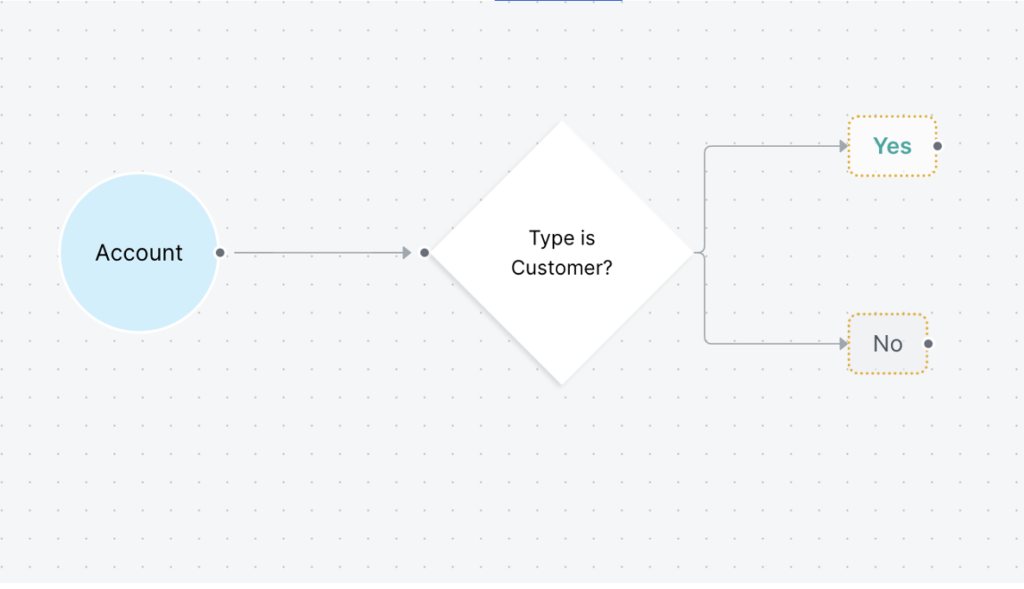
A Boolean decision node creates two potential workflow paths based a True/False (also called Yes/No) condition.
Branching decision node
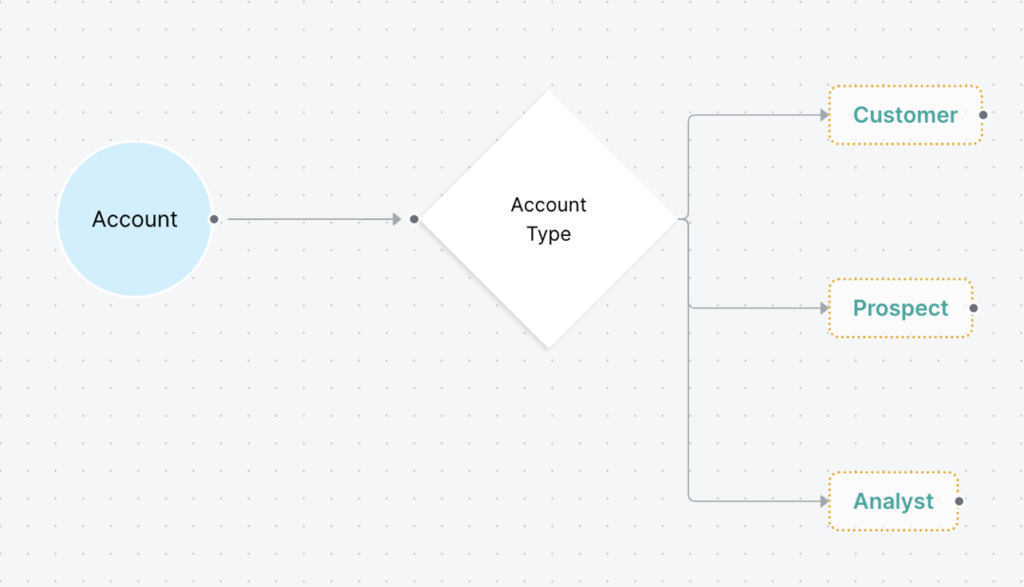
A Branching Decision node creates multiple-choice paths based on the branching conditions.
Add a decision node to a Data Workflow
To add a decision node to a Data Workflow:
From the Data Workflows canvas, go to the menu at the right.
Click Decision.
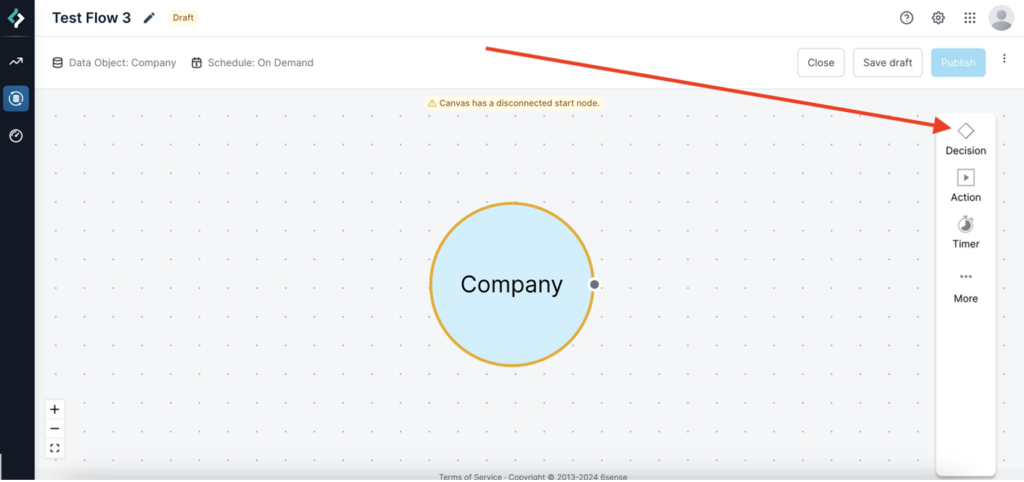
Drag and drop either True/False or Branching onto the canvas.
Tip: If you drop the node over the segment it will automatically create the connector line to the segment.
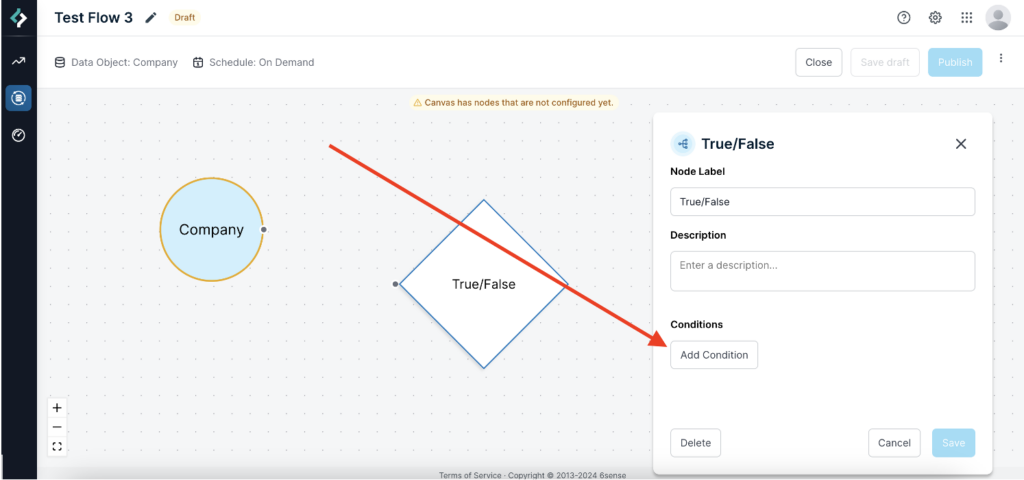
Hover over the node and click its edit icon.
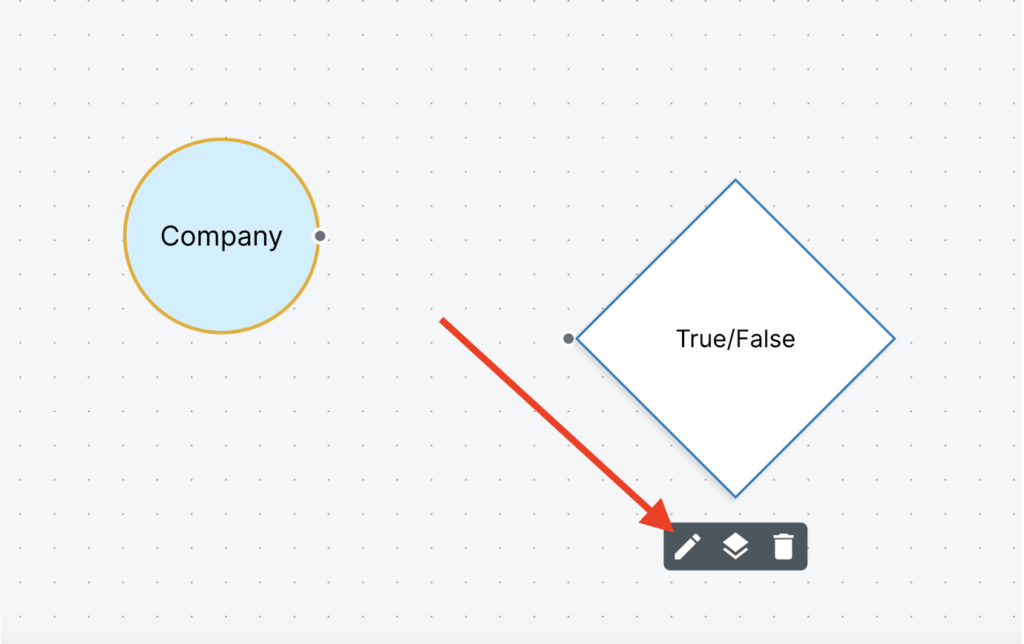
The node properties panel opens.
Change the label to better describe the decision.
Enter a description for future reference.
Click Add Conditions.
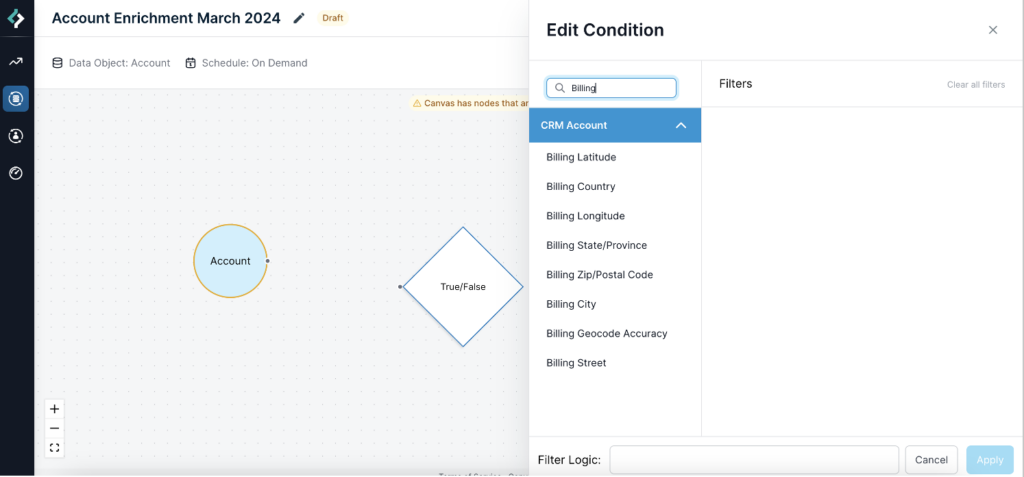
Search and select a filter from the list on the left of the Edit Conditions panel. This example shows how to search for the Billing Country filter.
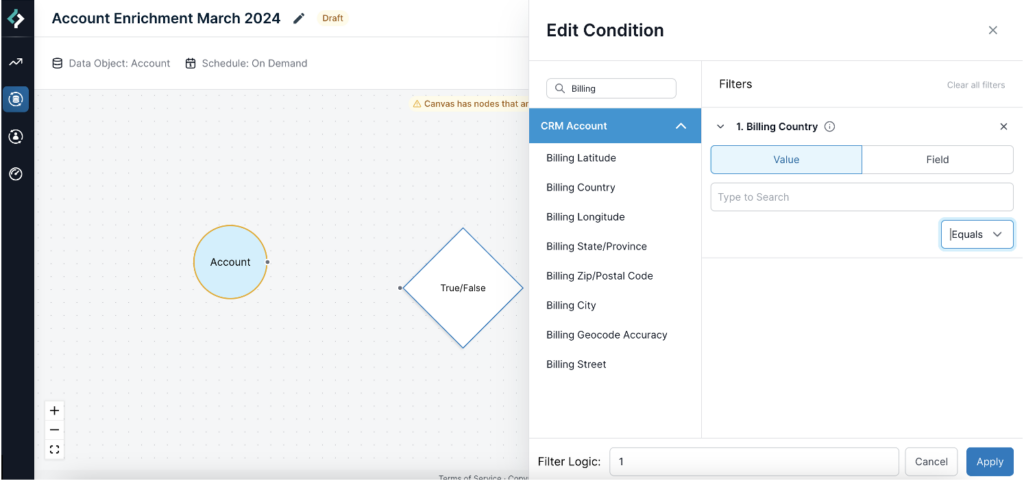
Use filter operators to set the value. This example shows the Billing Country filter equal to the value “United States”.
(Optional) Add an additional condition. For example, “all Accounts where Billing Country equals United States and Account Type is Customer”.

Enter the If conditions are Met branch label. By default it is “Yes”.
Set the When conditions are Not Met action. To exclude records that don’t meet the condition criteria from the workflow, keep the default value Do Nothing. If you want to perform a different action on that set of records, select Add Another Branch and set up that new branch’s conditions.
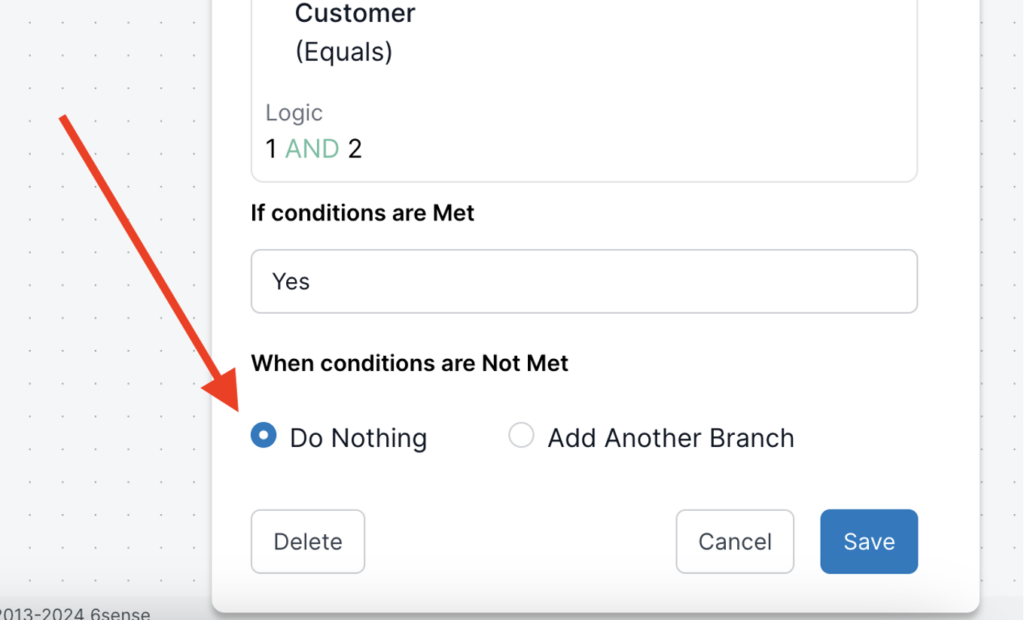
When you are done setting the node’s conditions, click Save.
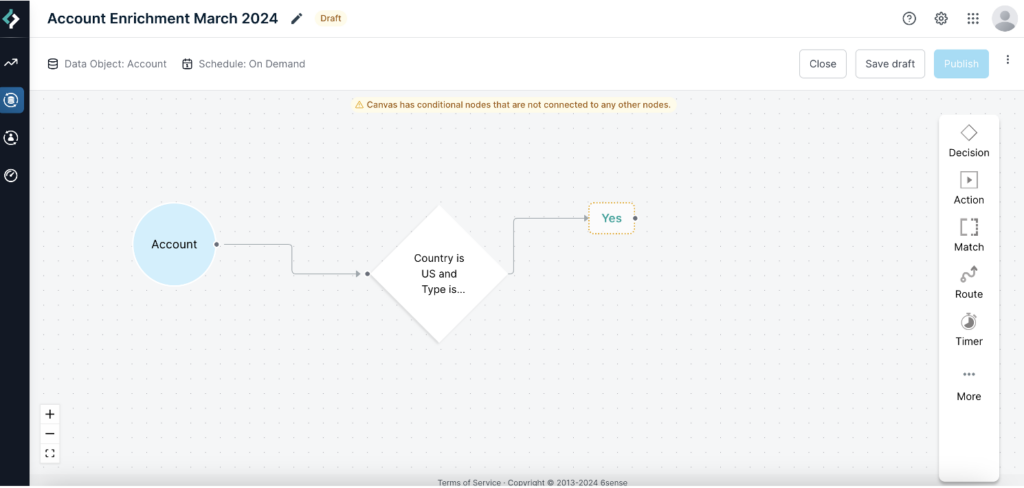
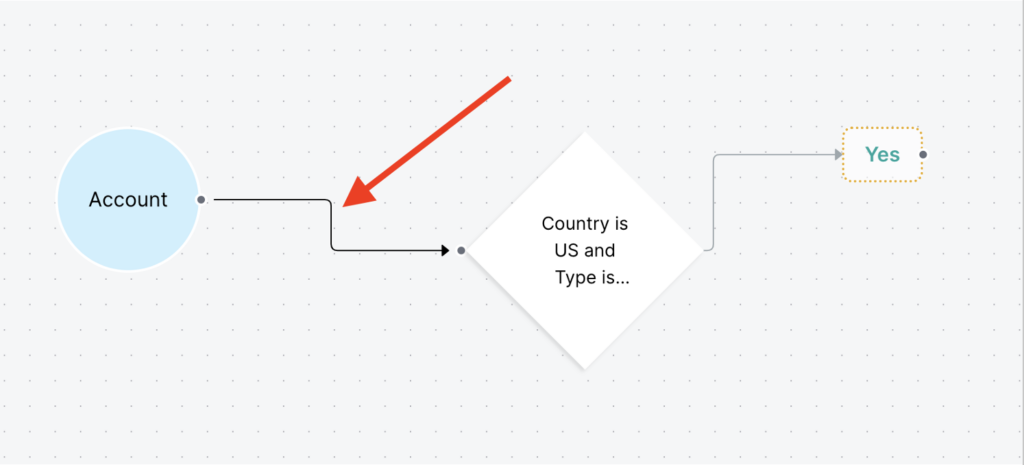
If it’s not already connected, select the segment and drag a line to the node to connect the decision node to the segment. The line indicates the direction of the workflow, left to right.
On the workflow’s canvas, click Save Draft.
After creating a decision node
After you create a decision node, the next step is to connect another node to the outgoing result Yes and/or No boxes. You can save a draft but you cannot publish the workflow until you configure a subsequent node. The canvas displays a warning message to prompt you to complete the workflow. See Node Validation Rules.
If the When conditions are not Met option is set to Do Nothing, there isn’t a No box on the canvas, and you would connect another node to the Yes box.
When you finish designing a workflow and it validates (no warning message), you can test it out using the Preview option. See Preview a Data Workflow.
Remove a node’s path
To remove a path line between a segment and a node or between two nodes, select the line and press the delete or backspace key.
Decision node Boolean filter operators
Based on the type of filter you select in the Edit Conditions panel, the filter operators display in a list. Operators include:
For text fields
Equals
Not Equal
Contains
Ends with
Starts with
Is Empty
Date fields
On
Not On
Before
After
On or Before
On or After
Checkbox
True/False
Picklist
Equals
Not Equal
Contains
Ends with
Starts with
Is Empty