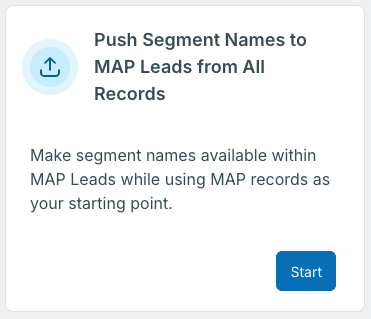
Data Workflows provides the Push segment Names to MAP Leads from All Records template. A workflow based on this template runs after the 6sense pipeline finishes and pushes all segment names for an account to eligible MAP leads.
This page covers how to use the template and shows how to filter the leads using a true/false decision node condition based on a MAP Field filter.
Learn about other templates at Data Workflows Use Case Templates.
Prerequisites
A mapping profile for your HubSpot or Marketo MAP. Refer to Mapping Profiles.
For HubSpot CRM or MAP integrated customers, the user who integrates 6sense with HubSpot must have the Super Admin persona in the HubSpot platform to push scores or segment names to custom objects or fields in HubSpot. If you are only pushing scores or segment names to standard HubSpot objects or fields, Super Admin permissions are not required.
Create a workflow from the template
To create a workflow using the Push Segment Names to MAP Leads from All Records template:
From the app picker, select Workflows.
From the left menu, select Data Workflows.
From the Workflows List, select Create.
Select the Push Segment Names category.
Scroll to Push Segment Names to MAP Leads from All Records and select Start.
The Create Workflow properties popup opens.
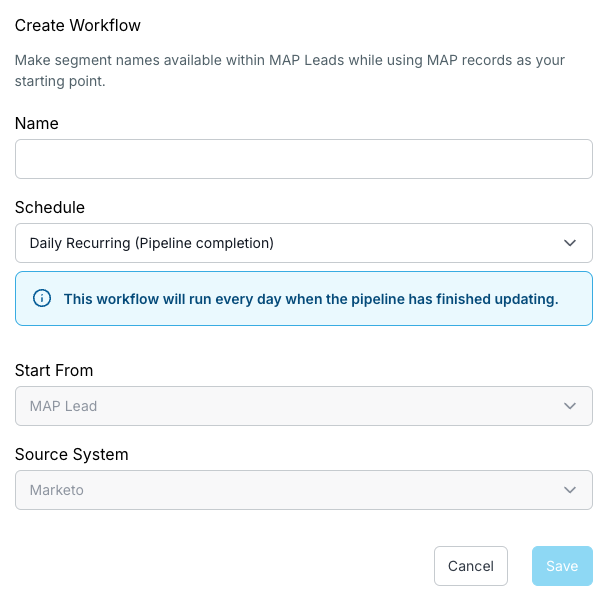
Enter a unique Name.
Select the Schedule.
For testing you can use On Demand. For production we recommend a Daily Recurring schedule so that the segment names can be the most up to date.
The Start From and Source System are preconfigured according to your MAP integration.
Select Save.
The canvas opens with a segment connected to a Push Segment Names action node.
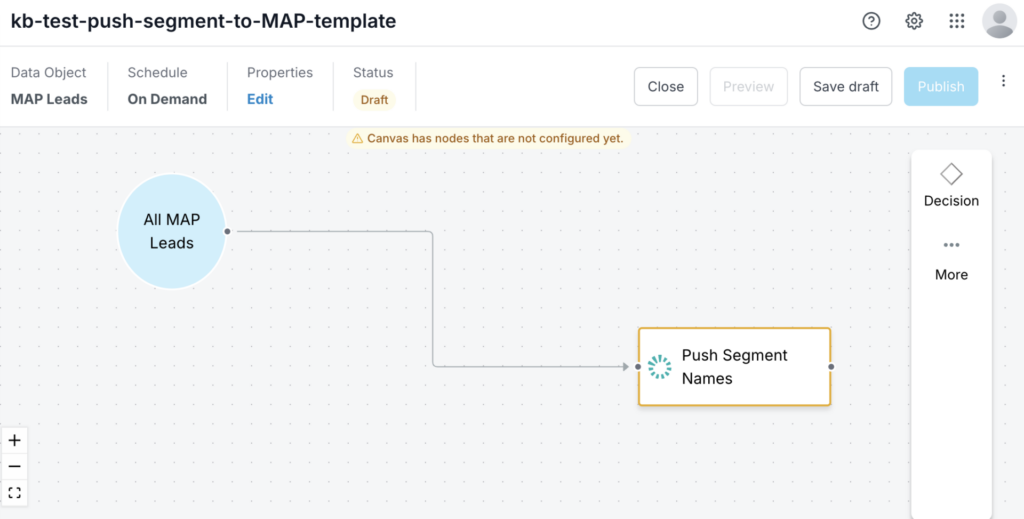
Select the Push Segment Names node.
Select the node’s Edit (pencil) icon.
The node’s properties panel opens.
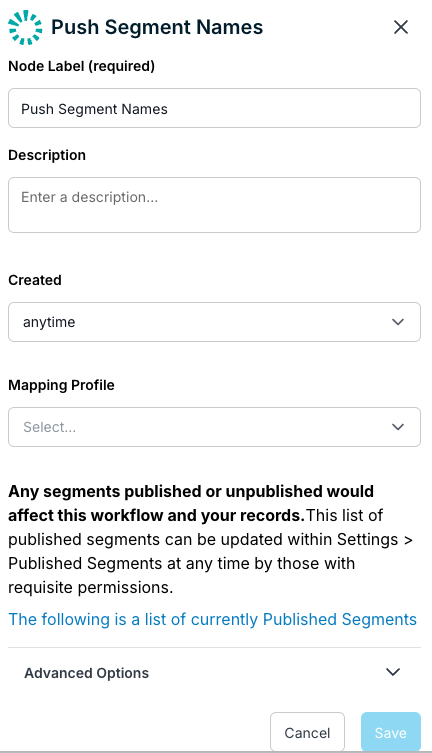
Enter the Push Segment Names node properties.
Node Label: The label that displays on the canvas.
Description: Information that you may want to refer to in the future.
Created: Conditions for filtering out leads:
Anytime: Does not filter any leads.
In the last day: Filters only the leads created in the last day.
In the last week: Filters only the leads created in the past week.
Mapping Profile: Select the mapping profile that maps the Segment Name field.
When you select a mapping profile, you can choose to override it, for this node only. Select the link and the Preview panel opens, showing the Segment Name mapping. By default the Enrich option is selected. Select Allow Overwrite to override it and select Save.
Select The following fields… link to see a list of fields not affected by this workflow.
Batch Size: The batch size at which the 6sense MAP APIs will push (export) records.
Published Segments: Any segments published or unpublished would affect this workflow and your records. This list of published segments can be updated within Settings > Published Segments at any time by those with requisite permissions. Select the link to see a popup with a list of currently published segments.
A given record will not be re-updated within: The day or days for 6sense to update a particular record again. The default is 7 days. Set this to “0” if you want to keep the segment name updated with the freshest data.
Select Save.
At this point, you have created a fully functioning Push Segment Names workflow.
Add a filter using a true/false decision node
We suggest that you add filters to ensure that the workflow pushes segment names to the records that you want.
To add filters using a decision node:
Select the path between the segment and the node.
An X icon appears.
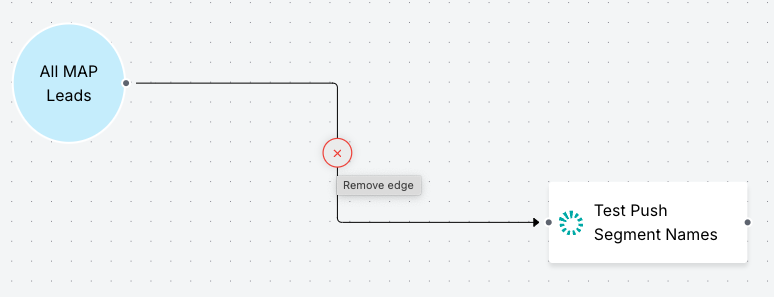
Select the X to delete the path.
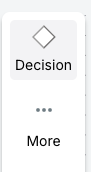
From the node menu, select Decision.
The Decision Nodes menu panel opens.
Drag the True/False node over the All MAP Leads segment and drop it.
Tip: You can select and move the nodes around on the canvas to align them in a way you prefer.
Select the True/False node’s Edit (pencil) icon.
The node’s properties panel opens.
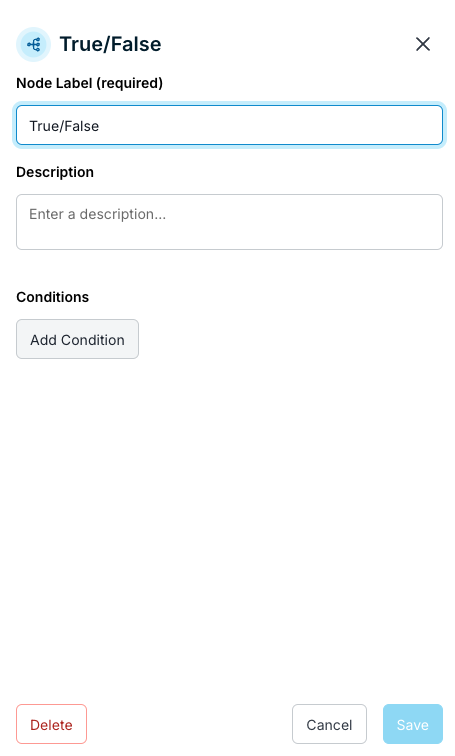
Select Add Condition.
The Edit Condition panel opens and lists all of the available MAP Lead fields to which 6sense has access.
For this example, push only segment names to ICP accounts using the Account in ICP field. Use Search to locate the field and select it.
Set the condition to Equals True.
Tip: This could be any combination of MAP fields of your choosing.
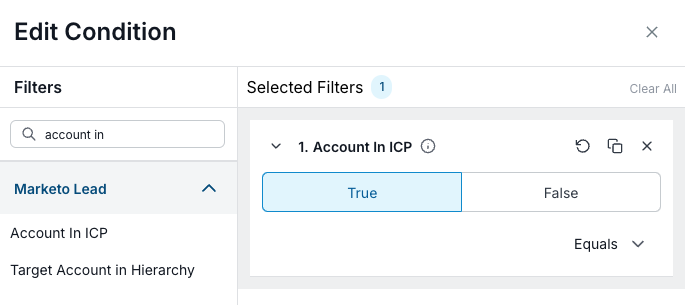
Select Apply to set the conditions.
Select Save.
The True/False node displays a Yes path.

On the canvas, select the dot on the right of the Yes box, and drag to connect the Yes path to the Push Segment Names node.
Select Save draft.
(Recommended) We suggest you run a preview of the workflow. Refer to Preview a Data Workflow.
When you are satisfied with the workflow, select Publish and the workflow runs as it is scheduled.
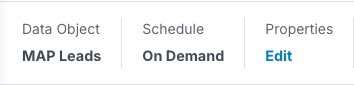
Tip: To change the workflow’s schedule, at the top of the page under Properties select Edit.