Lead to Account Match Data Workflows match leads in your CRM to accounts in your CRM. If there is a match, 6sense can:
Convert the lead to a contact under the matched account.
OREnrich the lead with details from the matched account such as the AccountID. This use-case may be preferable if you want to do further verification on the match and then manually convert the lead.
This page describes how to do this from scratch. To learn about available templates, refer to Data Workflows Use Case Templates.
Use lead to account matching starting with all leads
To build a lead to account matching workflow starting from all leads in my CRM:
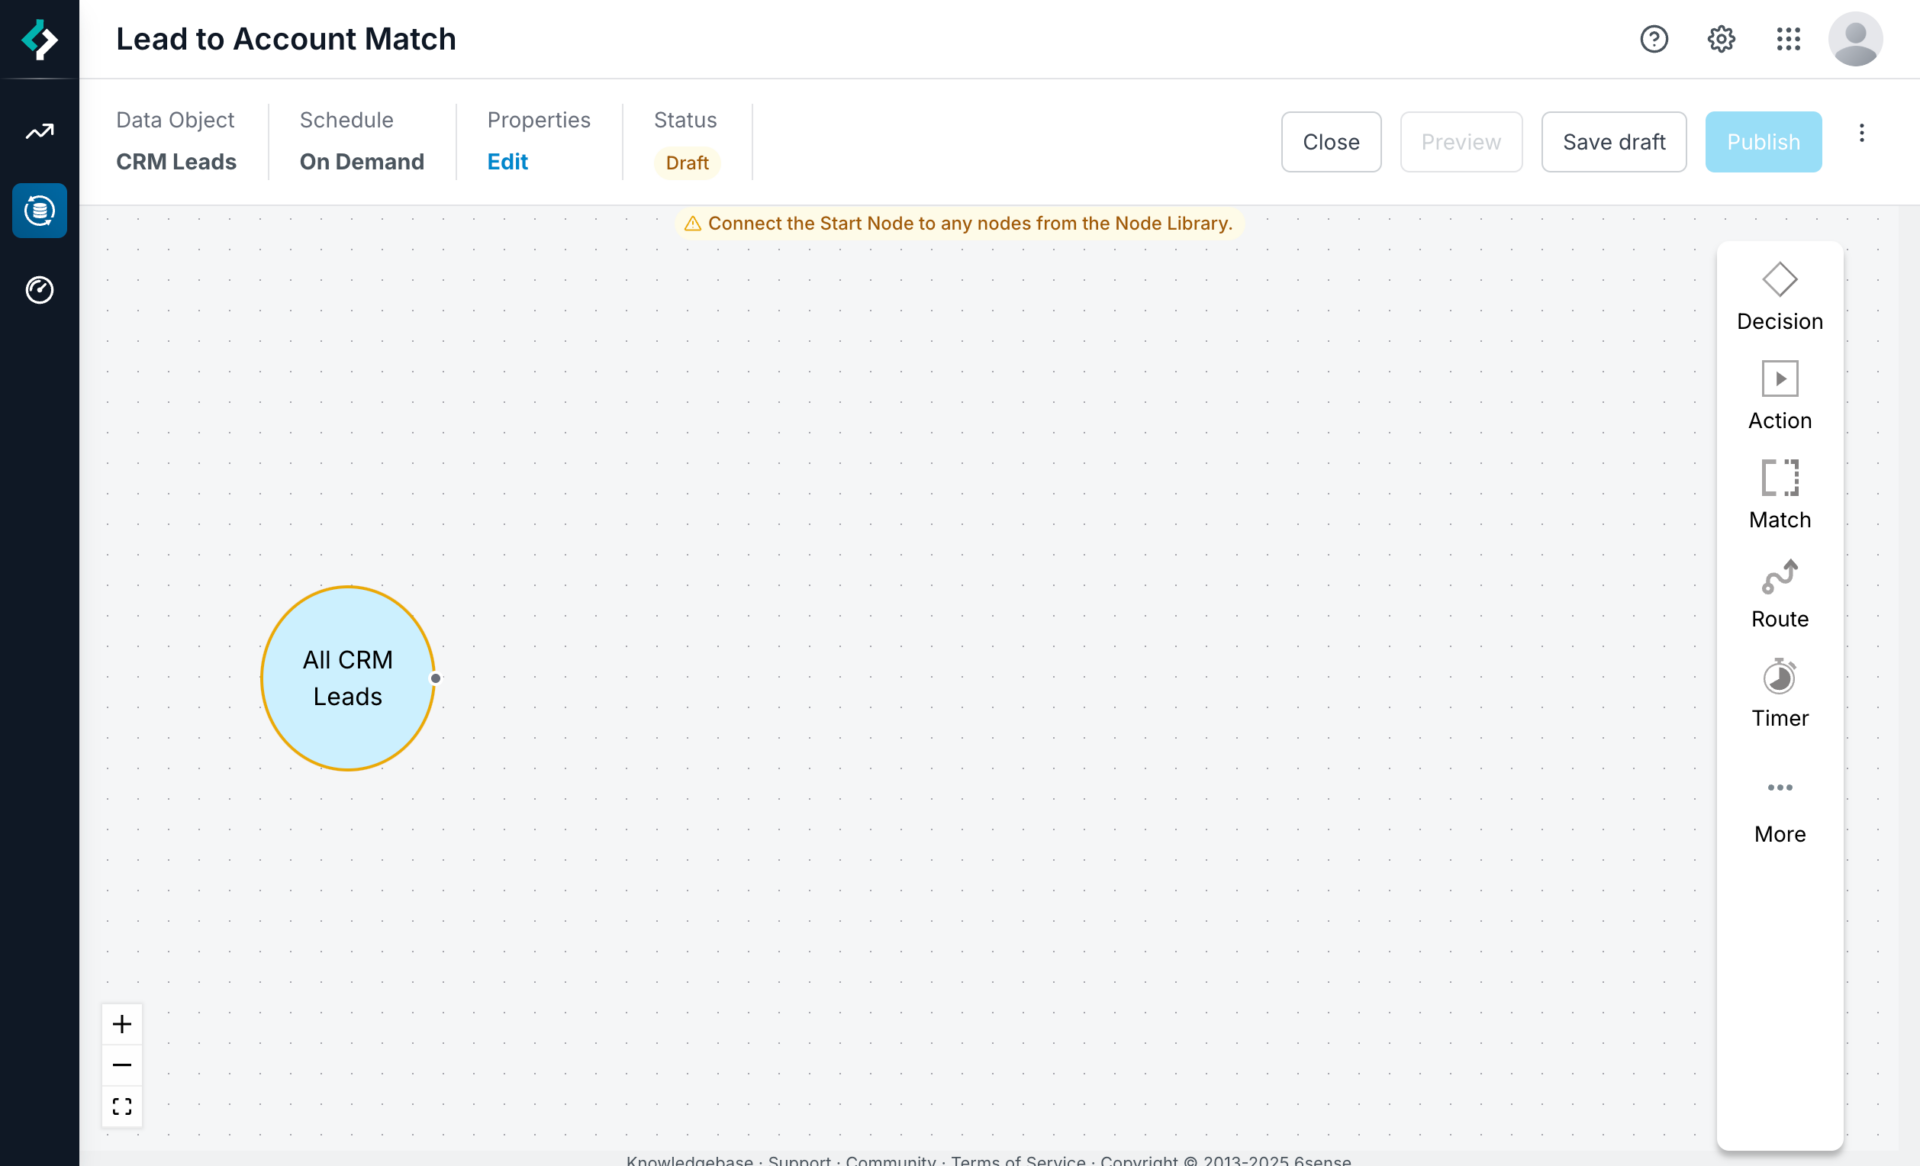
Go to Data Workflows > Create a Workflow.
Click Create from Scratch.
Set the workflow’s properties.
Name: Enter a descriptive name.
Schedule: Select the schedule at which you’d like the workflow to run.
Start From: Select CRM Lead.
A new canvas opens, with the All CRM Leads node that represents all the leads in your CRM.
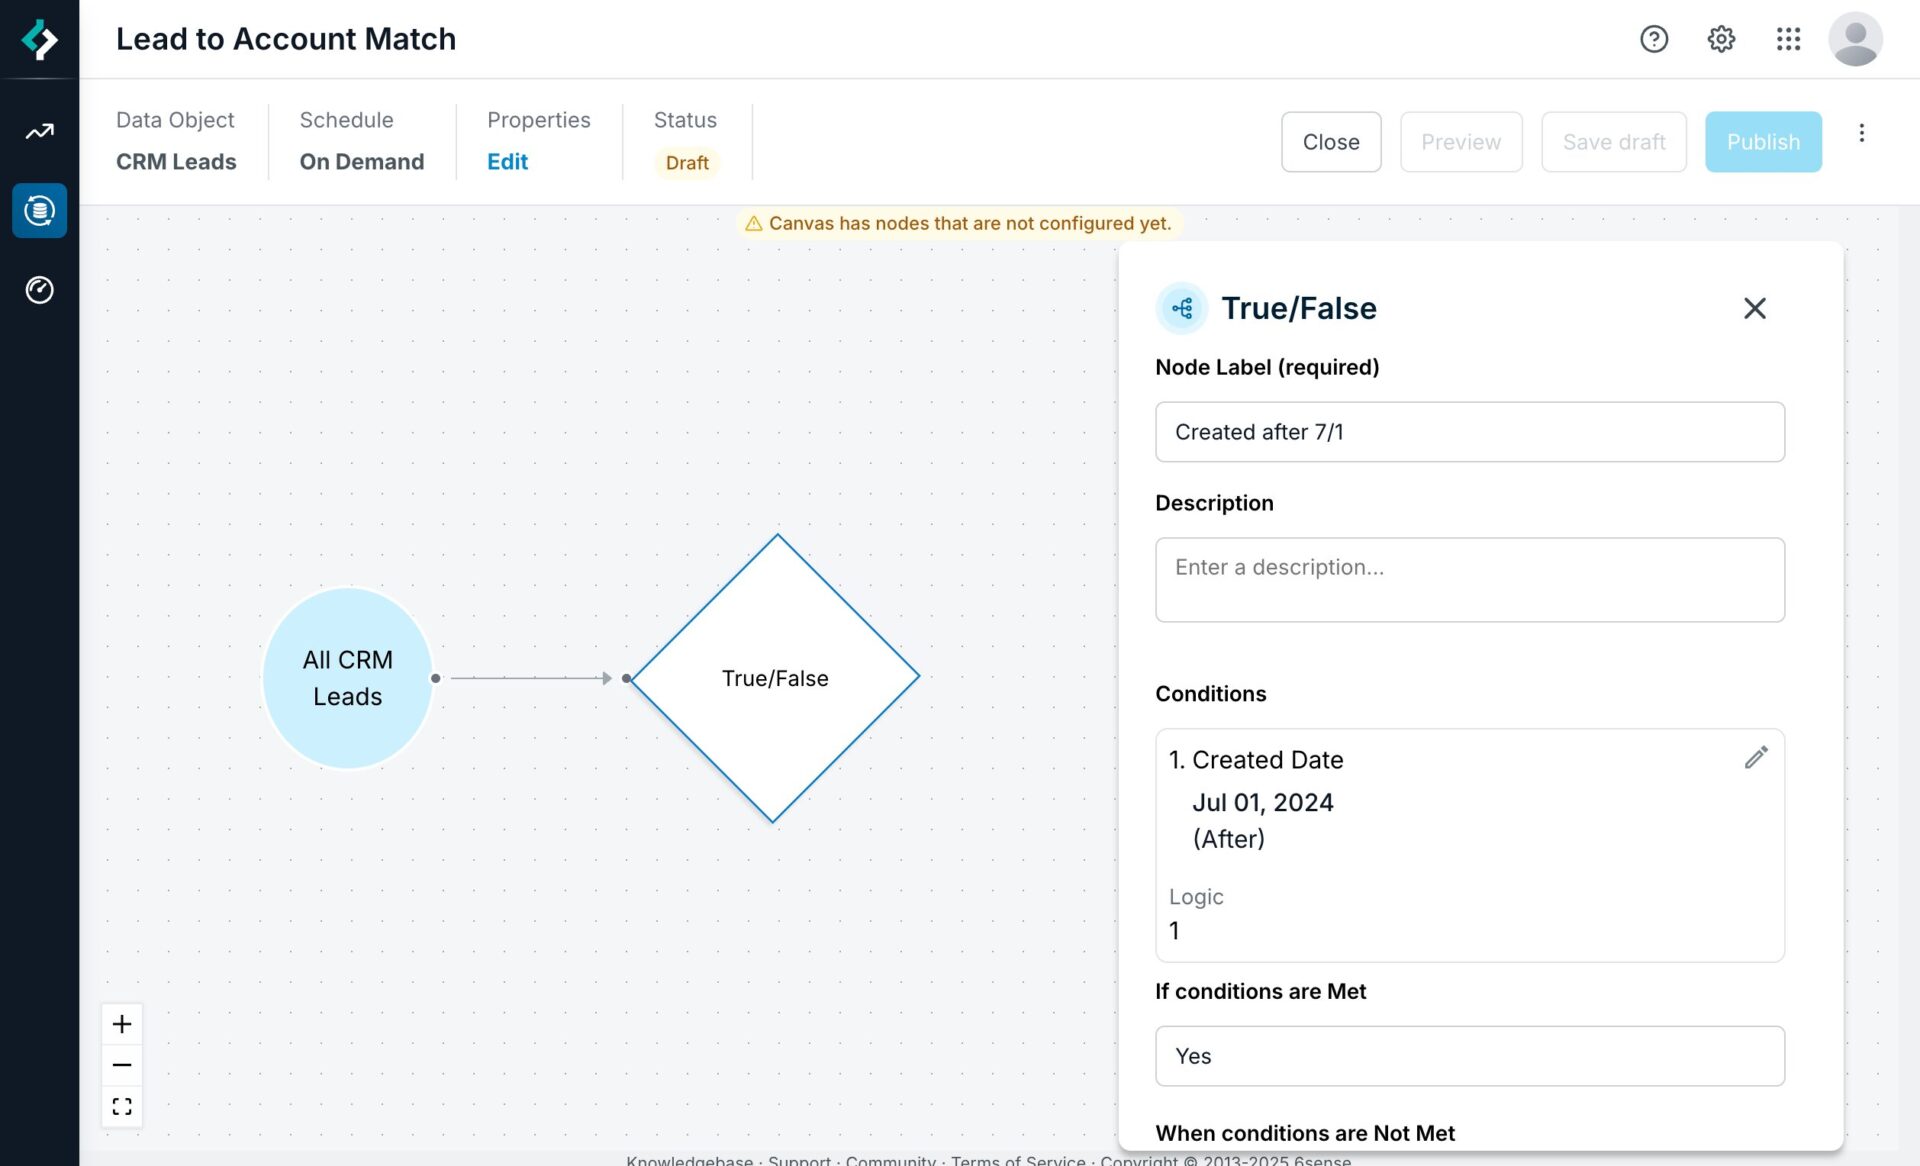
Add a True/False decision node.
Click the decision node’s pencil icon to edit its conditions.
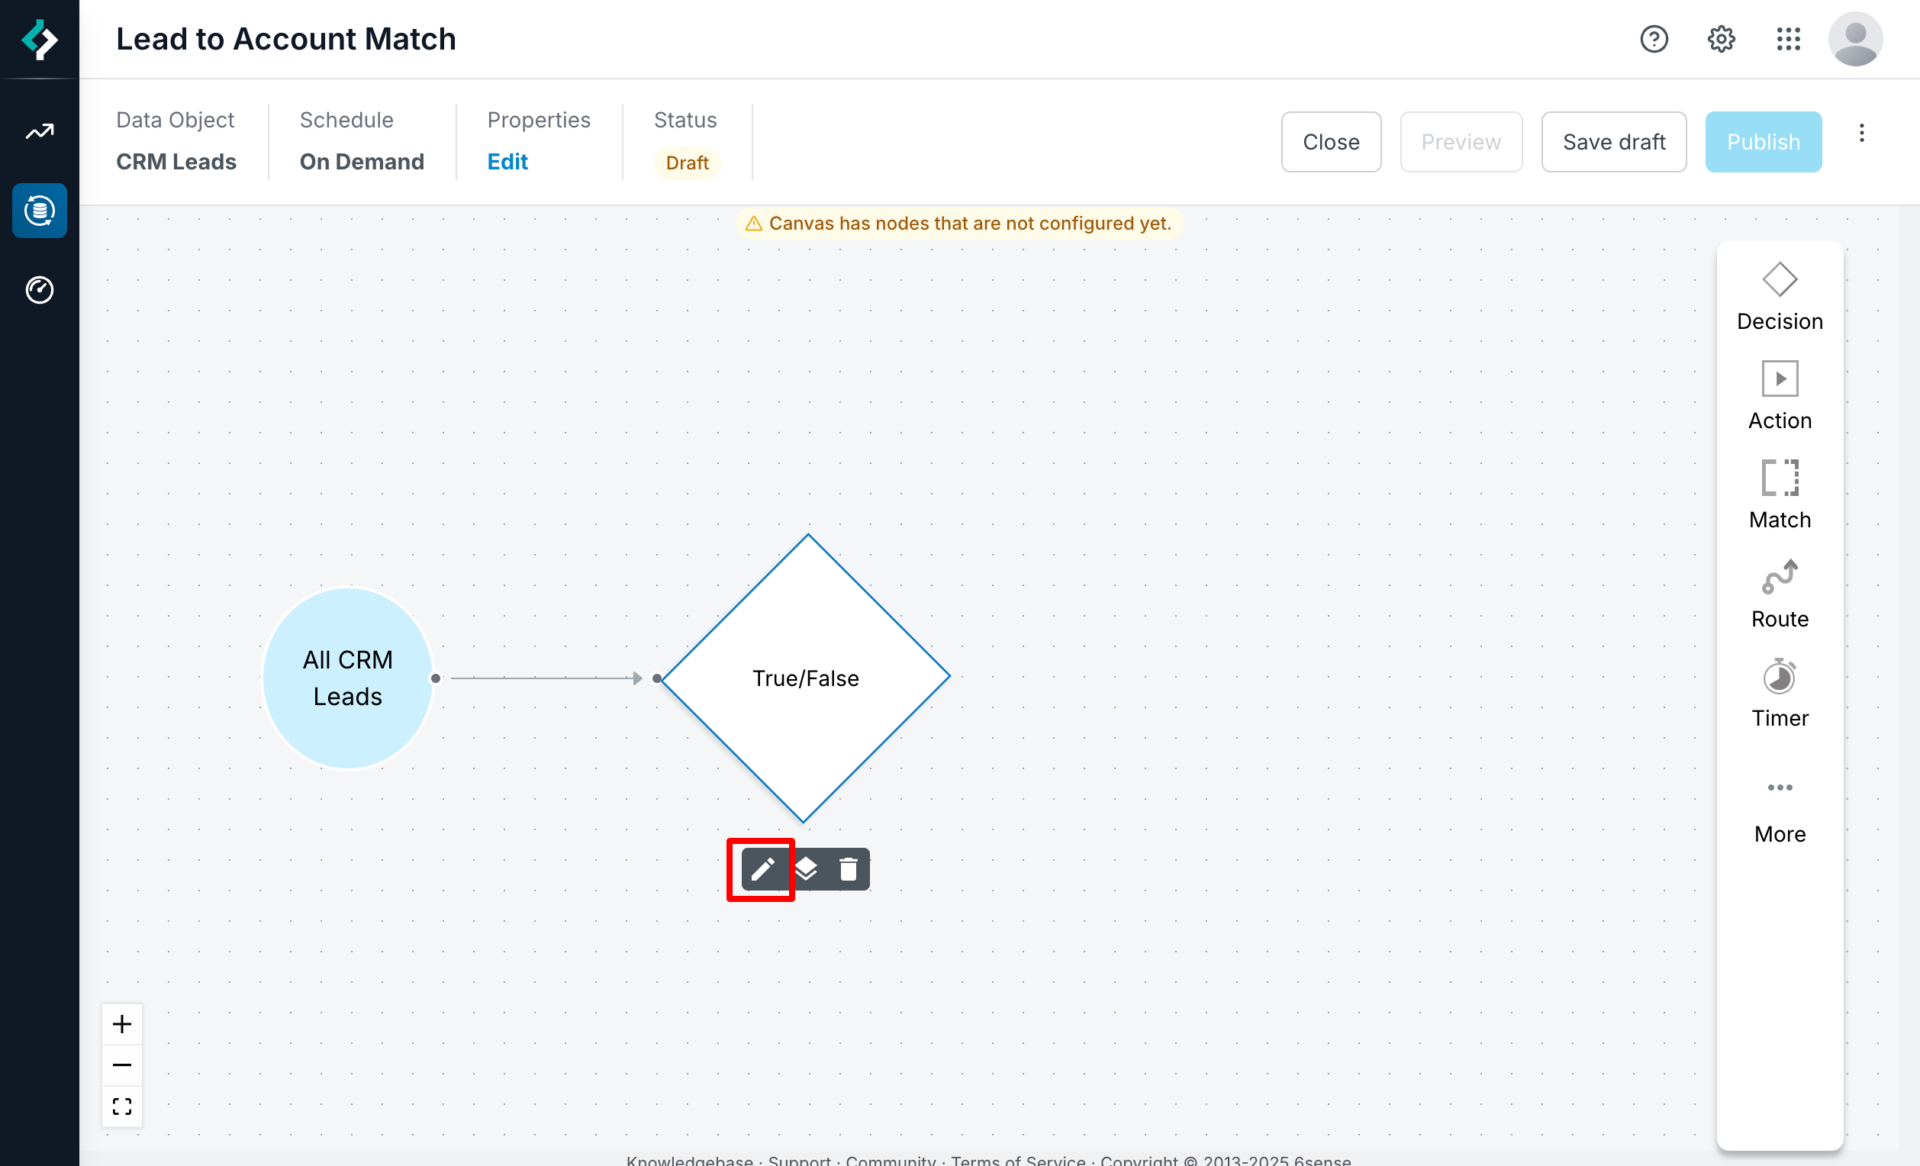
For example, you can run Lead to Account Matching on leads created after July 1, 2024. You can use any CRM lead filters to ensure you are running Lead to Account matching on the correct leads
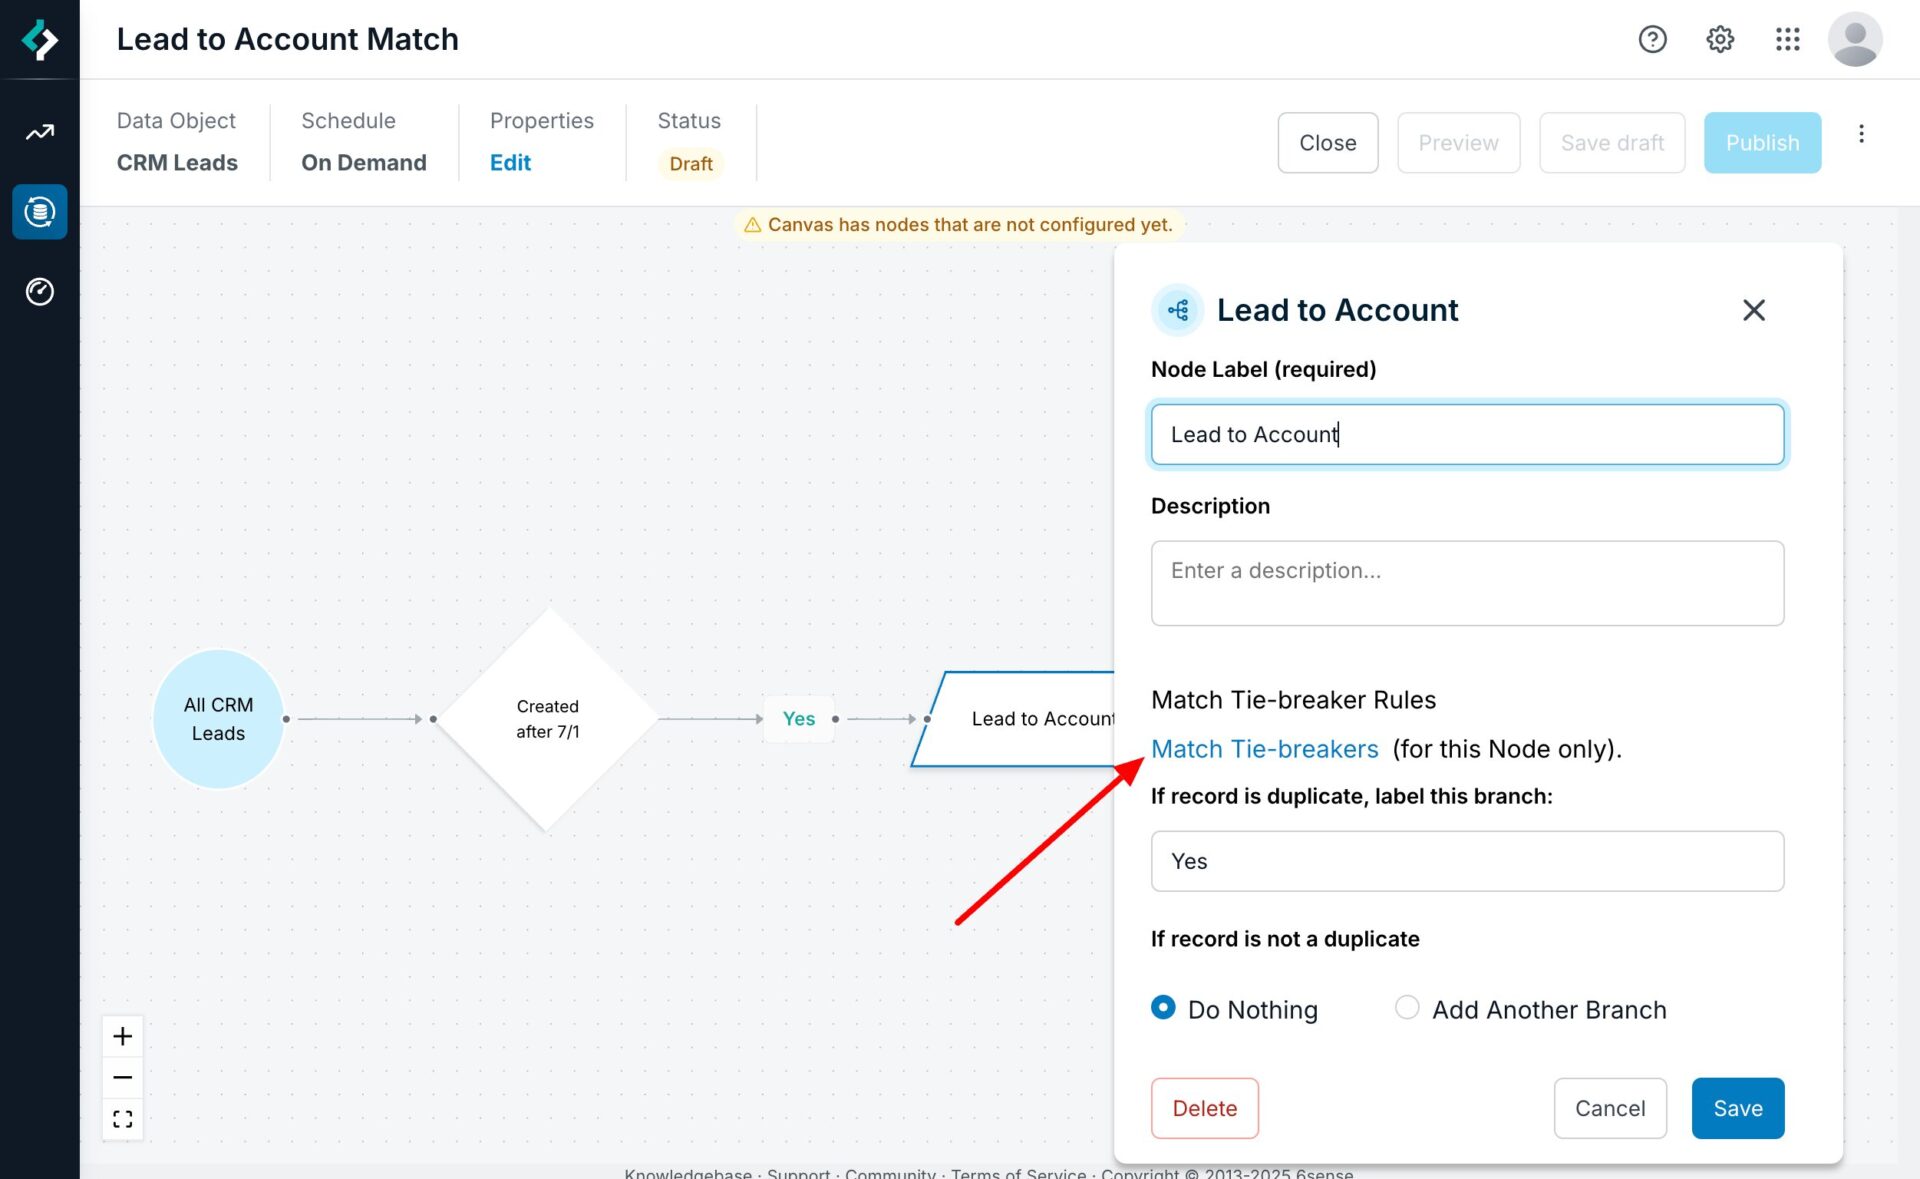
From the node menu, select Match Node > Lead to Account.
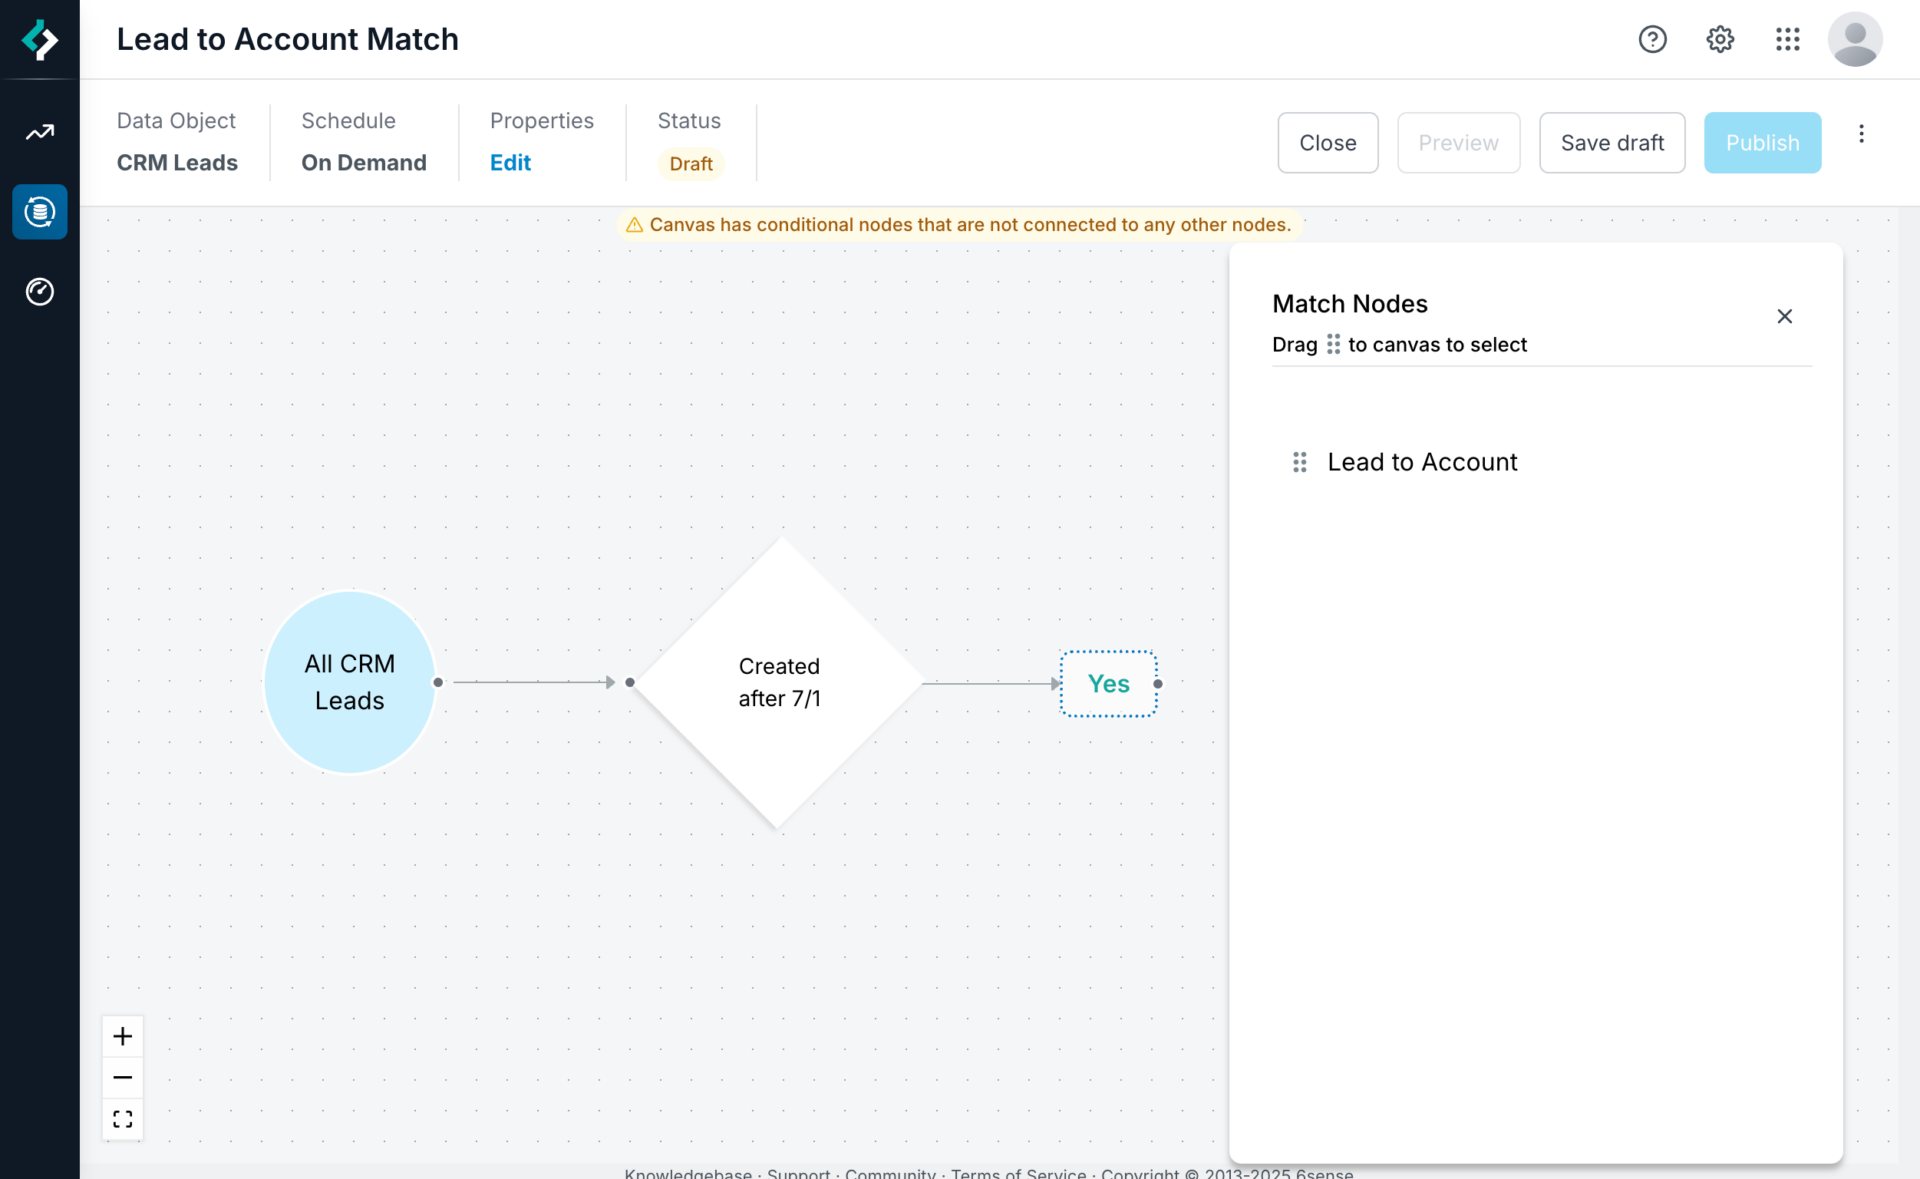
Drag and drop it over the Yes path.
Hover over the Lead to Account node and click its Edit (pencil) icon to open its properties panel.

Add your tie-breaker match rules to ensure that 6sense selects the correct CRM account if there are multiple matches. For details see the Matching and tie-breaking information below.
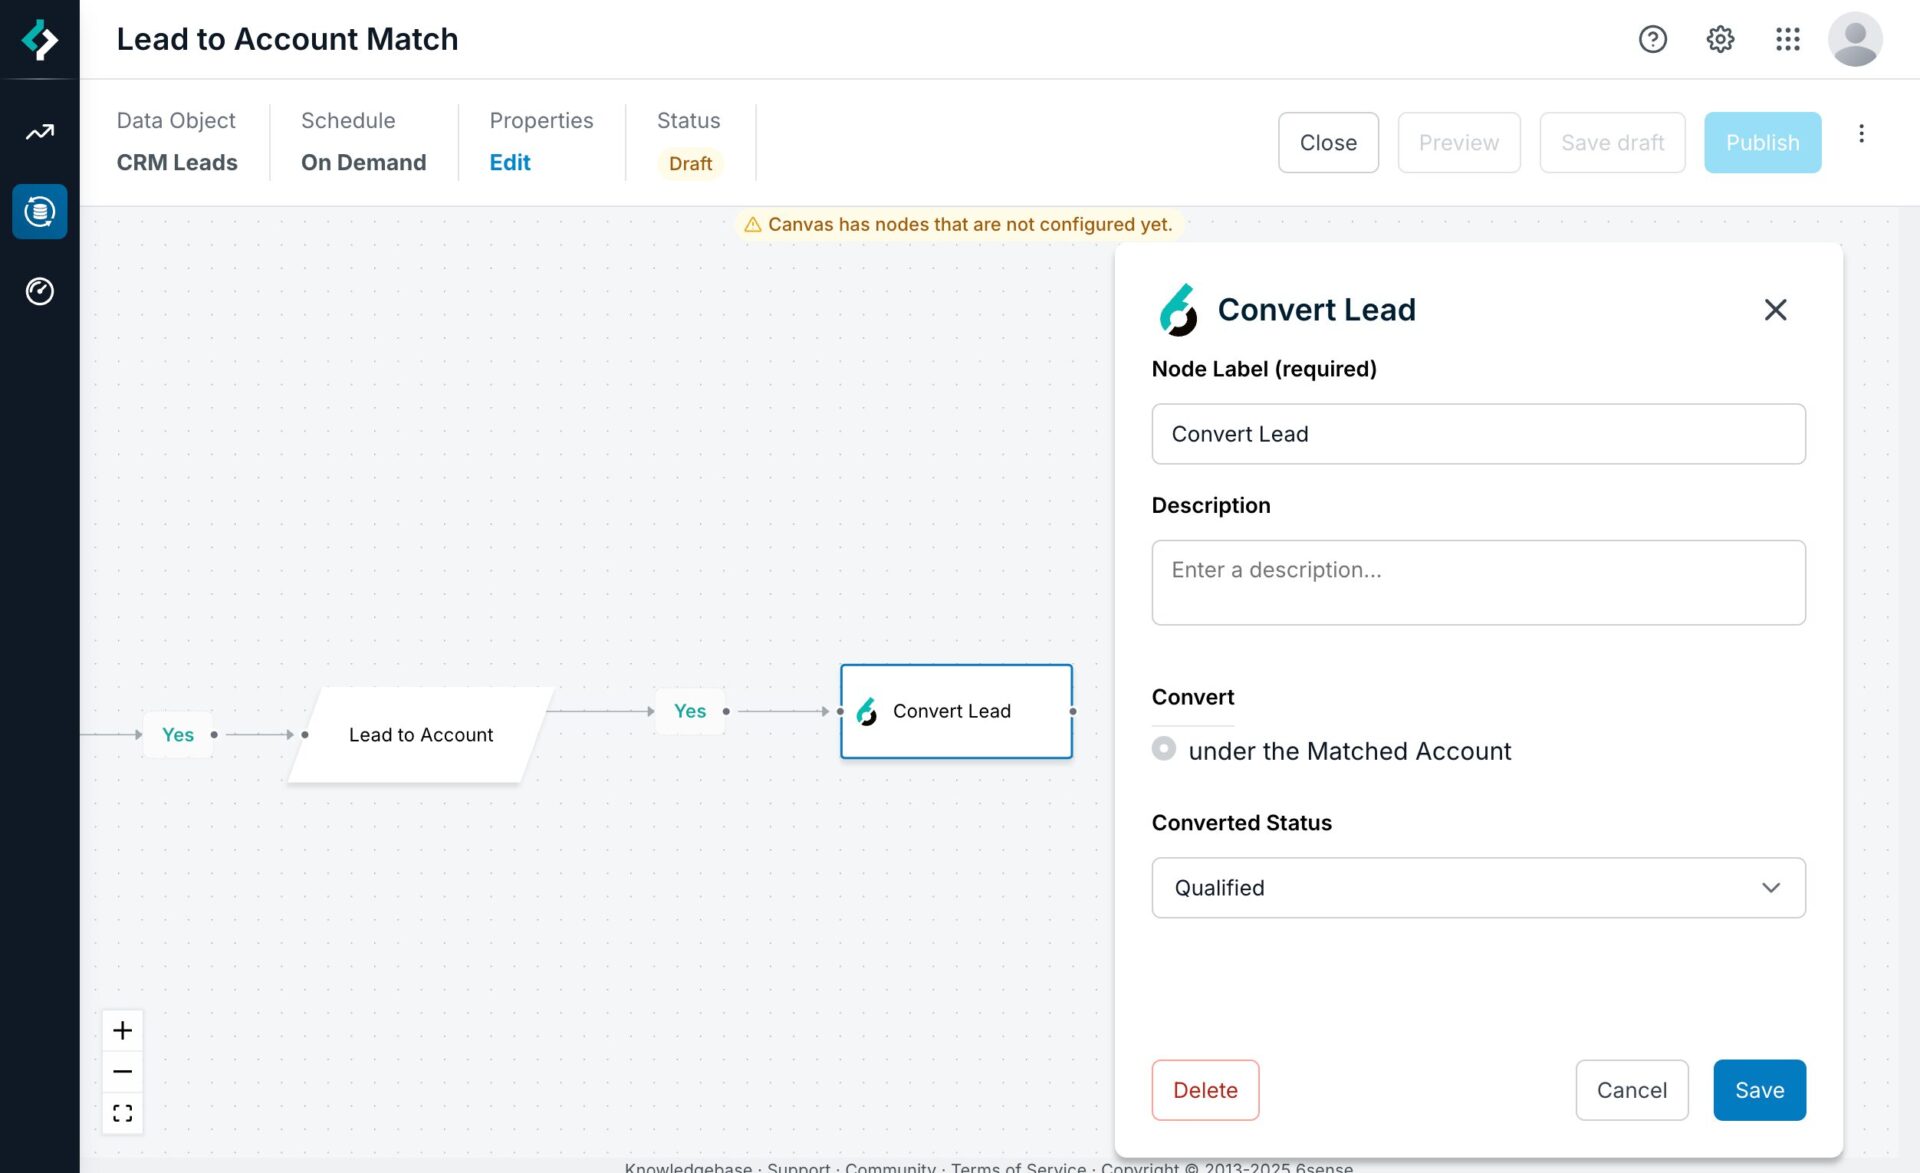
Decide what action to take when a match is found. Select an action node, either:
Convert Lead: Converts the lead to a contact under the matched account.
Select a value from the Converted Status menu.
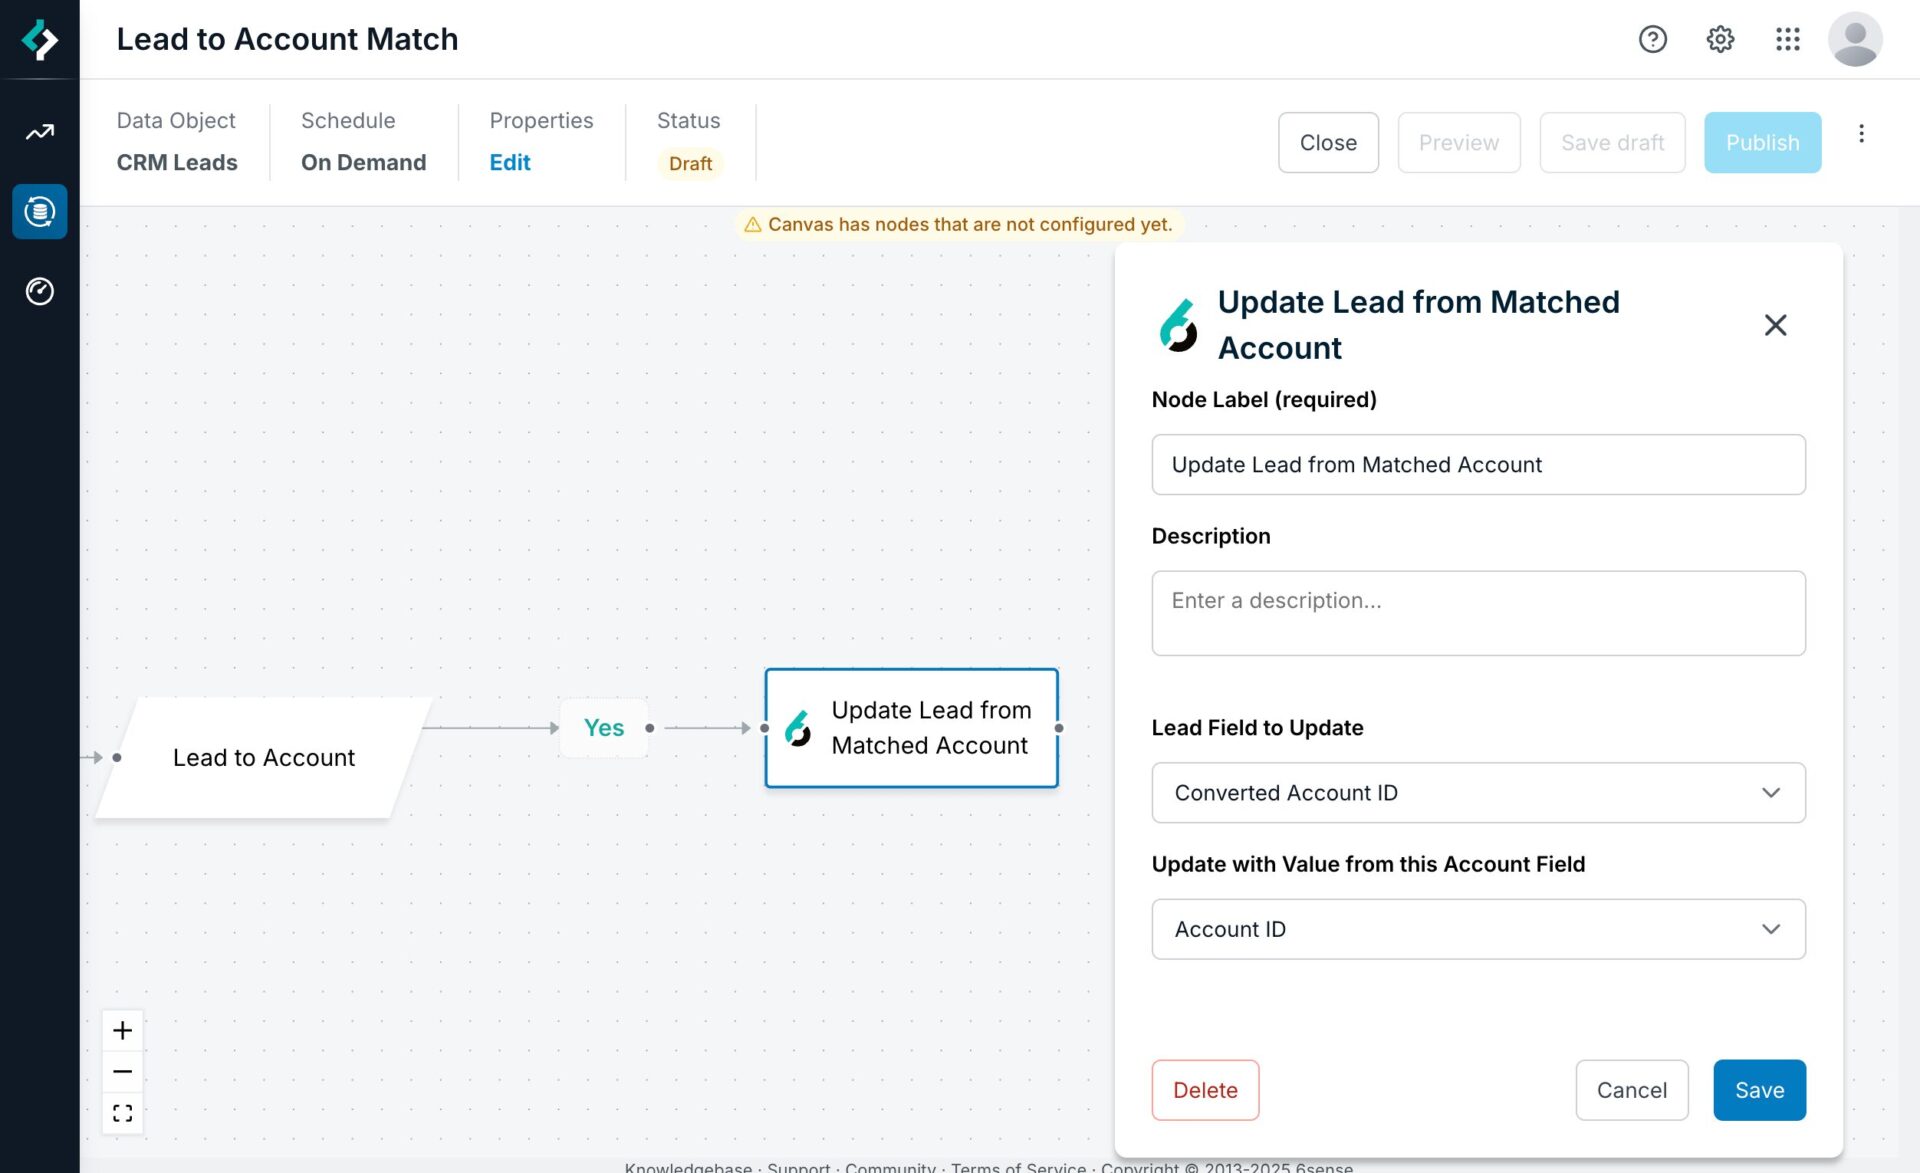
Update Lead from Matched Account: Updates a field on the lead record with a field from the matched account.
Use this when you do not want to automatically convert a lead, but you want to mark it so that your team knows it matched to an account.
For example, 6sense could write the account ID of the matched account to a field on the lead record so you can reference the matched account later.
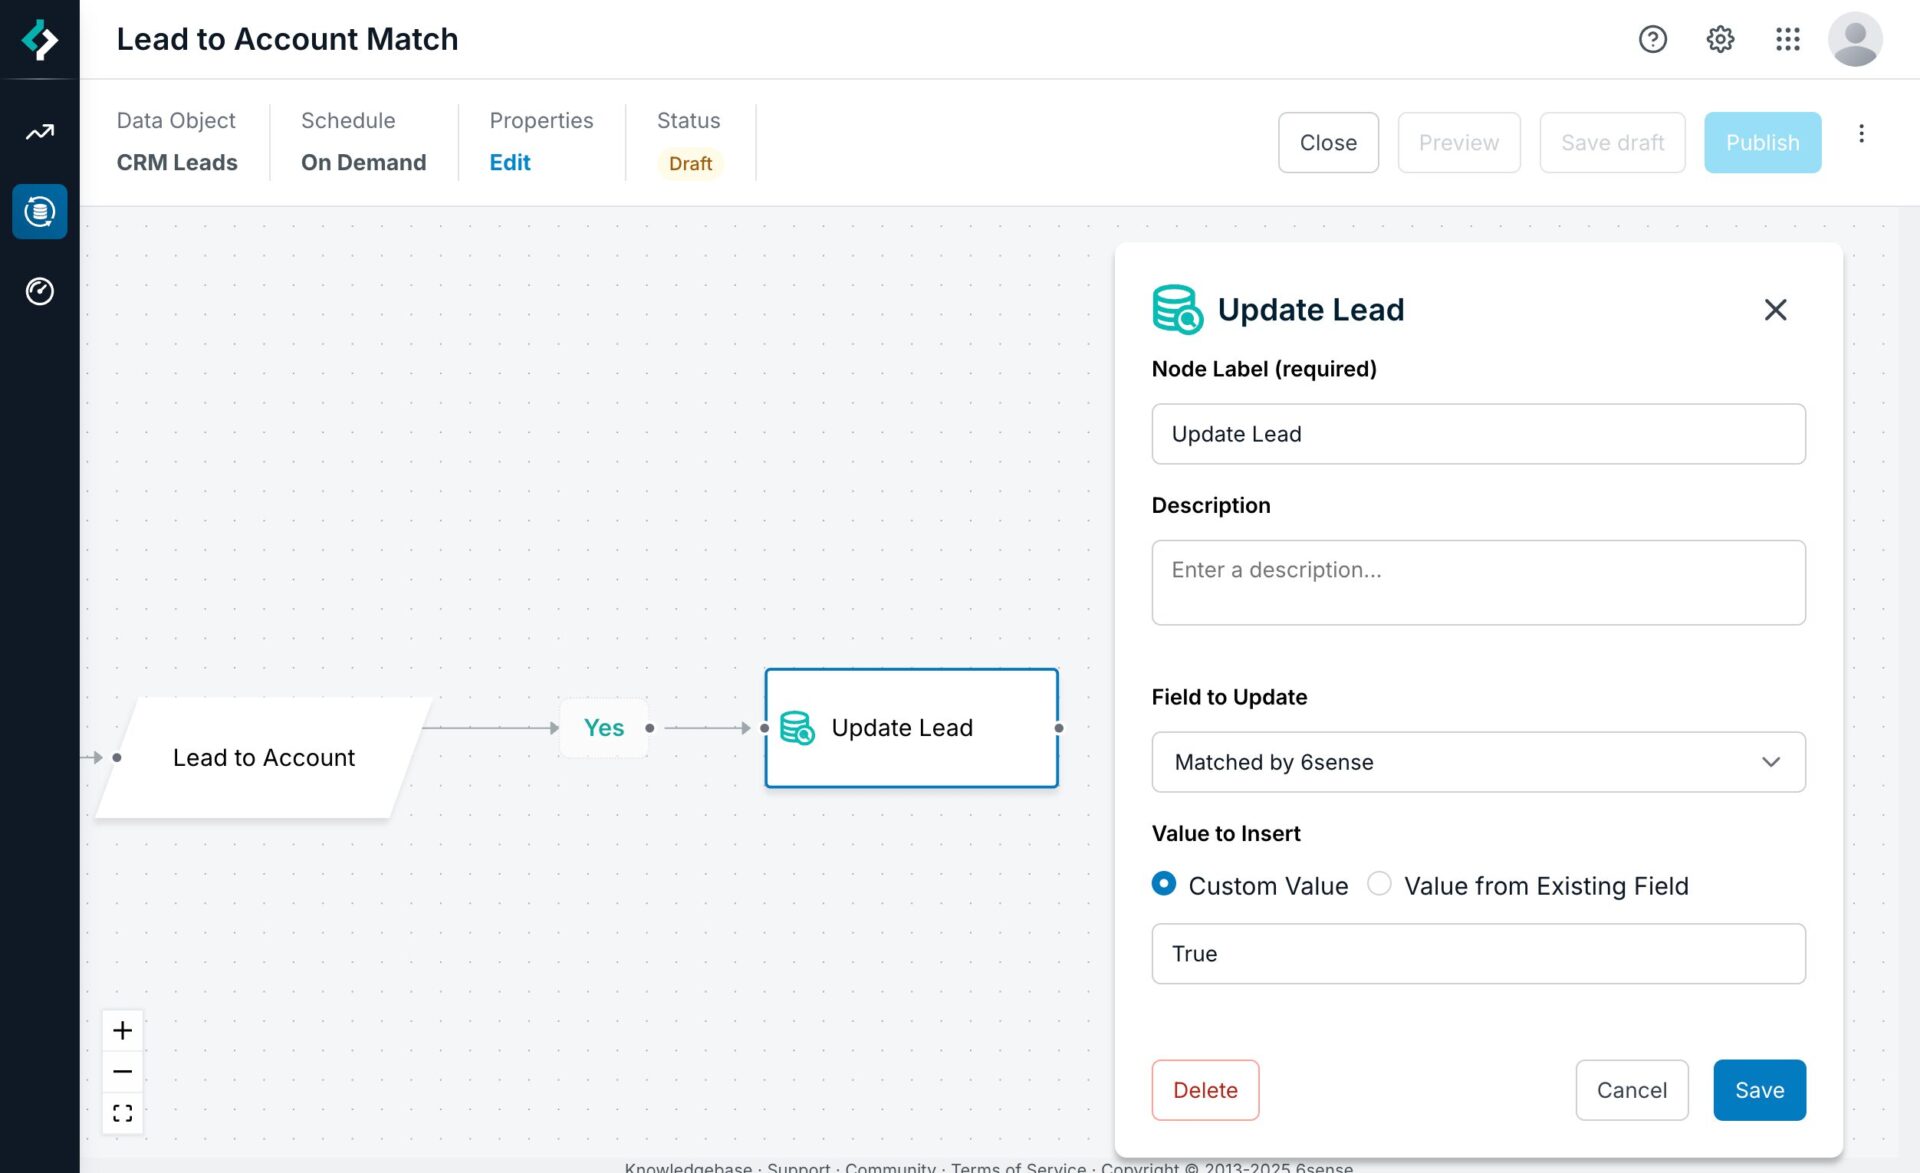
Updated Lead: Update any field on the lead with a custom value.
You can use this in parallel with the “Update Lead from Matched Account” node to write a custom value to the lead record for downstream processing.
Use the Preview feature to test out the workflow. See Preview a Data Workflow.
When you are satisfied with the workflow and ready for it to run, click Publish.
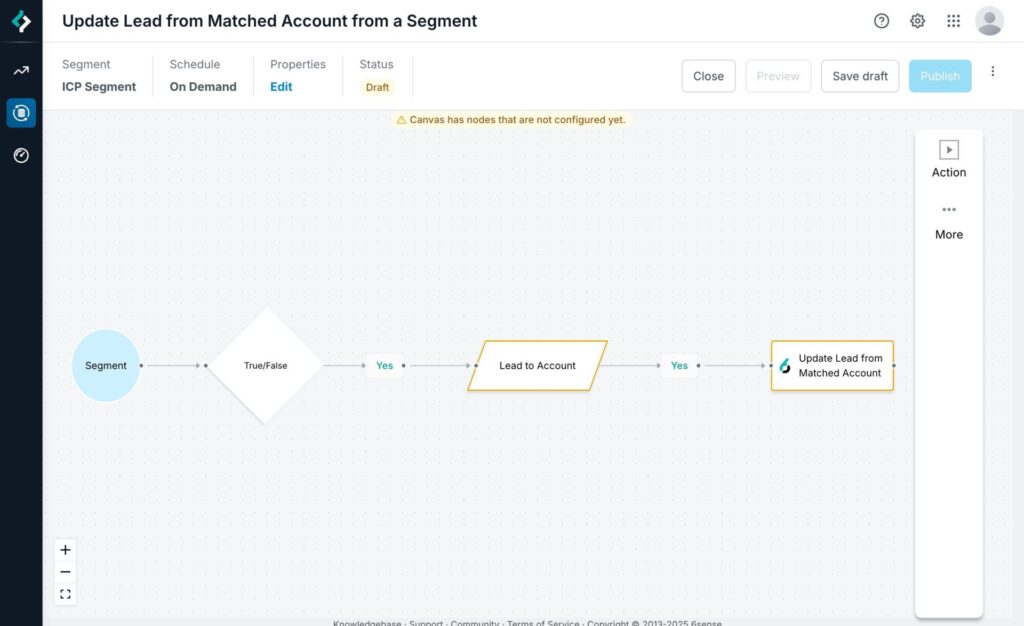
Use lead to account matching starting with a segment
To start from a 6sense segment to run the lead to account match:
Go to the Create a Workflow templates.
Select the Lead to Account Match category. The templates differ only in the final actions they take.
Follow the steps above to configure the decision node, tie-breaker rules, and action nodes to complete the workflow.
Convert Matched Leads to Contacts template

Update Lead from Matched Account from a Segment template
Matching and tie-breaking
Match logic
6sense matches leads in your CRM to accounts in your CRM with the logic below everyday when the pipeline runs.
First, 6sense matches CRM accounts to 6sense accounts and creates a Company ID.
By default, 6sense attempts to match all CRM accounts to a 6sense Company ID using the name, domain, and country on the accounts in your CRM.
There is a possibility there there are multiple CRM accounts that will match to a 6sense Company ID
Next, 6sense matches leads in your CRM to the Company ID.
All leads in your CRM are matched a 6sense Company ID with a combination of company name, website, country, and email domain
If there is no country value available on the lead, it is possible to match to a 6sense HQ Company with the other fields.
Finally, 6sense matches the lead by tie-breaking between all CRM accounts that match to the 6sense Company ID
Go to the next section to review how to configure Tie-breaker rules
Tie-breaker rule
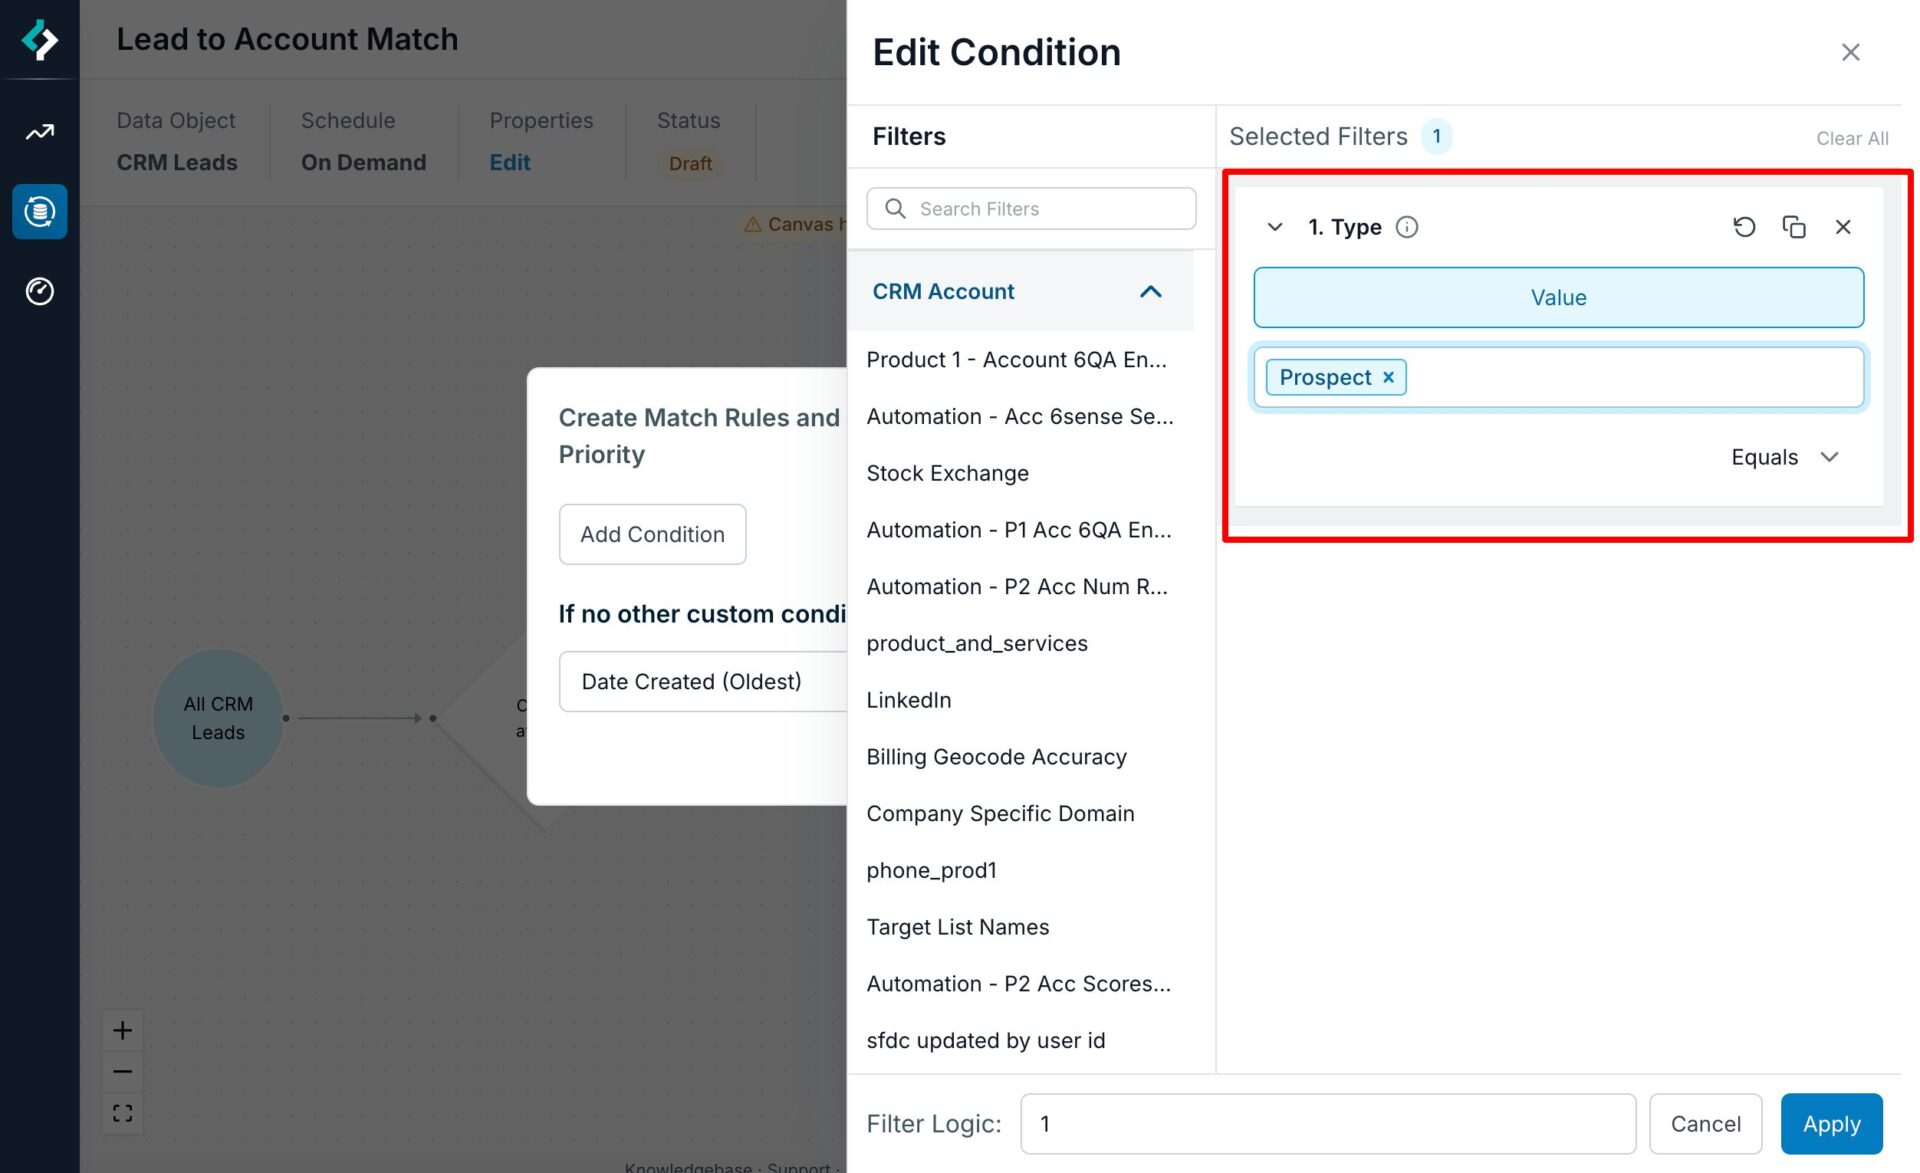
You can modify the matching behavior to determine the priority if a tie-breaker situation occurs.
Click Match Tie-breakers (for this node only) on the Lead to Account node config panel

Click Add Condition to set a Field-Value match rule
You can select a field on the Account Object and a Value. If there are multiple CRM accounts matches, 6sense will pick the one that matches the criteria you set up here. For instance in this example we want to match to the Account that is Type: Prospect. If multiple CRM accounts still qualify, then 6sense will fall back to tie-breaker rules in the next step.
Set the fallback tie-breaker rule.
Date Created (Oldest): Selects the CRM account that has the oldest creation date
Date Created (Most Recent): Selected the CRM account that has the most recent creation date
Updated Date (Oldest): Selects the CRM account that has the oldest last-updated date
Updated Date (Most Recent): Selects the CRM account that has the most recent last-updated date
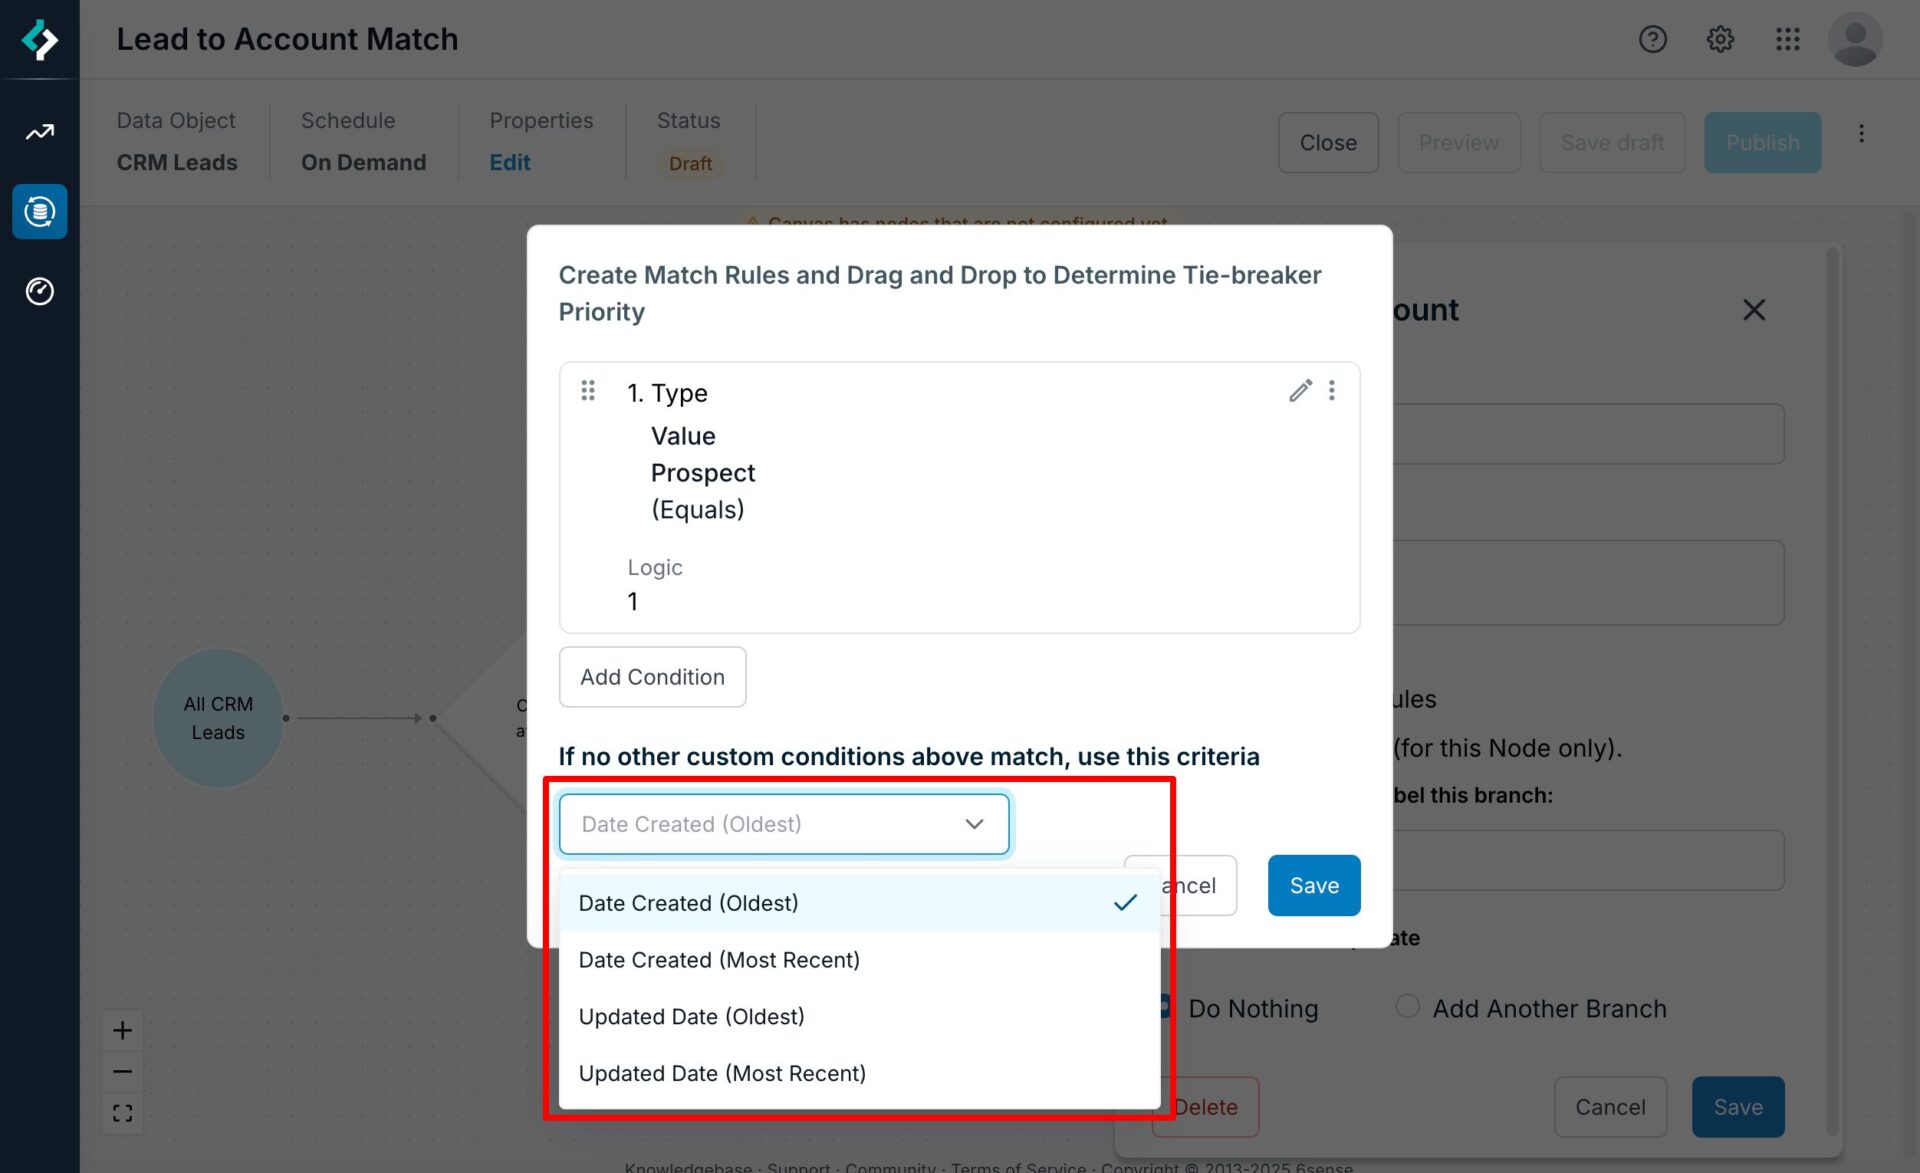
Click Save.