This is a guide for creating contact and company properties manually in HubSpot MAP to store the 6sense scores assuming you do not have Hubspot CRM integrated and do not want to rely on your CRM to push the scores into your Hubspot MAP.
For more information on how 6sense calculates scores, refer to 6sense Scores Breakdown.
Properties to be created:
HubSpot Property Type | HubSpot Property Label (Display Name) | Property Description | Source | Property Type |
|---|---|---|---|---|
Contact | 6sense Contact Reach Score | contactReachScore6sense | 6sense | Single-line text |
Contact | 6sense Contact Intent Score | contactIntentScore6sense | 6sense | Number |
Contact | 6sense Contact Profile Fit | contactProfileFit6sense | 6sense | Single-line text |
Contact | 6sense Contact Grade | contactGrade6sense | 6sense | Single-line text |
Contact & Company | 6sense Account Intent Score | accountIntentScore6sense | 6sense | Number |
Contact & Company | 6sense Account Profile Fit | accountProfileFit6sense | 6sense | Single-line text |
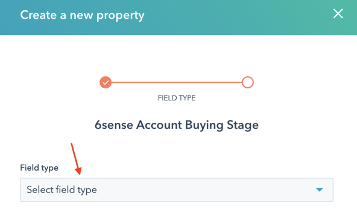
Contact & Company | 6sense Account Buying Stage | accountBuyingStage6sense | 6sense | Single-line text |
Contact & Company | 6sense Account Reach Score | accountReachScore6sense | 6sense | Single-line text |
Contact & Company | 6sense Account Numeric Reach Score | accountNumericReachScore6sense | 6sense | Number |
Manage Properties in HubSpot
Prerequisite
The user who integrates 6sense with HubSpot must have the Super Admin persona in the HubSpot platform to push scores or segment names to custom objects or fields in HubSpot. If you are only pushing scores or segment names to standard HubSpot objects or fields, Super Admin permissions are not required.
Step-by-step procedure
Navigate to Settings > Properties.
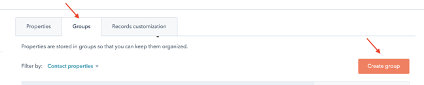
Before you get started with the new custom properties, it’s recommended to create a new ‘6sense’ property group on both the Contact and Company level for organizational purposes.
Once you’ve created your new property groups, toggle back to Properties to start creating the custom properties required on both the Contact, and the Company, object records, listed in the chart above.
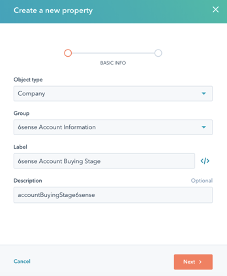
Select the Contact or Company object type.

Complete the property label and description fields and assign the property to the appropriate ‘6sense’ group.
Select the appropriate field type for each property (as indicated in the table above), and select Create.