This how-to guide is for 6sense administrators (users with access to the 6sense ABM Settings). It describes the process of integrating 6sense with your production Salesloft instance so that 6sense has sufficient permissions to sync with Salesloft on a regular basis. Integrating 6sense with Salesloft allows users to add contacts to a Salesloft Cadence through 6sense Sales Intelligence.
Step-by-Step Instructions
Generate a Salesloft API key.
Activate Salesloft integration in 6sense.
Turn on the Add to Salesloft action.
Generate a Salesloft API Key
Generate a Salesloft API key in Salesloft by logging in to your Salesloft account.
Click Create New in the API section as displayed below:
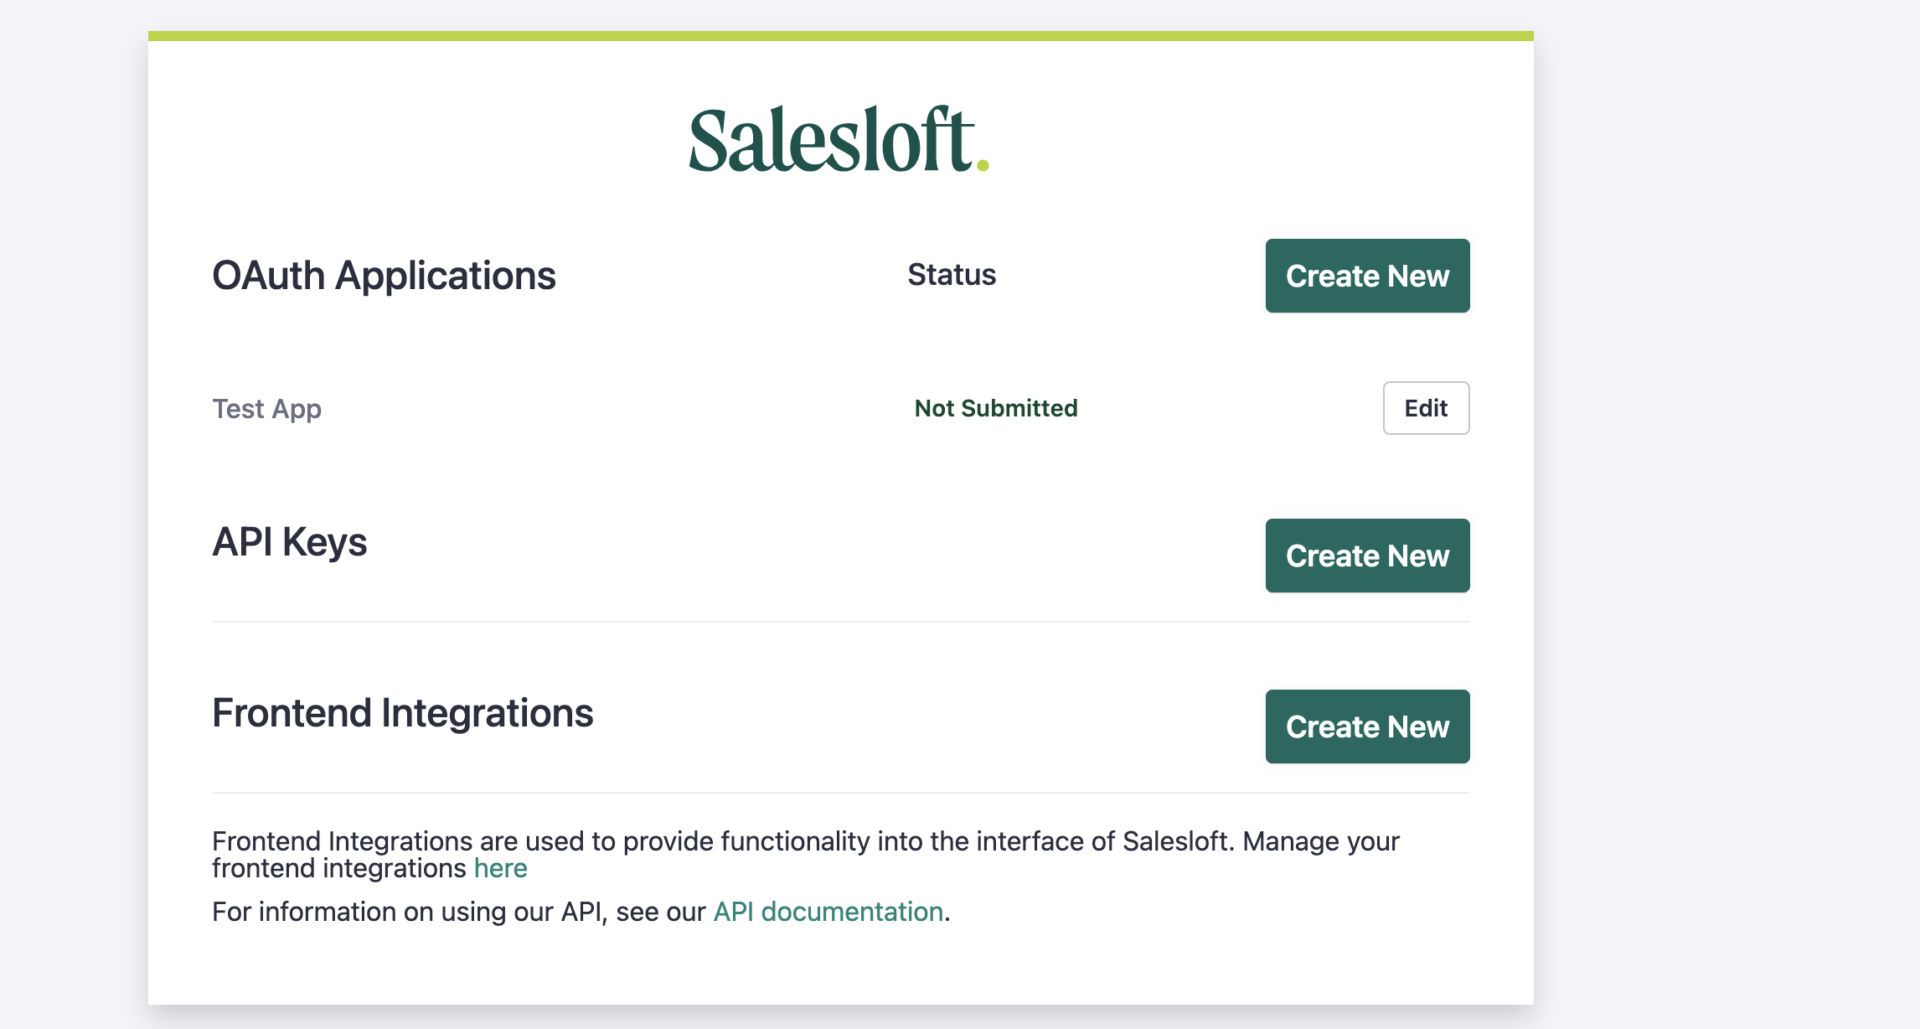
Name your API key.
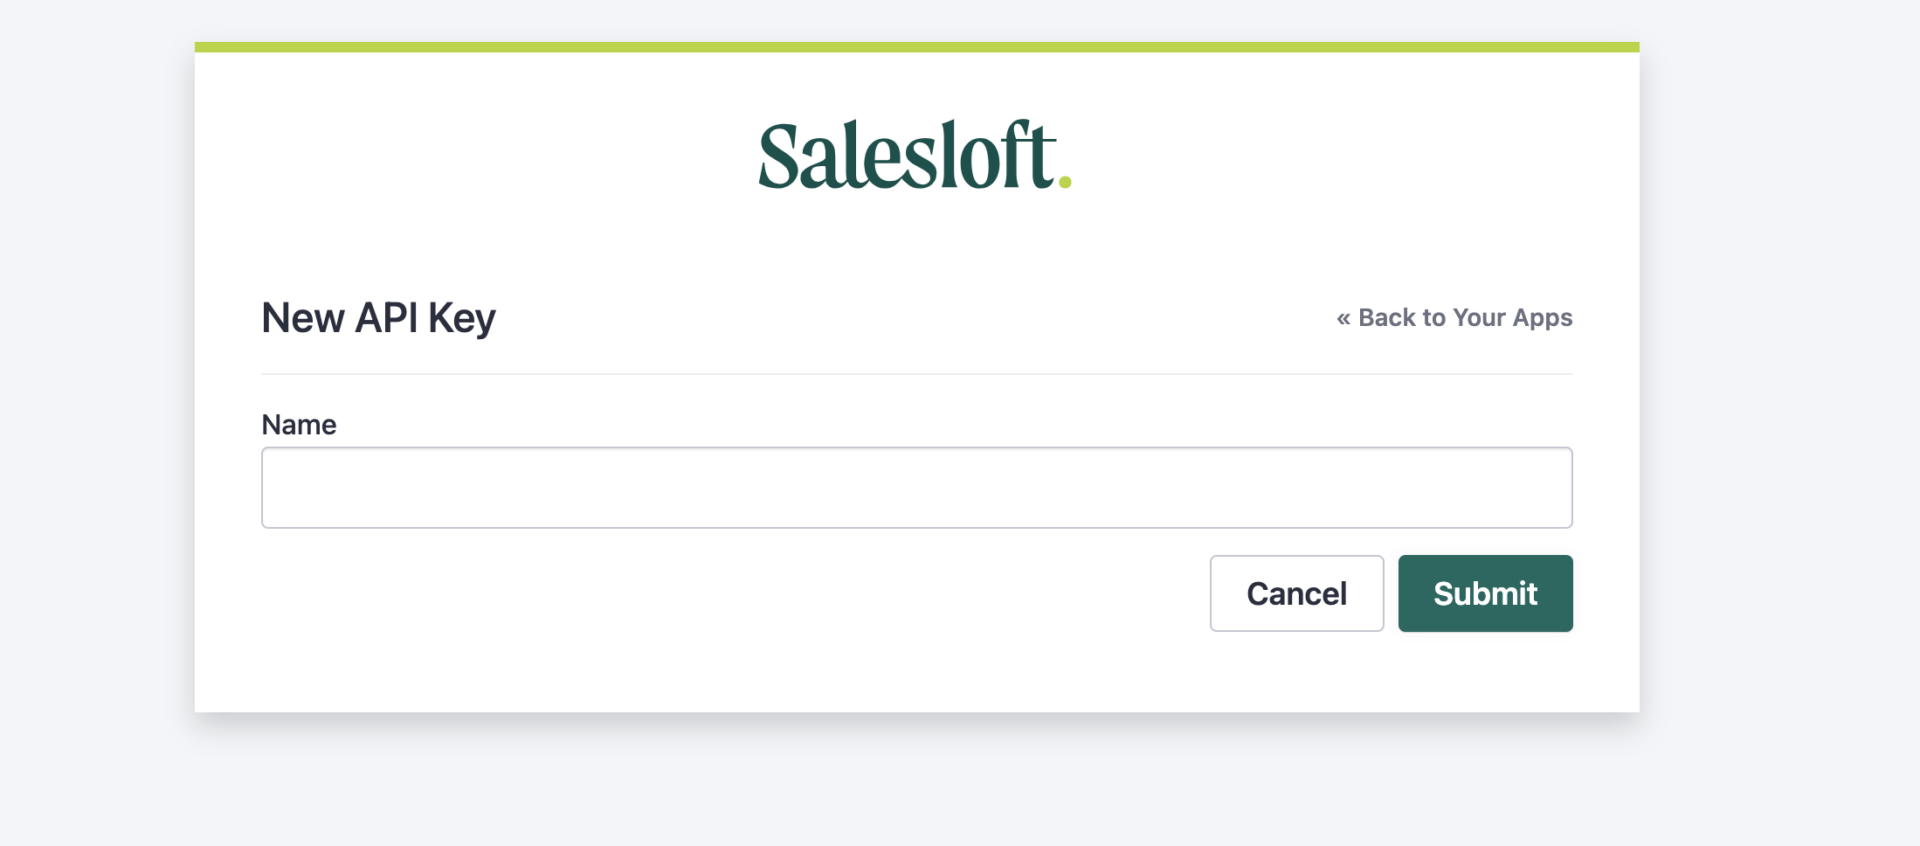
Copy the newly generated API key for use in the next step.
Activate Salesloft Integration in 6sense
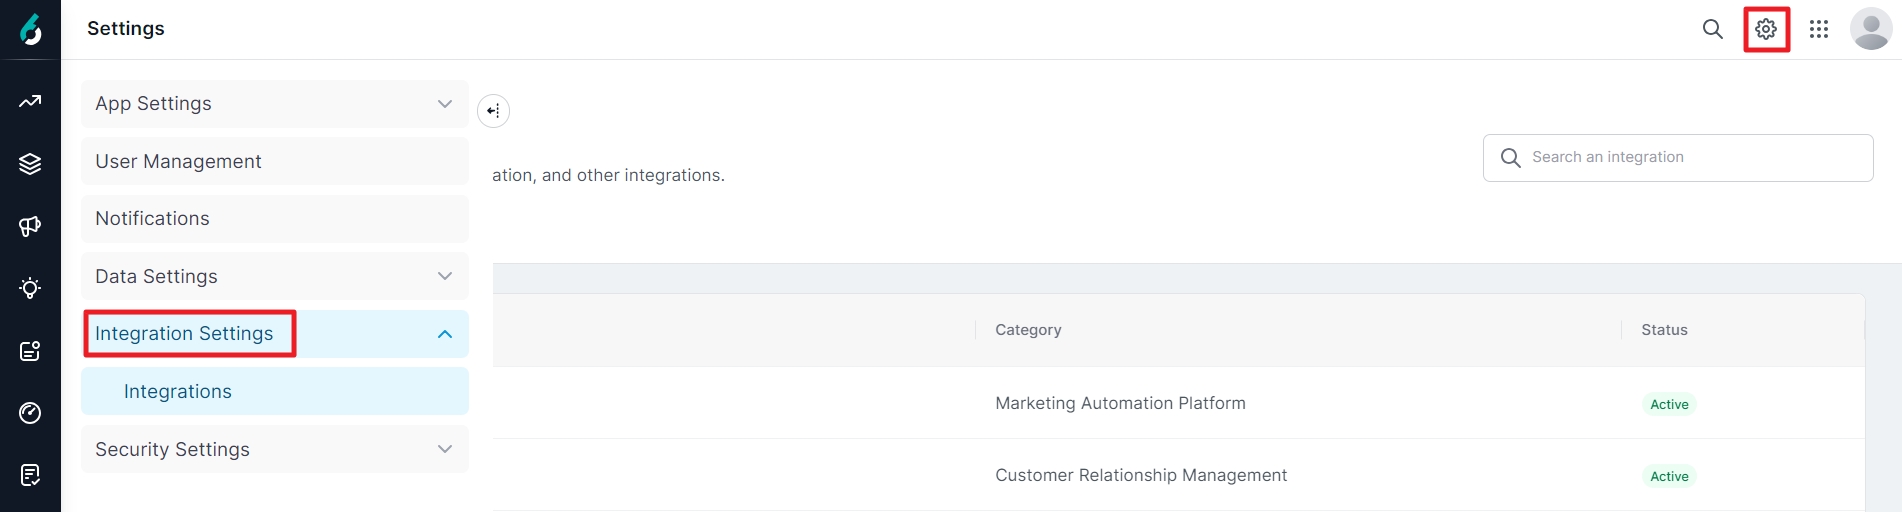
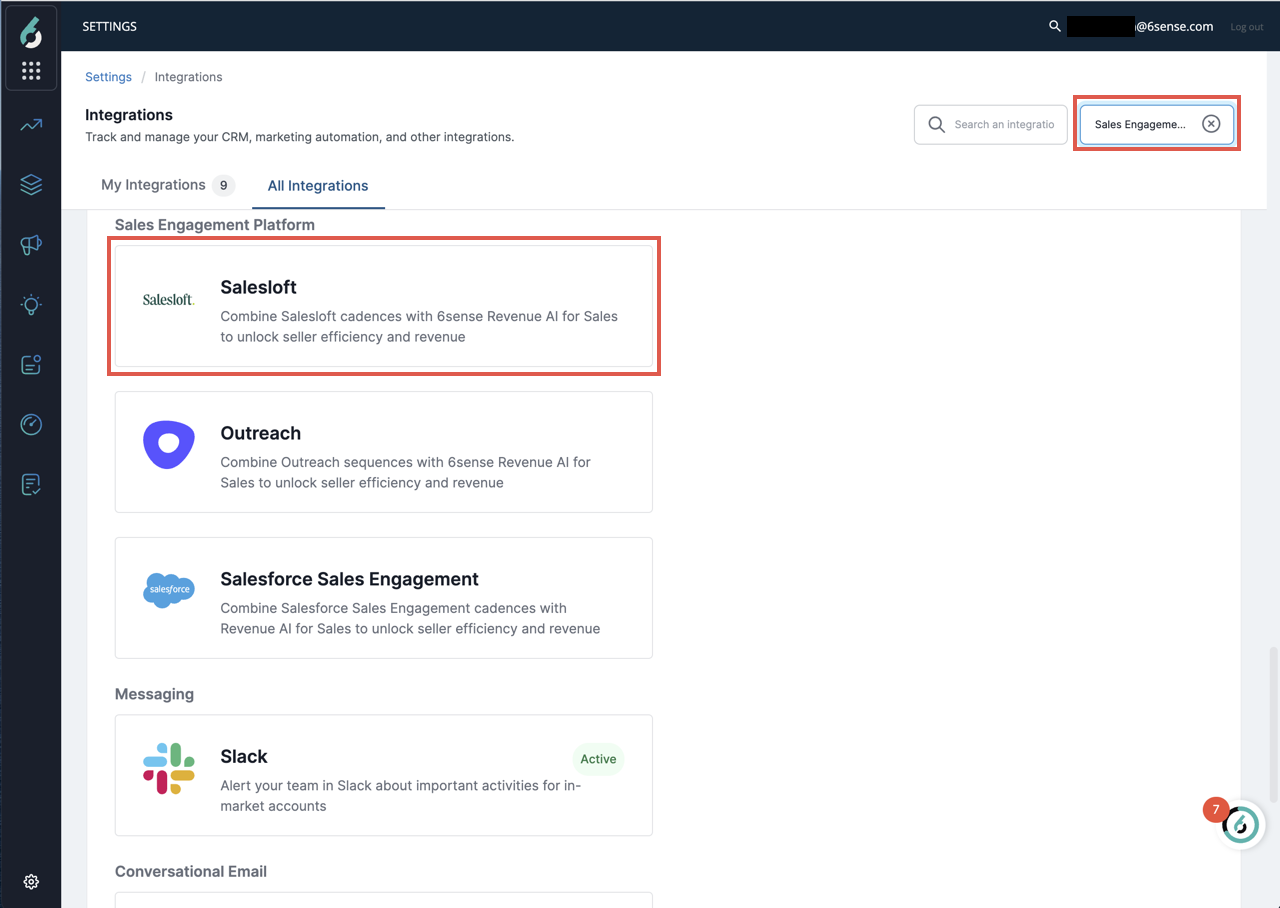
Go to Settings and click the Integrations section.
From the All Integrations tab, click Salesloft. (You can jump to the sales engagement platform category in the list by using the category dropdown.)
Click Connect to begin the integration.

Click Set Up Salesloft.

Enter the valid Salesloft API key you generated previously.
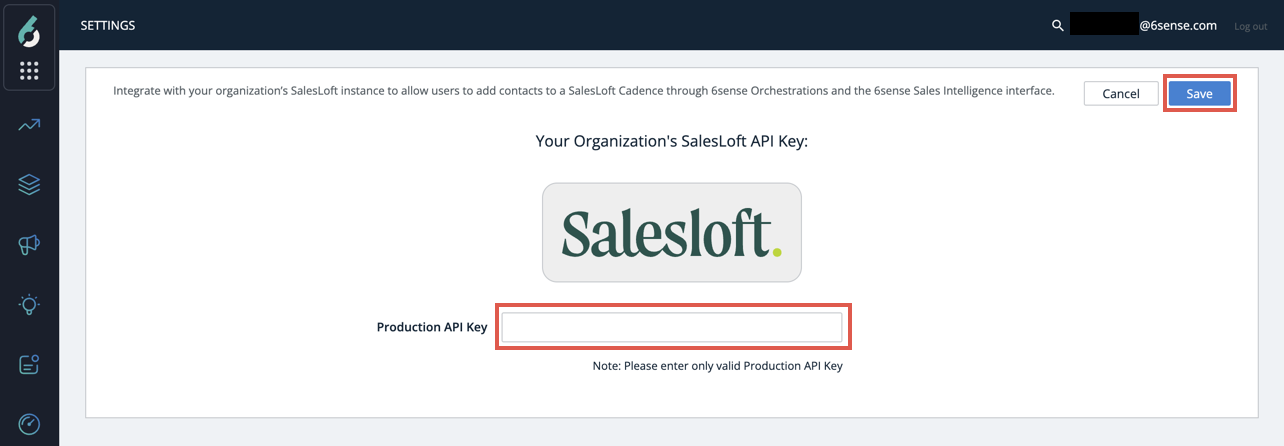
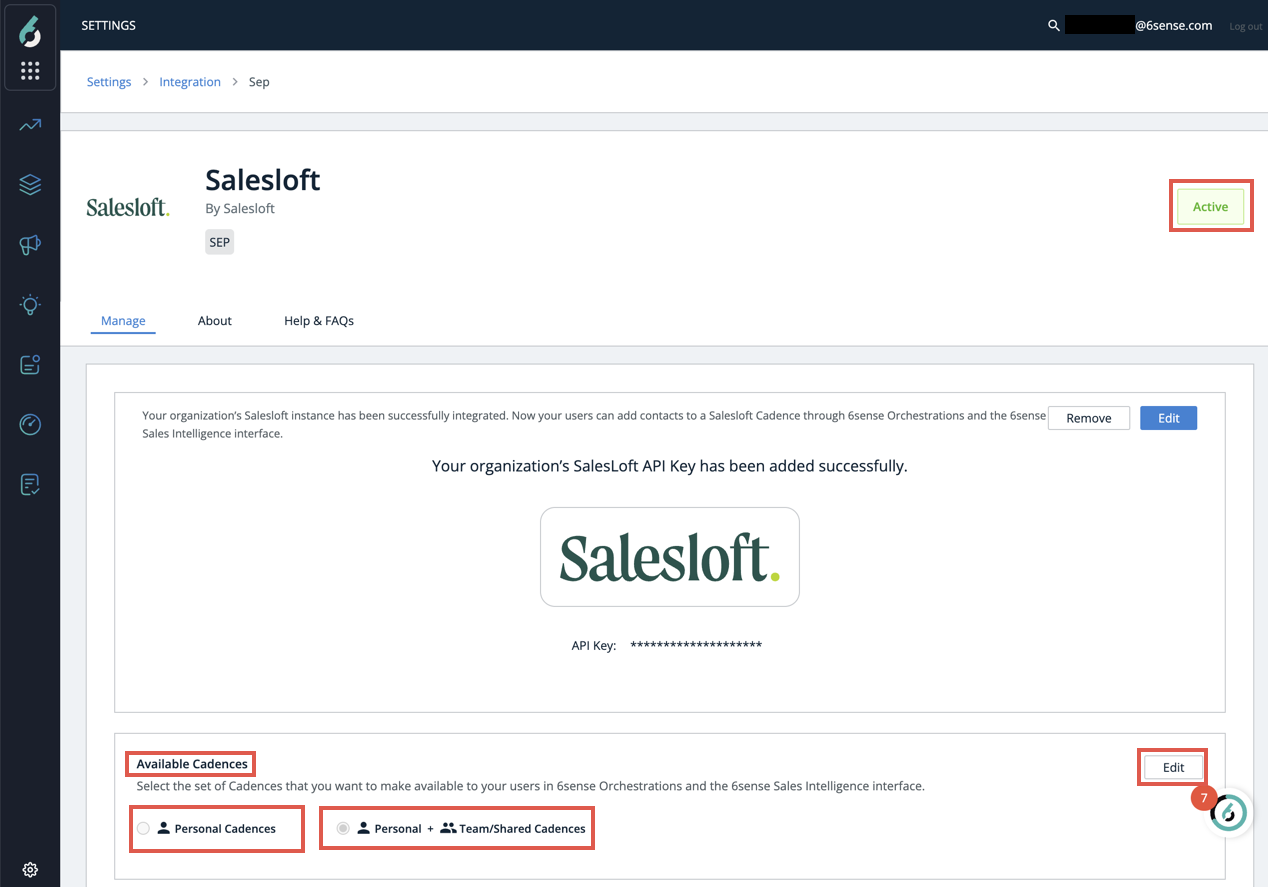
Salesloft is integrated when you see the Active badge (and the option to remove or edit the added API key). On this screen, you can also manage the available cadences by selecting whether you want to display personal Cadences or personal and team Cadences (the default).
Turn on the Add to Salesloft Action
To see the Add to Salesloft option on contacts in Sales Intelligence, you need to turn on this feature.
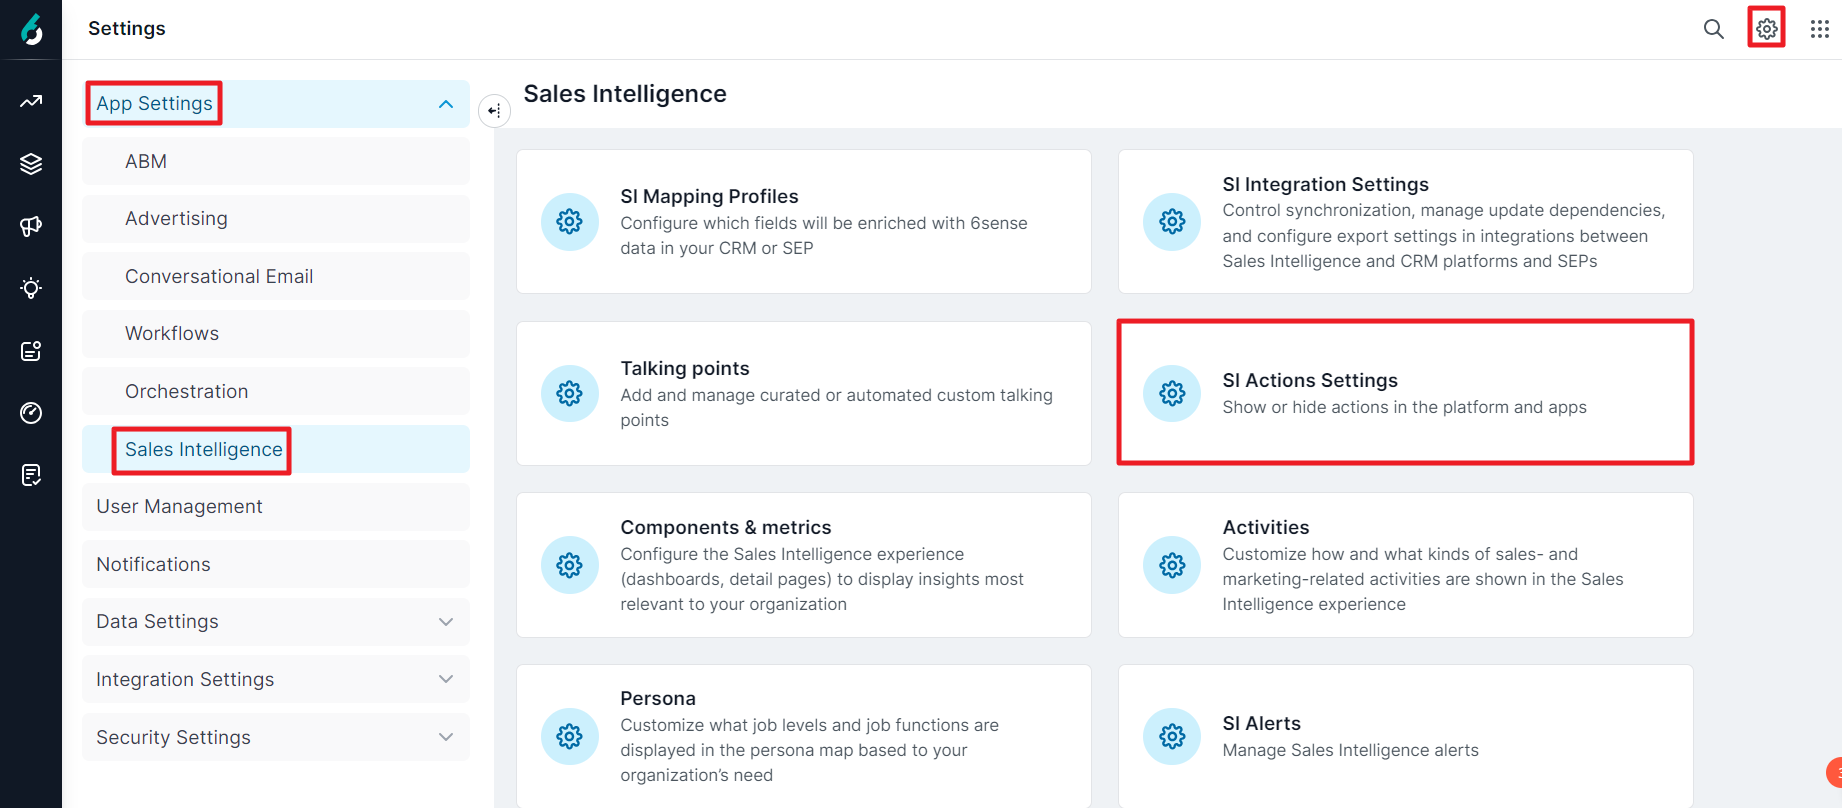
Navigate to Settings, click App Settings, and select Sales Intelligence. Select SI Actions Settings from the cards on the right.
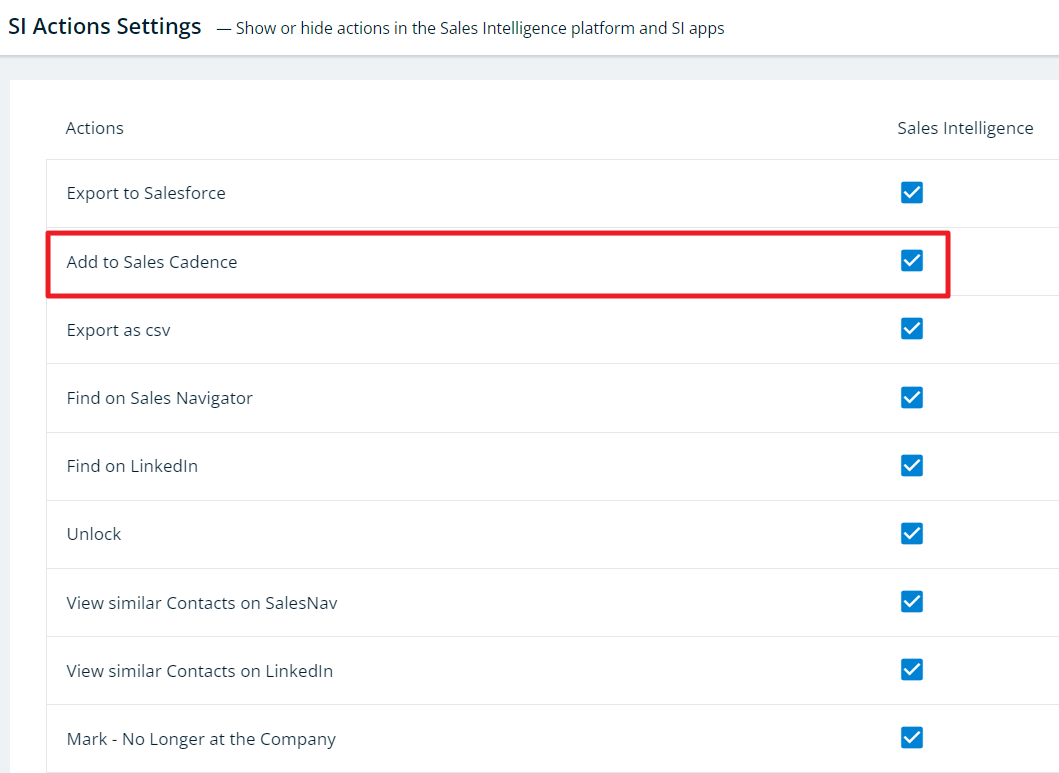
Check the box for Add to Sales Cadence under Sales Intelligence.
 If you have not yet completed the integration above, this option will display Integrate your organization’s SEP instance. Click that link to begin the Activate Saleloft Integration step described above.
It may take up to 1 hour before the Add to Salesloft button appears in Sales Intelligence.
Please note that you will also need to set up an SI Mapping Profile.
Frequently Asked Questions
Why when selecting the Add to Salesloft option to export a contact, I see the status “No Data” in the dialog box?
A: Seeing the No Data status can appear if the username specified in 6sense does not match that of the email inbox specified in SalesLoft.
To resolve this, disable the username in the 6sense user administration screen and re-invite the user using the email address associated with the inbox in SalesLoft.