Before training your sellers, we recommend that you populate Sales Intelligence (SI) data fields so sellers can see details about:
Relevant job titles and postings
Information about what the overall account cares about
Competitor and partner technologies that the account uses
Job Titles and Postings
To set up Job Titles data:
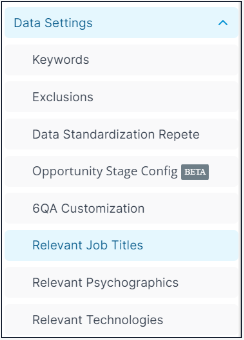
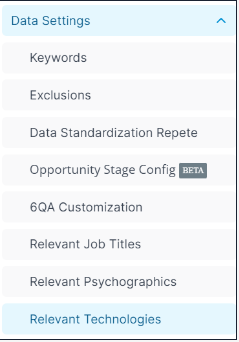
In SI, go to Data Settings > Relevant Job Titles.
The Relevant Job Titles page allows you to select job titles relevant to your sales team and your go-to-market strategy. Job posting data allows sales teams to determine whether an organization is growing or looking for specific roles to fill that can open up conversations about new opportunities, upsells, and more.

Relevant Psychographics
To set up Psychographics data:
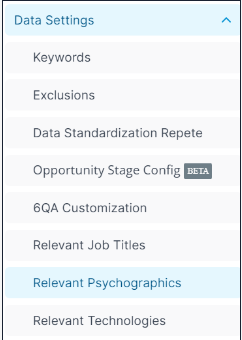
In SI, go to Data Settings > Relevant Psychographics.
The Relevant Psychographics page allows you to select terms describing values, affinities, topics, and interests relevant to your sales team and your go-to-market strategy.
Psychographic terms are pre-loaded.
Select and Add Psychographics
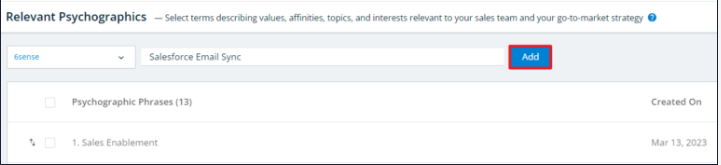
To add terms that you want to track:
Enter a psychograph topic or subject to find.
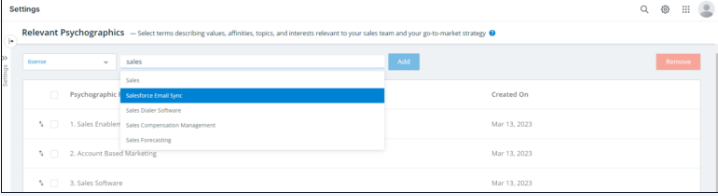
Search by psychographs, then select the term.
Click Add.
Admins must first select a Product.
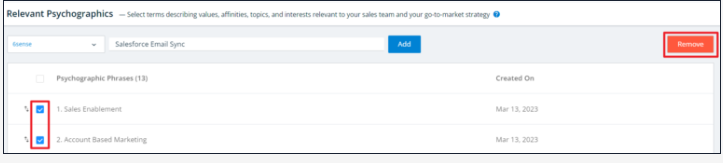
Remove Psychographics
To remove a psychograph:
Check the box beside a listed psychograph.
At the top right, click Remove.
Reorder Psychographics
The order that psychograph terms display in SI is determined by the order that you rank them in this configuration screen.
To re-order psychographs:
Drag and drop them in the list.
Confirm Psychographic Usage
Navigate to an SI Company Details page to see if the account uses any of your configured psychograph terms.
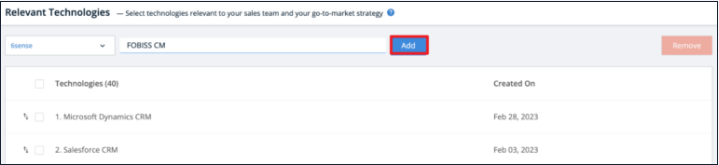
Relevant Technologies
To set up Technologies data:
In SI, go to Data Settings > Relevant Technologies.
The Relevant Technologies page allows you to add technologies relevant to your sales team and your go-to-market strategy.
Add technologies such as your competitors, integration partners, and complementary technologies.
Add Technologies
To add technologies:
Search by technology names.
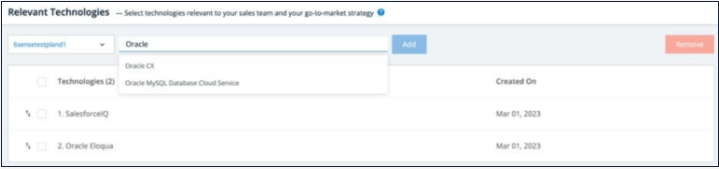
Select the technology name.
Click Add.
Admins must select a Product first.
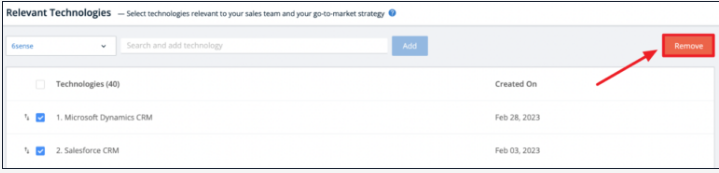
Remove Technologies
To remove a technology:
Check the box beside a listed technology.
At the top right, click Remove.
Reorder Technologies
The order that any technologies will be shown within Sales Intelligence is determined using the order that you rank them within this configuration screen.
Reorder technologies by dragging and dropping them in the list.
Confirm Technology Usage
Navigate to an SI Company Details page to see if the account uses any of the configured technologies.
Additional SI Admin Settings
Additional settings allow Admins to customize the SI UI and other more detailed portions of the UI. You can make sure the access and views are set up in the best way possible for your teams.
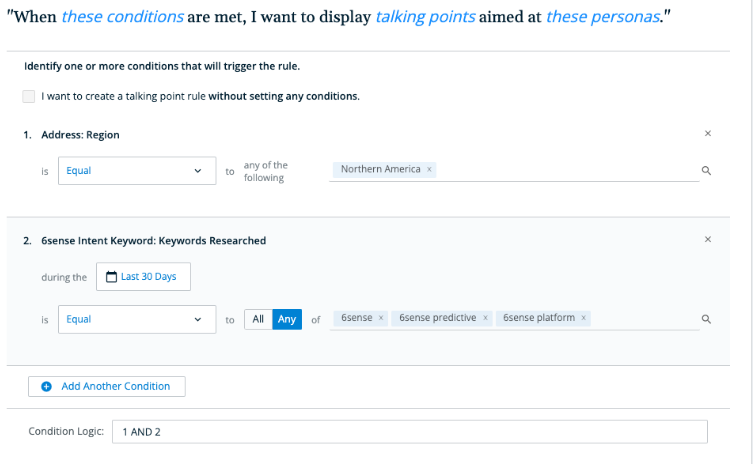
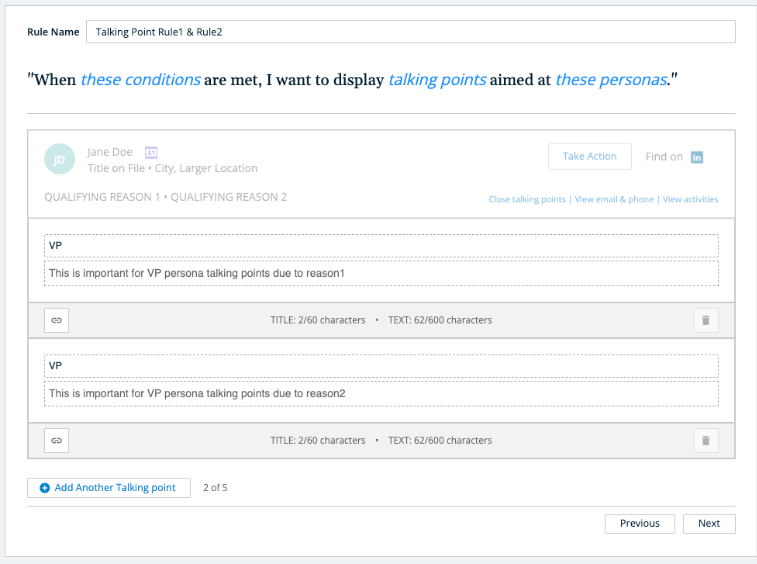
Talking Points
To configure Talking Points:
Name the rule that makes it easily recognizable. In this example, we named the rule after a segment combined with the persona we want to reach: 6s for 6s: Foundational Keyword -Predictive Analytics – Head of Sales.
Decide if you want this rule to display based on conditions, or not. If not, check the box next to I want to create a talking point rule without setting any conditions.
Notice that this example uses the Keyword filter.
Set the day range from predefined options, or specify a date range.
Select the operator and how to apply the operator, and select the keywords. We recommend using the same keywords already configured in your instance.
You have the option to add conditions to further refine matches.
Enter the text for your talking points.
There is a limit of 5 talking point rules.
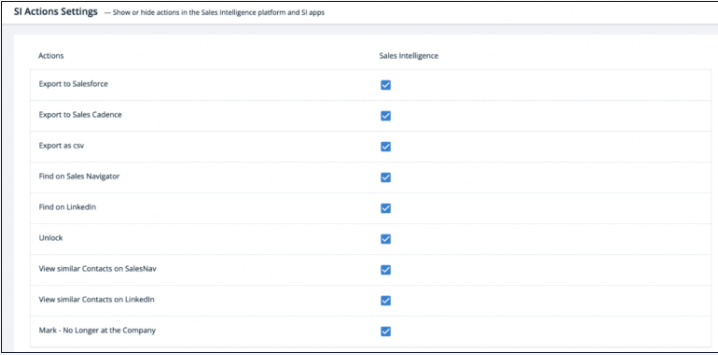
SI Actions Settings
In the SI Actions settings, Administrators can select which actions are available in SI. Available actions include:
Export to Salesforce
Export to Sales Cadence
Export as CSV
Find on Sales Navigator
Find on LinkedIn
Unlock
View similar Contacts on SalesNav
View similar Contacts on LinkedIn
Mark – No Longer at the Company
Components and Metrics Settings
In the Components & Metrics Settings, Administrators can configure the SI experience to display the insights most relevant to your organization.
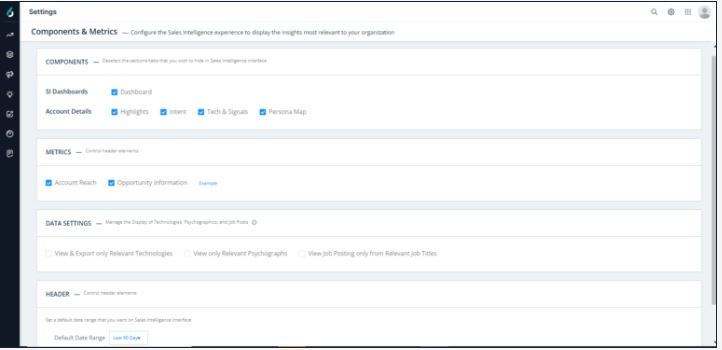
COMPONENTS
Select or deselect the components to display in SI.
SI Dashboards
Dashboard: When checked, displays the Dashboards.
Account Details (Company Details Pages)
When checked, the component displays in the account details (company details pages):
Highlights
Intent & Web Activities
Tech & Signals
Persona MAP
Activities & Timeline
Company Hierarchy
METRICS
When checked, the metrics appear in dashboards and in company and people details pages.
Account Reach
Opportunity information
For more information click Example.
DATA SETTINGS
When checked, SI displays the technographics, psychographics, and job postings in the Tech & Signals tab in company details pages.
View and Export only Relevant Technologies
View only Relevant Psychographics
View Job Postings only from Relevant Job Titles
By default, SI displays all technographics, psychographics, and job postings.
When an Administrator checks one of these items, SI enables a toggle to allow a user to switch between displaying all technographics, psychographics, and job postings and or only relevant ones.
Relevant technographics, psychographics, and job postings are those that were chosen by an Administrator using configurations based on what is relevant to your sales team and organization’s go-to-market strategy.
HEADER (DATE RANGE)
HEADER is the default date range used throughout SI. Users can change the date range manually; this setting is the default. The date range options are:
Last 7 Days
Last 30 Days
Last 60 Days
Last 90 Days
Last 180 Days
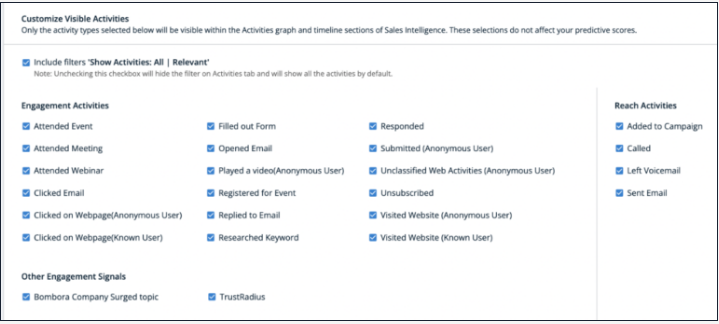
Activities Settings
In the Activities settings, Administrators can customize how and what kinds of sales- and marketing-related activities are shown in SI. Only the activity types selected will be visible within the SI Activities graph and timeline sections. These selections do not affect your predictive scores.
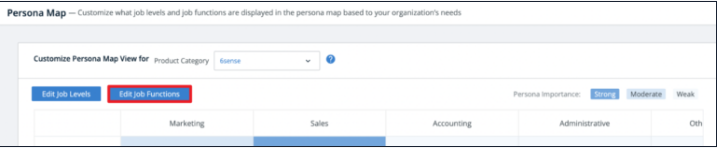
Persona Map
In Persona settings, Administrators can customize what job levels and job functions are displayed in the persona map on company details pages, based on your organization’s needs.
When viewed inside Sales Intelligence, the persona map displays the number of leads and contacts at that account who fall into each engagement type category.
Any users who are not classified into the specified job functions or job levels will instead be included as part of the Other classification.
Each cell of the persona map will show the number of unlocked and locked leads at that account who fall into specific job functions and levels.
Any updates to the persona map may take up to 24 hours to be reflected within Sales Intelligence.
Edit Job Levels
Click the Edit Job Levels button at the top of the persona map to choose which job levels to include in the map.
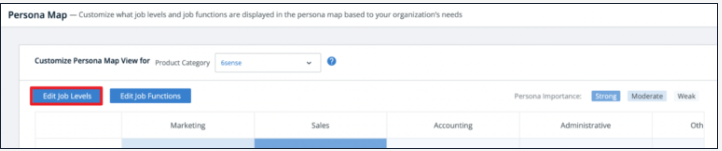
The options include:
Staff
Manager
Senior
Director
Vice President
C-Level
Other
You can move these job levels between the persona map and the Other Levels section by clicking the appropriate option to the right of the job level listed.
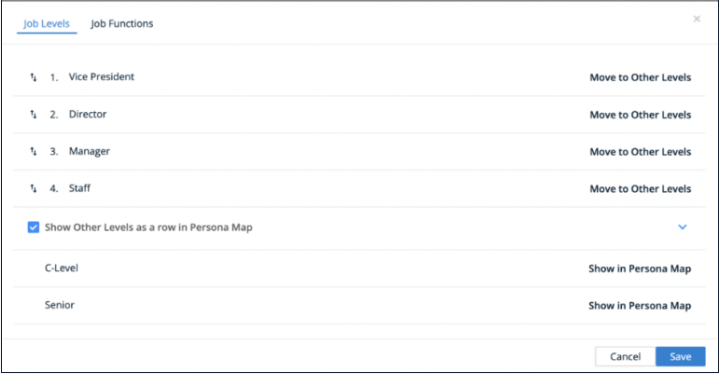
Click the dropdown arrow to show all the job levels listed under Other Levels. You can check or uncheck the box at the top of this list to decide whether to show Other Levels as a row in the persona map.
When you are done editing, click Save.
Edit Job Functions
Click the Edit Job Functions button at the top of the persona map to choose which job functions to include in the map.