This page covers the old segments interface. For the new interface, refer to Segments.
For related legacy segment organization guidance, please refer to the following articles:
Segments can be organized within the 6sense platform into mutually exclusive folders, enabling 6sense customers to classify and separate their segments by team, use case, event, etc. All segment-enabled users can create, edit, and delete folders and their associated segments.
Foldering systems are recommended to be based on a combination of the below. An organization can create up to 200 folders. As a best practice, organizations should internally align with their 6sense account owner to implement a consistent organization-wide system.
Territories (US West, US Midwest, US East, etc.)
Use Cases (tests vs. analytics)
Campaign channels
Group Ownership (Marketing, Demand Generation, Product Marketing, etc.)
Individual Ownership (John’s Segments, Mary’s Segments, Jane’s Segments, etc.)
Objectives (Q1 2021 Targets, Q2 2021 Competitive Takedowns, etc.)
Events (Webinar X, Event Y, Conference Z, etc.)
Timelines (Q1 2021, Feb 2021, 2021, etc.)
Campaigns (Jan 2021 Newsletter, Feb 2021 Prospects, Mar 2021, etc.)
There are two system-generated, permanent folders for ease of customer segment organization and understanding.
Global Segments: This folder appears at the top left of the Segments screen, and can be used to navigate amongst and sort all segments, independent of the folder structure.
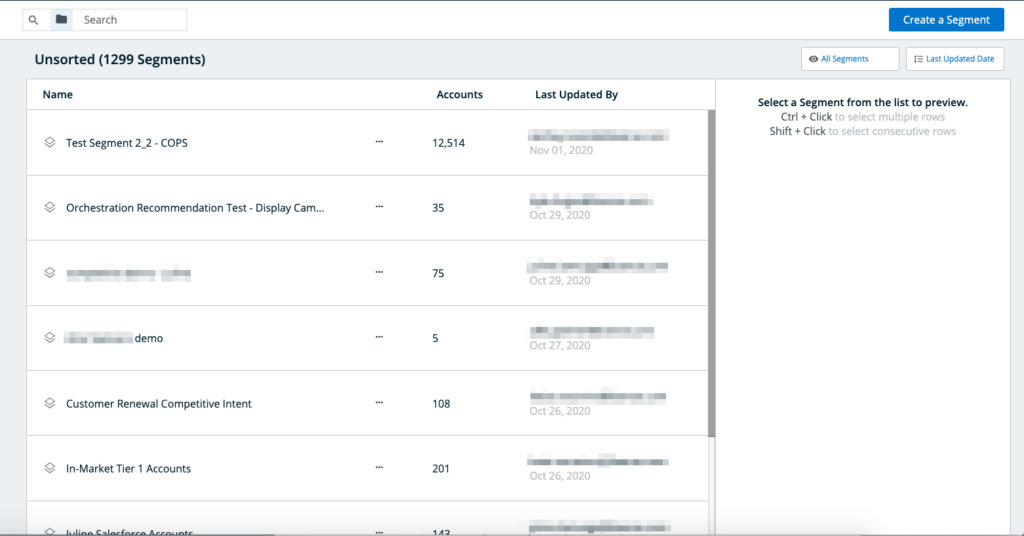
Unsorted: This is the default folder into which segments will be sorted unless otherwise specified during the segment creation process.
Creating, Editing, and Deleting Folders
Folders can be created by clicking on the “Create Folder” icon within the left panel below.

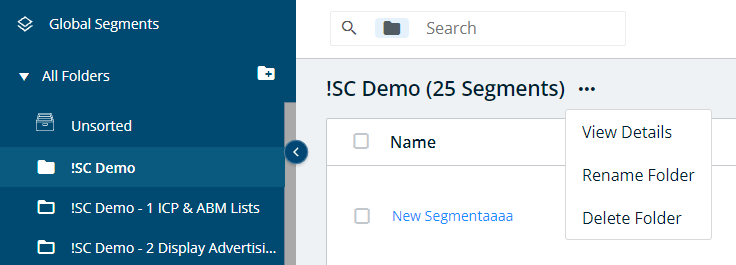
To view folder details, rename a folder, or delete it, click on the “three dot” icon next to its name in the middle panel, pictured below. When a folder is deleted, all of the segments within it will return back to the system-generated, permanent “Unsorted” folder.
Moving Segments into Folders
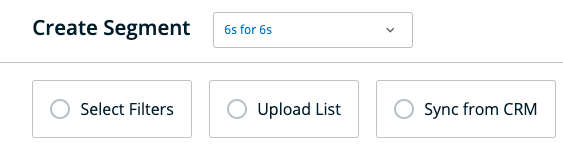
During the segment creation flow, users are prompted to allocate the segment into an existing or new folder. This occurs at both the beginning and end of the segment creation flow, with the folder selection confirmation at the end of the segment creation process being the final folder allocation. Unless otherwise specified, segments will be default sorted into the “Unsorted” folder.
Segments can also be moved between folders using the below methods.
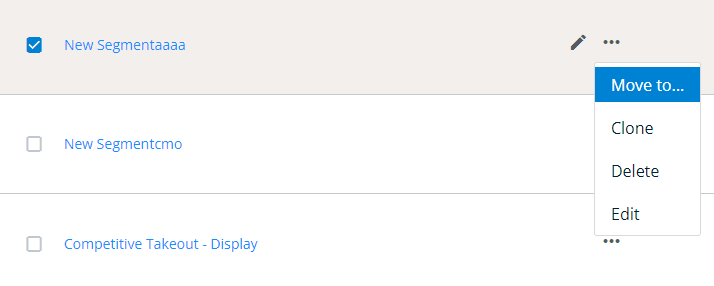
From the main segment screen. Individual segments and groups of segments can be moved between folders using drag-and-drop, as well as by clicking on the “three-dot” dropdowns associated with each segment.
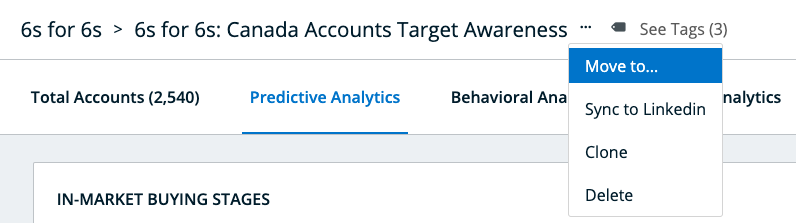
From the Segment Analytics screen. When viewing an individual segment’s analytics screen, its allocated folder can be changed by clicking on the related dropdown, pictured below.