Integrating 6sense with Snowflake requires key pair authentication, a secure method that uses a public/private key pair instead of a password. This approach ensures strong encryption and compliance with modern security standards.
Integration with Snowflake allows the user to send Data Packs (f.k.a. Standardized File Export (SFE)) data directly to your organization’s Snowflake instance via Data Loading to an Internal Named Stage. For more details on Data Packs, refer to 6sense Data Packs (Standardized File Exports) – Data Dictionary.
Prerequisites
You must be a 6sense Data Packs customer.
Your organization must be using Snowflake internally.
You must contact your CSM, PC or Support to turn on this integration if eligible.
Account identifier for your Snowflake instance.
Once Snowflake has been configured as your organization’s Data Pack destination, by default we will no longer send the data to the SFTP server if you were previously using it.
Step-by-step procedure
Step 1: Start the connection process
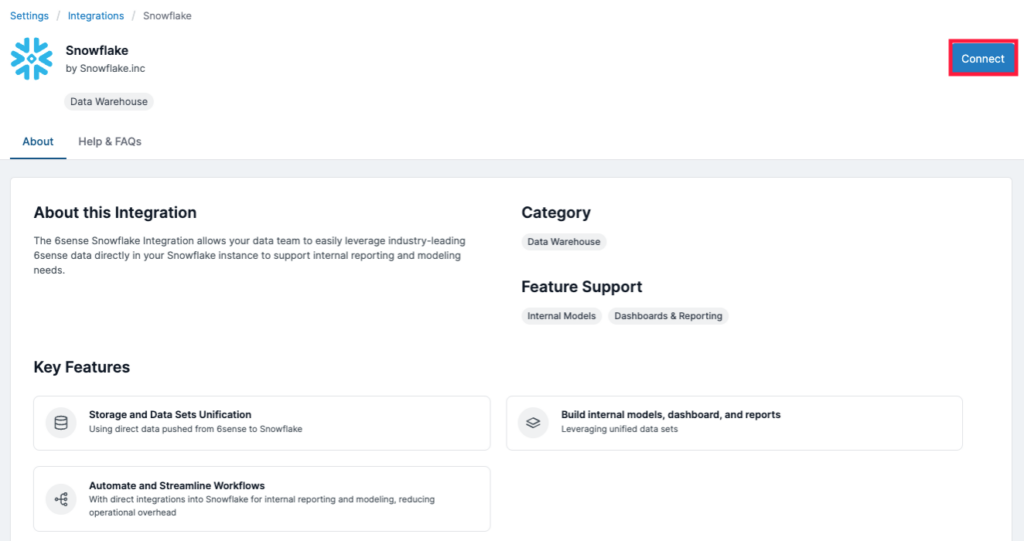
In 6sense, go to Settings.
Select Snowflake from the Integrations page under Data Warehouse.
.png)
Choose Connect.
Step 2: Enter connection details
In the connection form, enter the following:
Username: The Snowflake service account username. Example:
6SENSE_USERAccount Identifier: Your Snowflake account identifier.
Key Size: Choose the desired key size (e.g., 2048 or 4096 bits). Larger keys offer stronger security.
.png)
Step 3: Generate and save the public key
Wait for the public key to generate.
.png)
Save the generated key securely in your system.
.png)
Add the public key to your Snowflake user profile. For more details, refer to Configuring key-pair authentication.
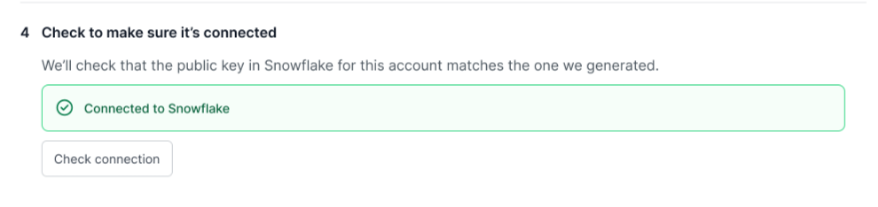
Step 4: Test the connection
Return to the 6sense UI and select Test Connection.
If successful, you’ll see a confirmation message.
If the test fails:
Double-check the public key setup.
Ensure the account identifier and username are correct.
Confirm that the key was added to the correct Snowflake user.
Select Next to proceed.
Step 5: Configure the integration settings
After testing the connection, you’ll need to provide Snowflake metadata so we can validate and confirm the exact endpoint for data export.
In the Configure screen, enter the following details:
Role: The Snowflake role that grants access to the required objects, for example, SIXSENSE_ROLE.
Warehouse: The compute warehouse used for query execution, for example, SIXSENSE_WAREHOUSE.
Database: The database where 6sense will write or read data, for example, SIXSENSE_DATABASE.
Schema: The schema within the database for storing tables, for example, SIXSENSE_SCHEMA.
Stage Name: The Snowflake stage for file storage during data transfer, for example, SIXSENSE_STAGE.
Tip: Ensure these objects already exist in Snowflake and your service account has the necessary privileges.
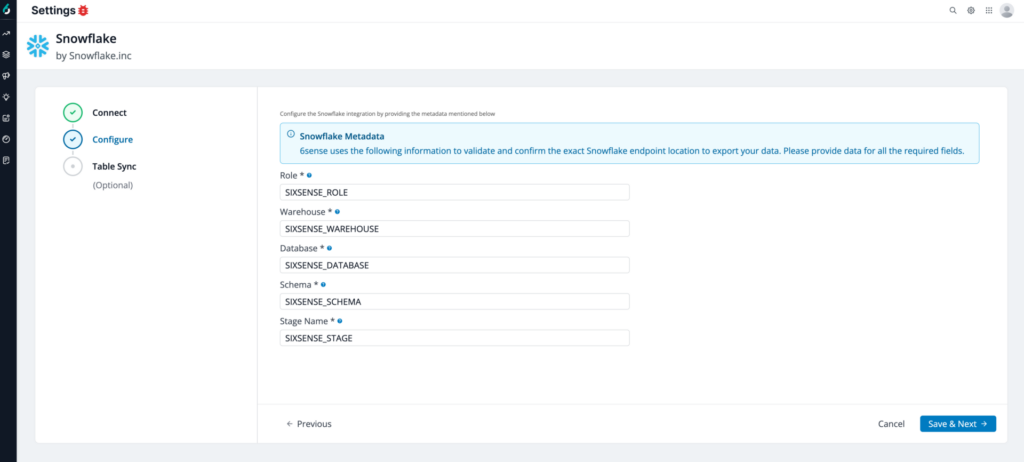
Select Save & Next to proceed to optional table sync settings.
Step 6: Configure data sync (optional)
Use this step to map incoming 6sense Data Pack CSV files (for example, Web Activity, Company Activity, or LinkedIn Campaign Activity) to existing Snowflake tables.
When configured, 6sense automatically copies each CSV file from the Snowflake internal stage into the specified table.
Before you configure table mappings
To ensure successful data ingestion, all of the following requirements must be met:
Snowflake tables must already exist
6sense does not create or modify Snowflake tables.
Column count must match exactly
The number of columns in the Snowflake table must exactly match the number of columns in the incoming CSV file.
Example: If a CSV file contains 9 columns, the mapped table must also contain exactly 9 columns.
Column names must match the CSV file
Column names must exactly match the CSV file, including spelling and case sensitivity (if enforced in your Snowflake configuration).
Column order must match the CSV file
The order of columns in the Snowflake table must match the order of columns in the CSV file.
Ensure compatible data types
Snowflake column data types must be compatible with the values in the CSV file.
Date/time fields →
DATEorTIMESTAMPNumeric fields →
NUMBERText fields →
VARCHAR
Required Snowflake permissions
The Snowflake role assigned to 6sense must have:
USAGEon the target database and schemaINSERTpermissions on the mapped tables
Tip: Reference 6sense Data Packs when creating Snowflake tables. It includes:
The data dictionary for each Data Pack
The full list of fields and required column order
Sample CSV files that show the exact structure expected by 6sense
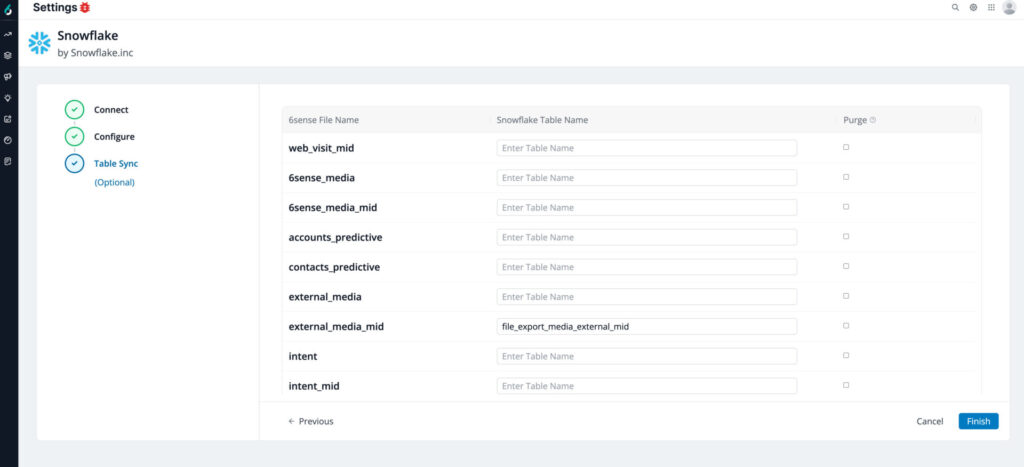
Configure data sync
In the Data Sync section, specify which Snowflake table should receive each Data Pack file.
Each CSV file can be mapped to a different Snowflake table.
(Optional) Select Purge to remove the file from the Snowflake internal stage after data is successfully copied into the table.
Select Finish to complete the integration.
Manage the integration
After setup, you can:
View the connection status.
Re-authenticate if needed.
Disconnect or update credentials.
Regenerate the public key.
FAQ
Does 6sense support OAuth for Snowflake integration?
No. 6sense currently supports key pair authentication only for connecting to Snowflake. OAuth-based authentication is not supported.
What are some common ingestion issues?
Most data load failures occur when Snowflake table definitions do not exactly match the incoming Data Pack structure. Before troubleshooting, verify that:
Column names and order match the sample CSV file exactly
Column count matches the CSV file
Data types are compatible with the incoming values
The Snowflake role used by 6sense has the required permissions