This guide describes the process of integrating 6sense with a production instance of Salesforce. This integration will perform nightly data syncs based on changes to CRM data.
The benefits of integration include:
Dynamic synchronization of account lists and account-based reports from CRM into a 6sense segment
Common use cases include:
Maintain a customer segment to exclude or include in other 6sense segments.
Maintain an exclusion list of accounts (competitors, partners).
Define your target list (such as tier 1 enterprise accounts).
Things to know
Review the Salesforce edition, permission, API, and integration-user requirements before you begin.
6sense can only integrate with the following Salesforce packages:
Enterprise Edition
Unlimited Edition
Developer Edition
Performance Edition
See the Minimum Data Requirements article for a list of objects that will be synced nightly.
Permissions:
Read permissions are required at a minimum for each of the objects.
Write permissions will be needed for any objects you plan to export data via:
Sales Intelligence: Write access required if you plan to export to contact, lead, or account objects.
Install 6sense External Client App (ECA) in Salesforce:
6sense ECA should be installed in your Salesforce CRM. Refer to Install 6sense External Client App (ECA) in Salesforce to install and configure policies.
The integration user needs to be API enabled.
New Salesforce Integration users with API-only access can use this integration.
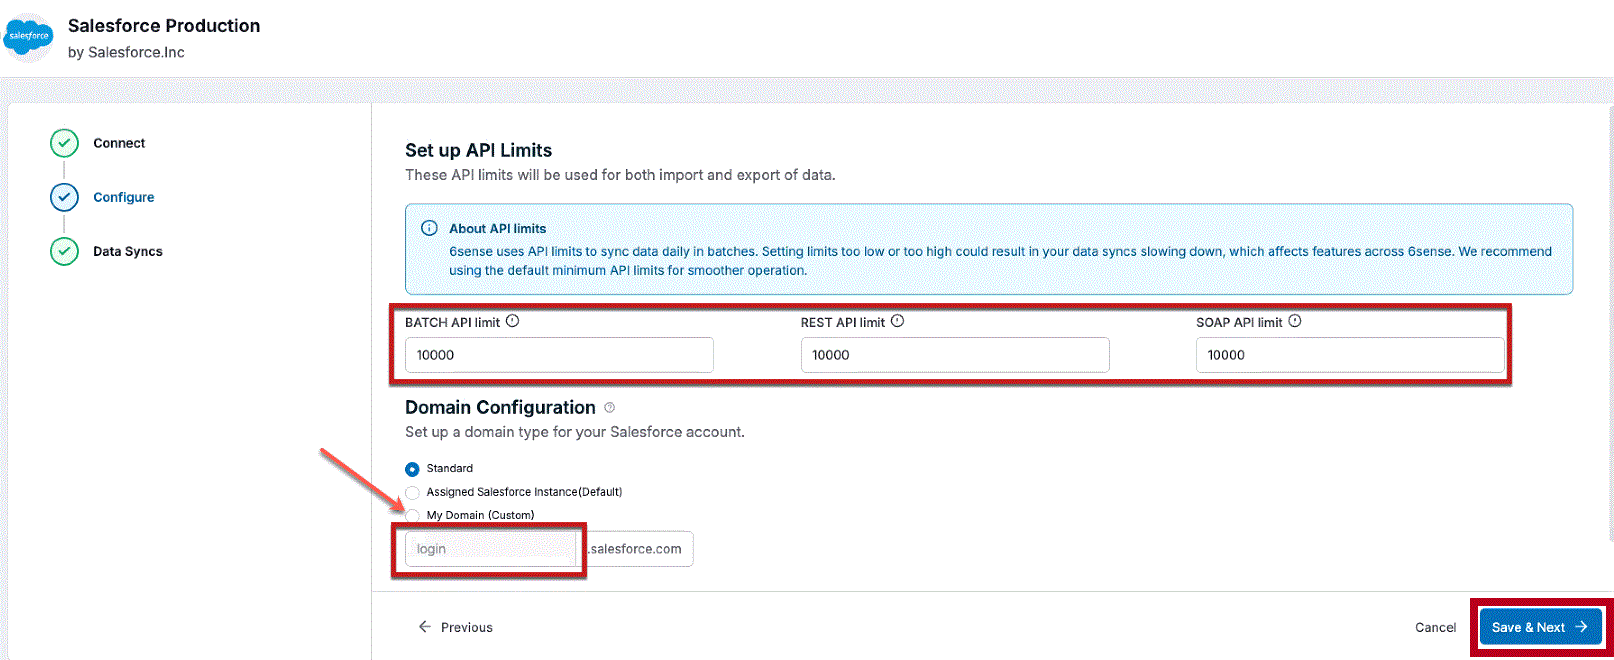
API Limits: During the integration, you’ll be asked to enter some API limits. These limits are put in place so 6sense stops making API calls once any of the limits are reached. Below are the limits you’ll be asked to set:
Recommended starting limits:
BATCH API: 1,000
REST API: 15,000
SOAP API: 15,000
To see how these APIs are used by 6sense, see API Limits – Overview.
Integration steps
To connect the production Salesforce instance and turn on the data sync, do the following steps:
Log out of any active Salesforce session.
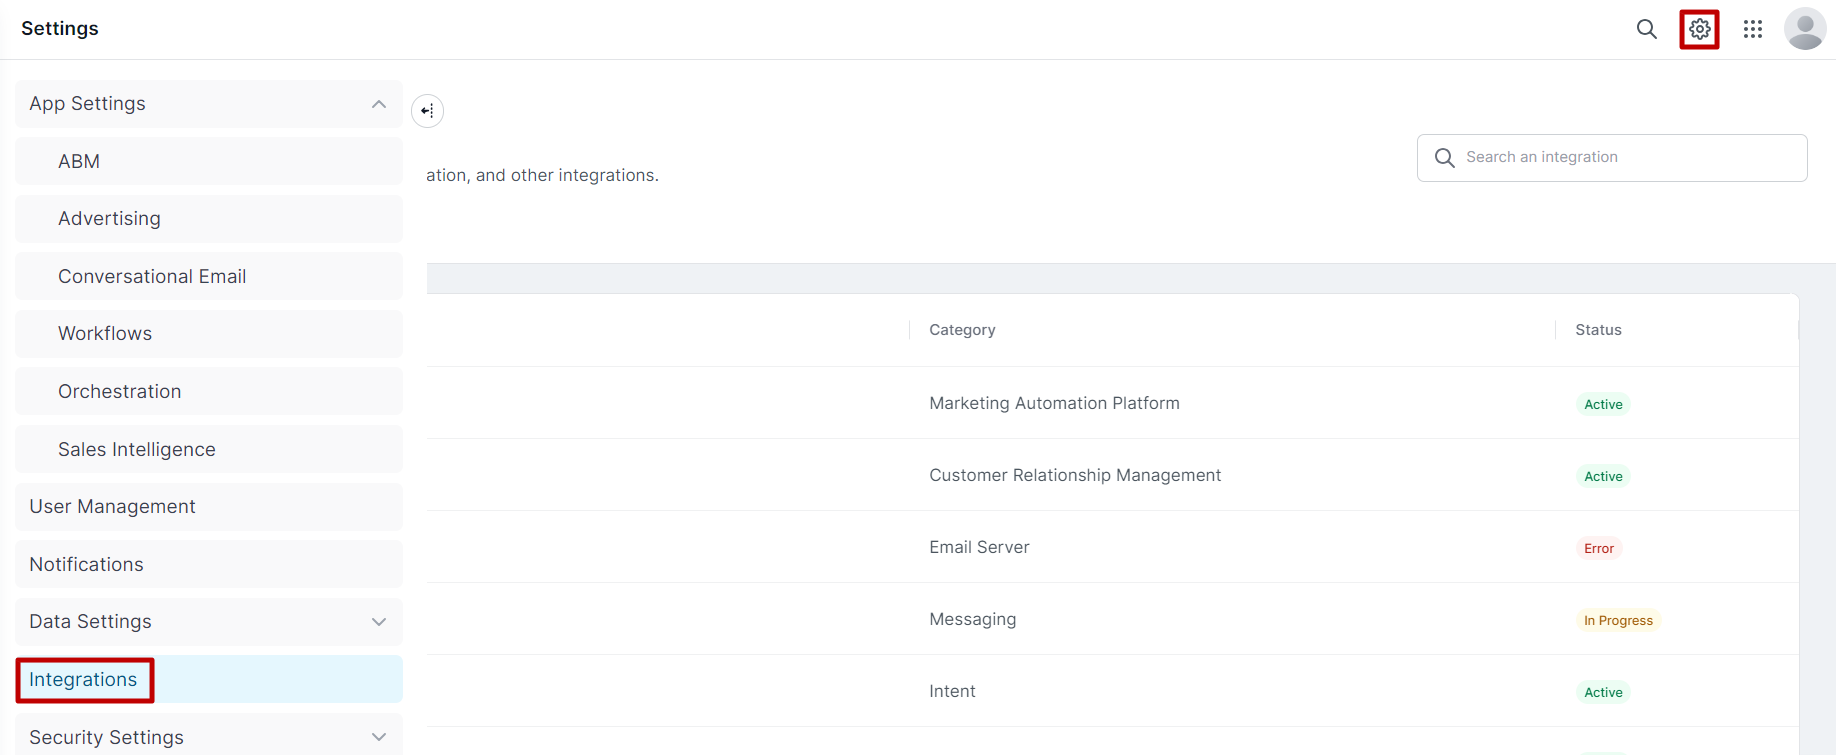
In 6sense, select Settings > Integrations.
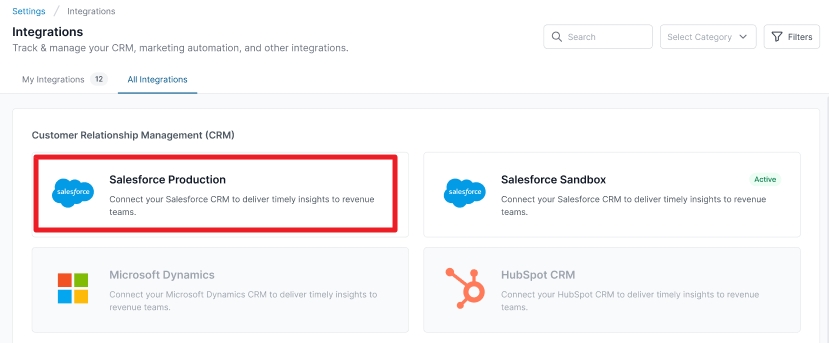
Select Salesforce (Production) under the CRM section.
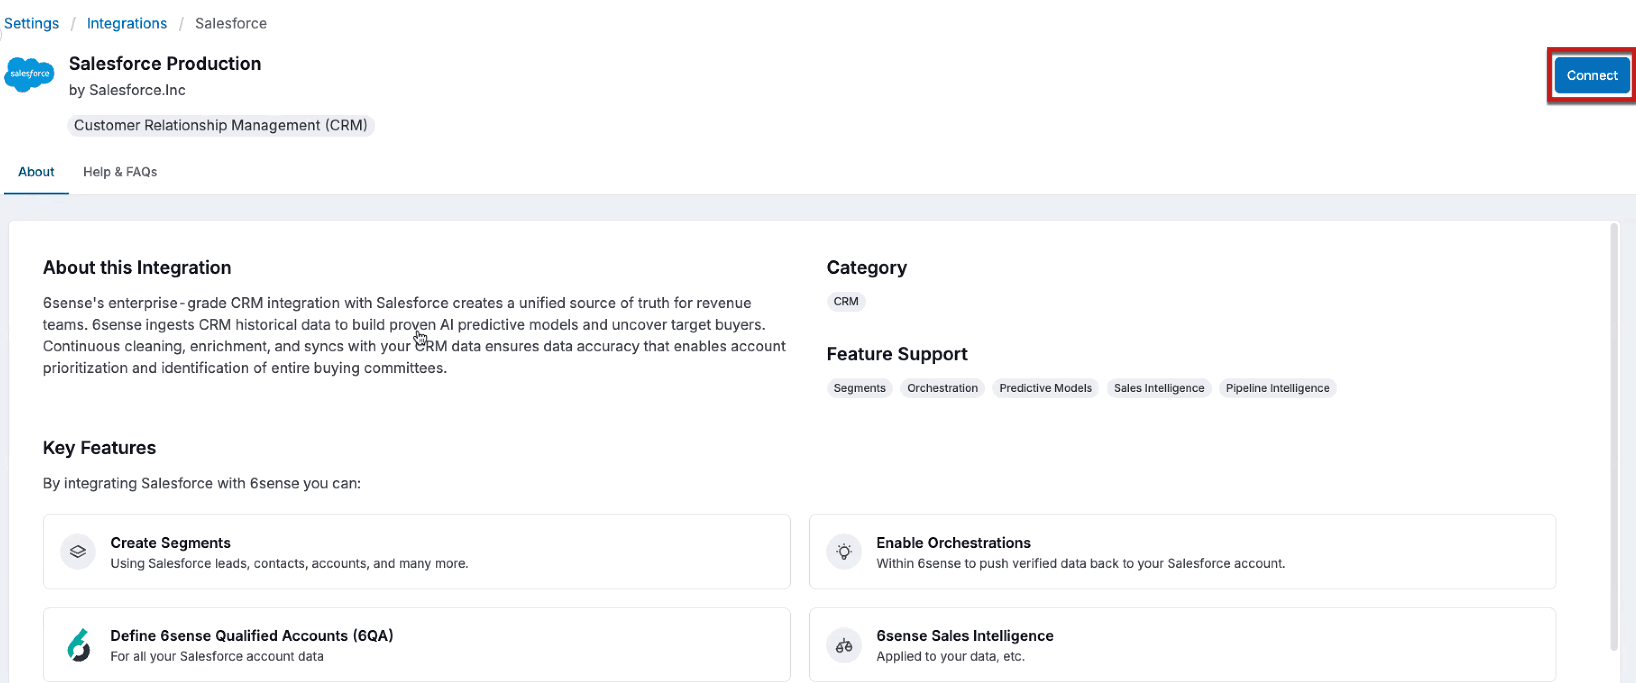
Select Connect.
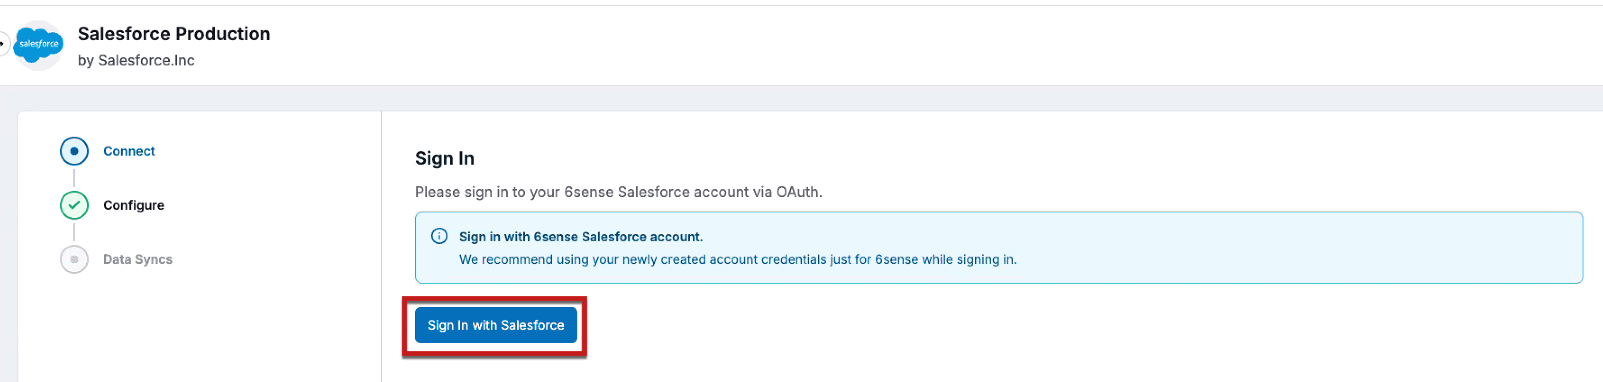
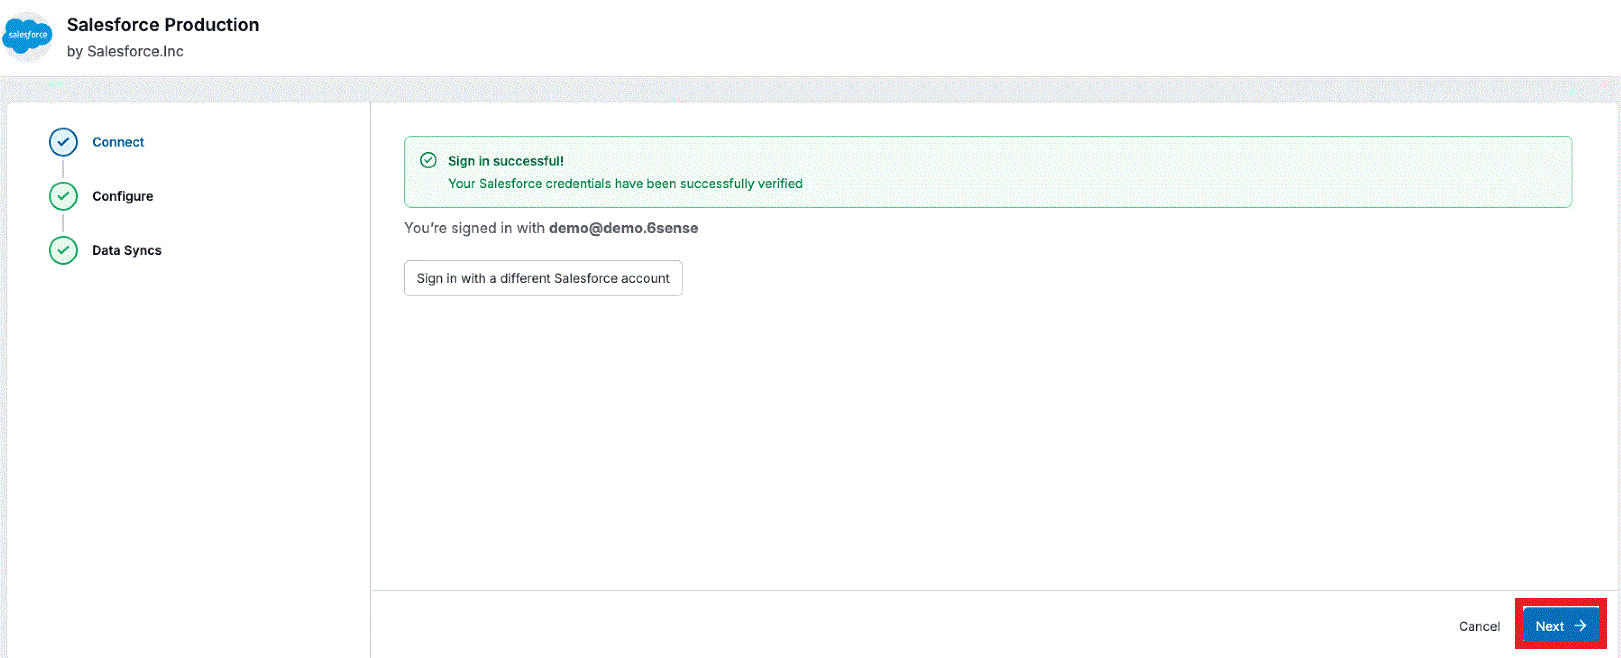
Select Sign in with Salesforce and enter the integration user credentials.
Once the Sign in successful! message appears, select Next.
Enter the recommended API limit value noted in the section above.
If your Salesforce instance has a custom domain, enter the custom domain value in the My Domain (Custom) section. See the Salesforce Domain Configuration for details.Select Save & Next.
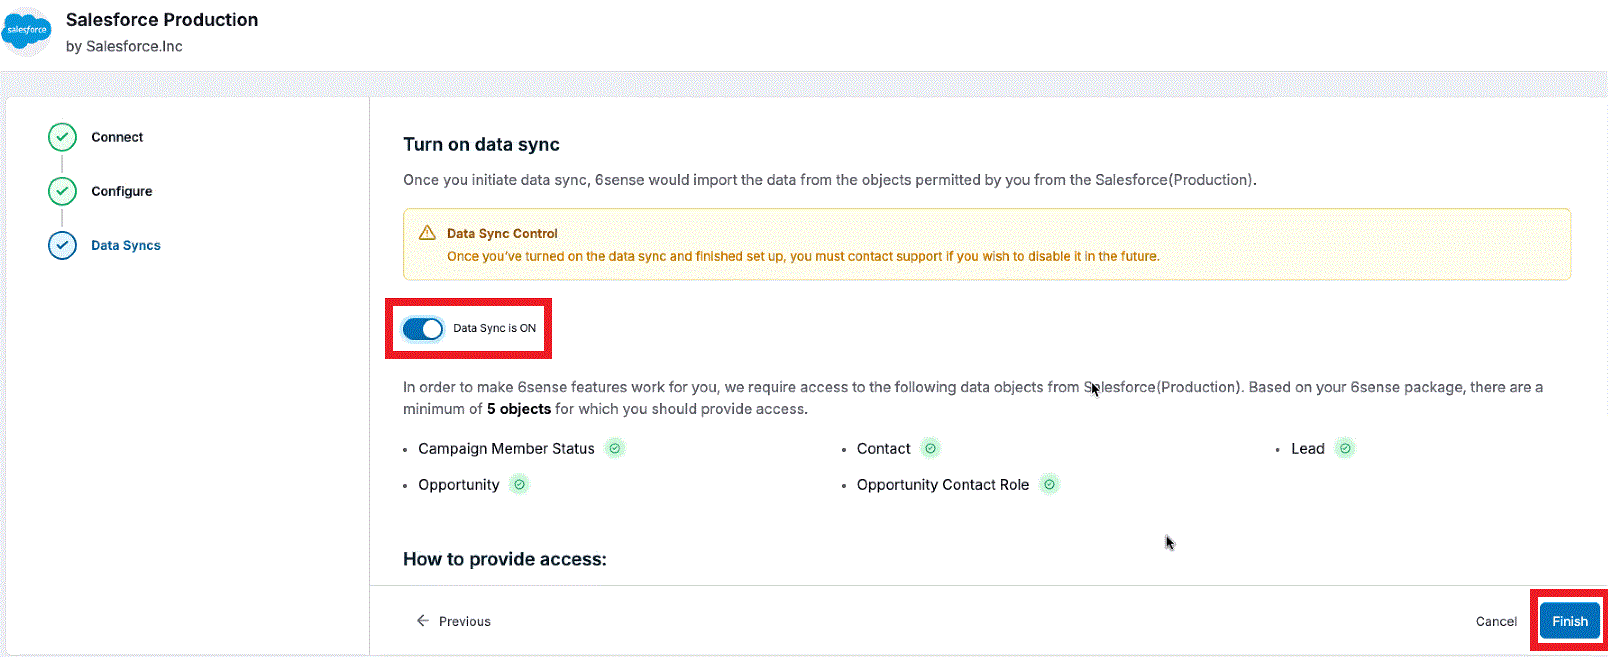
On Turn on data sync, enable Data Sync is on, then select Finish.
Within 30 to 60 minutes, Salesforce objects should show Sync Queued status.
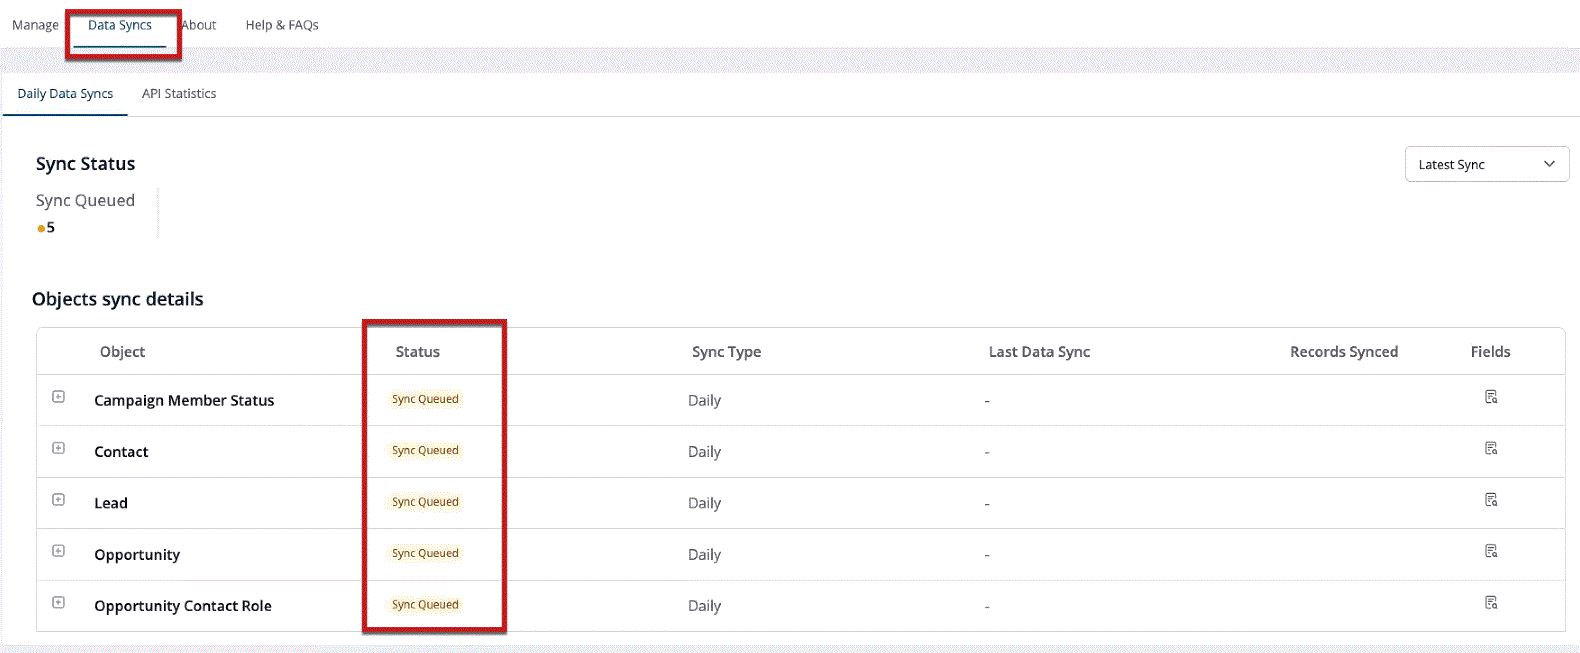
If an error appears, point to the status to identify possible object-permission issues. Confirm that the integration user has read access to each affected object. If permissions had to be adjusted in Salesforce, follow steps 6 through 8 of this article as this will trigger another permission check.
Re-check the data syncs tab to ensure each object shows Sync Queued status. If you still see permission errors on Data Syncs tab, contact 6sense Support.
Net new AI Email customers must have Real Time Syncs turned on.
Post-integration and what to expect
Now that the integration setup is complete, a permission check will run. If successful, Salesforce objects will be queued to sync, and this syncing process should be complete within 24 hours. However, this sync may take longer depending on the number of records to be synced.
Key takeaways
The integration synchronizes Salesforce data with 6sense each night.
The Salesforce integration user requires API access and permissions for each synchronized object.
Write access is required for objects that receive data from 6sense.
Recommended starting limits are 1,000 Batch, 15,000 REST, and 15,000 SOAP API calls.
The initial Salesforce synchronization typically finishes within 24 hours.
FAQ
Can I be notified if there are any issues with exceeding API Limits or if the Salesforce credentials expire?
Yes. Refer to Manage Recipients for System Notifications for additional information on system notifications.