This article describes how to integrate 6sense with a production instance of Microsoft Dynamics 365. The integration performs nightly data synchronization based on changes to CRM data.
Things to know before you begin
You must be on Microsoft Dynamics 365 for Sales Cloud.
Refer to the Minimum Data Requirements article for Sales Intelligence and ABM packages to see the list of objects that will be synced nightly.
Permissions:
Read permissions are required at a minimum for each of the objects.
Write permissions will be needed for any objects you plan to export data from:
Scores Orchestrations: Write access required for the account, contact, or lead objects depending on which object(s) you plan to export scores to.
Sales Intelligence: Write access required if you plan to export to contact, lead, or account objects.
API Limits: During the integration, you’ll be asked to enter some API limits. These limits are put in place so 6sense stops making API calls once any of limits are reached. Below are the limits you’ll be asked to set:
REST recommended starting limit: REST API 10,000 calls.
To see how these APIs are used by 6sense, please see API Limits -Overview.
Integrations steps
Set up the security role and object permissions
6sense connects to Dynamics CRM through a customer-created user profile. This user profile is used to read (and write) to and from various Dynamics 365 objects. To set this user profile up follow the steps below:
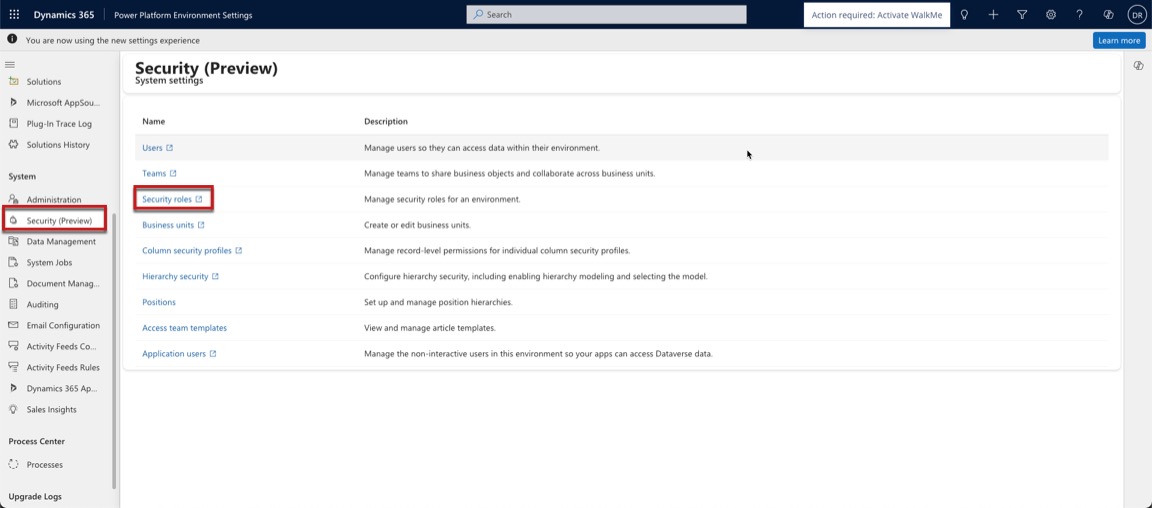
Log into your Microsoft Dynamics 365 instance and navigate to the Power Platform Environment Settings screen.
Under System, select Security > Security roles.
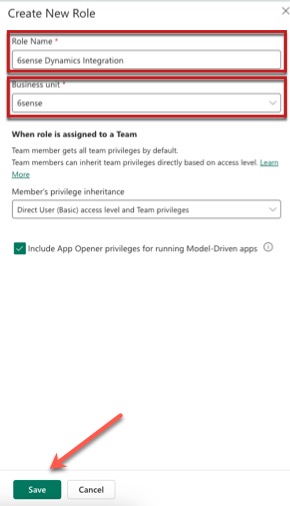
Select New Role and it will bring up the following screen. Enter a role name, select a business unit and click the Save button.
The permission screen below will display. Under the Tables tab, make sure the Show all tables option is selected.
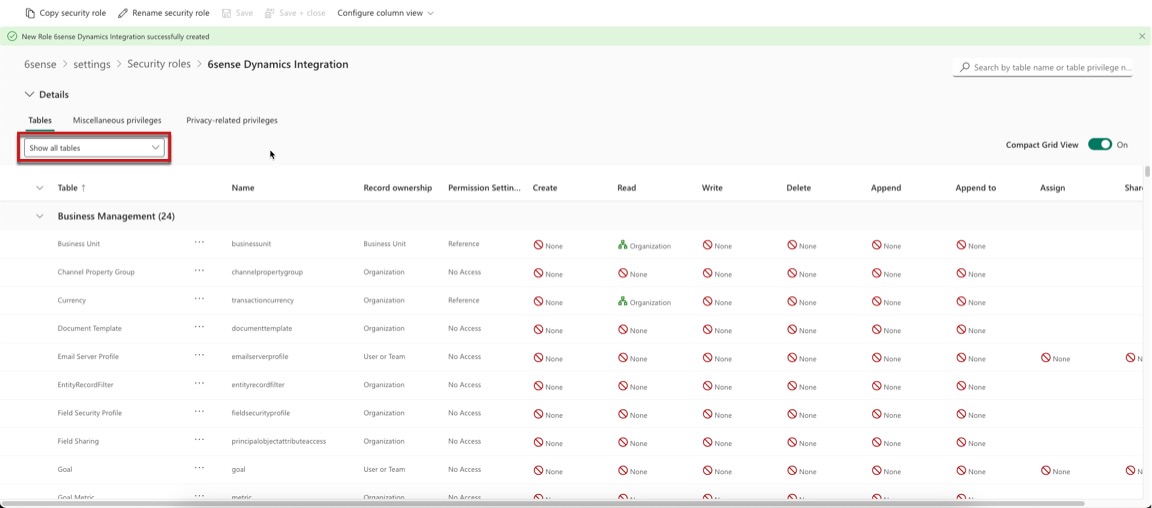
If your 6sense subscription includes Audience Workflows, Data Workflows, Orchestrations, or Sales Intelligence, assign the following permission. Otherwise, only provide Read permissions for each of the tables listed:
Table | Permissions |
Account | Create, Read, Write, Append, Append to |
Campaign | Read |
Contact | Create, Read, Write, Append, Append to |
Lead | Create, Read, Write, Append, Append to |
List | Create, Read, Write, Append, Append to |
Opportunity | Read |
User | Read |
If you’re a Predictive customer, provide Read access to these additional tables:
Table | Permissions |
Appointment | Read |
Read | |
Listmember | Read |
PhoneCall | Read |
Product | Read |
Task | Read |
Select the organization level when assigning Read and Write permissions.
.png)
Select the Miscellaneous Privileges tab and make sure the Show all privileges option is selected from the drop down.
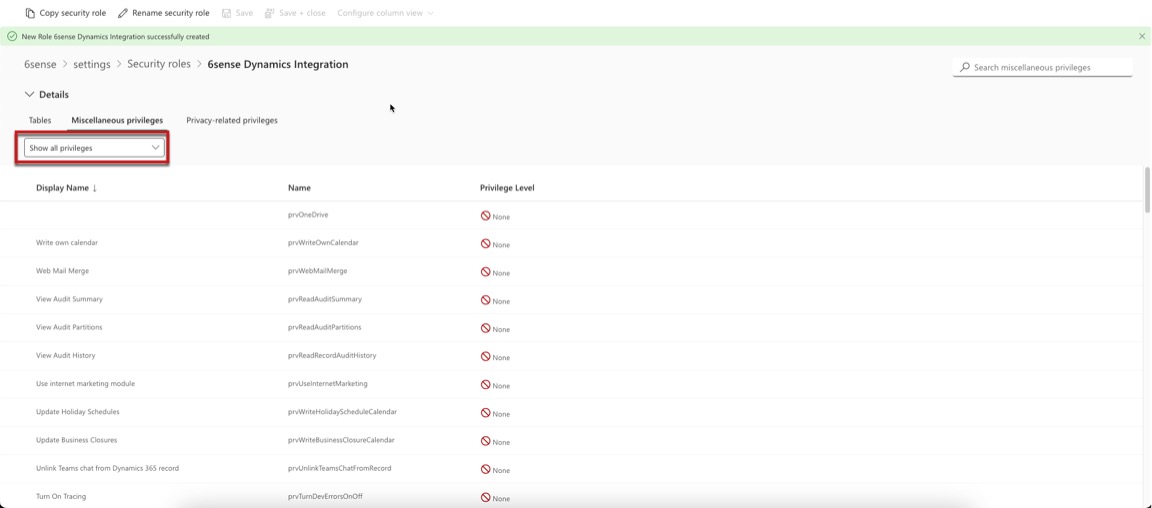
For Privilege level, select Organization for:
View Audit Partition
View Audit History
View Audit Summary
Privileges allow 6sense to detect when a record is deleted, removed, or merged.
Getting your Dynamics 365 Client ID/Client Secret/Tenant ID
Now that security role and object permissions are setup, we’ll need to register a new application for the purpose of integrating it with 6sense.
These steps will generate the following:
Client ID
Client Secret
Tenant ID
Log into Microsoft Azure.
Click App Registrations.
Click New Registration.
Enter a name for the application and select a value for “Supported account types”.
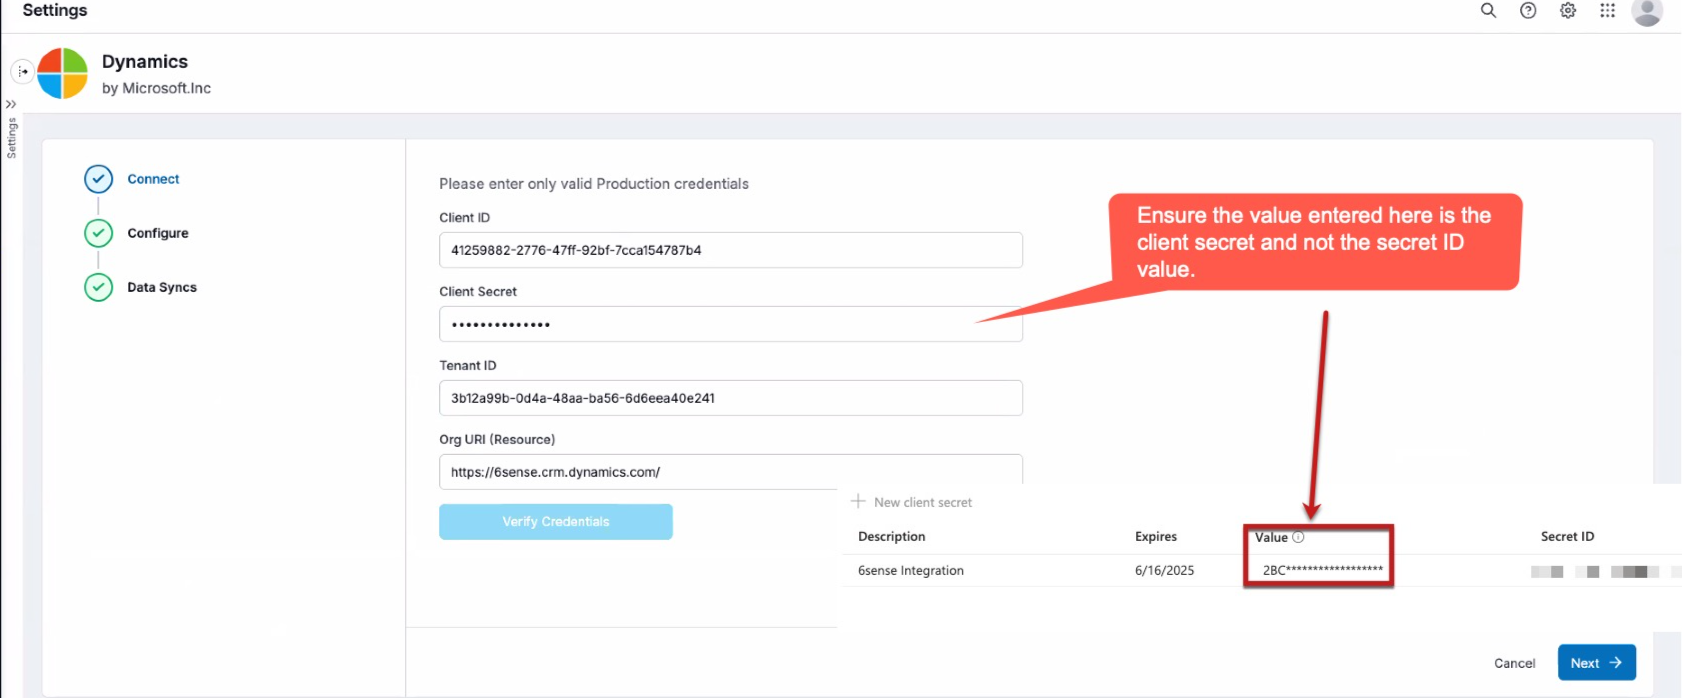
Click on Certificates & Secrets > New client secret and select the expiration time for the client secret you are about to create. Copy the value (which is the client secret)
Note: For the client secret, make sure you copy the secret contained in the value field..png)
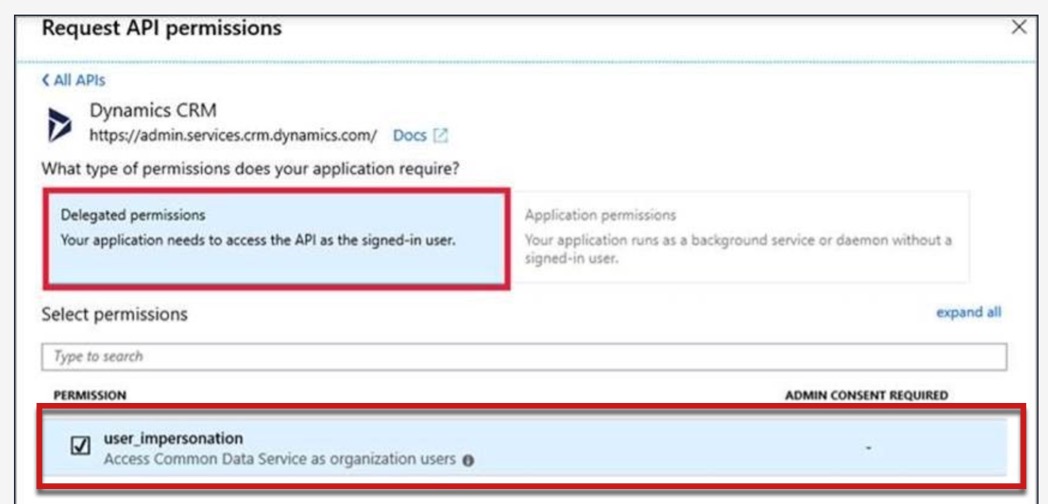
Select the API permissions tab, click on Add a permission.
Select the Dynamics CRM tile under the Microsoft APIs tab.
Click on Delegated permissions and make sure the user_impersonations permissions is checked.
Click on Add permissions.
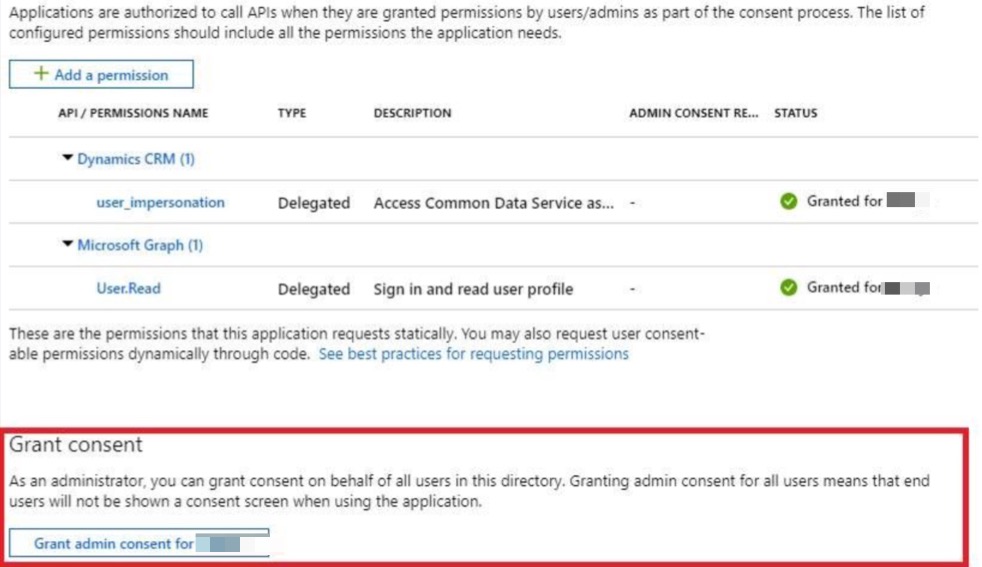
Remember to click Grant admin consent.
Log into Dynamics365 and create an application user by selecting Security > Application user.
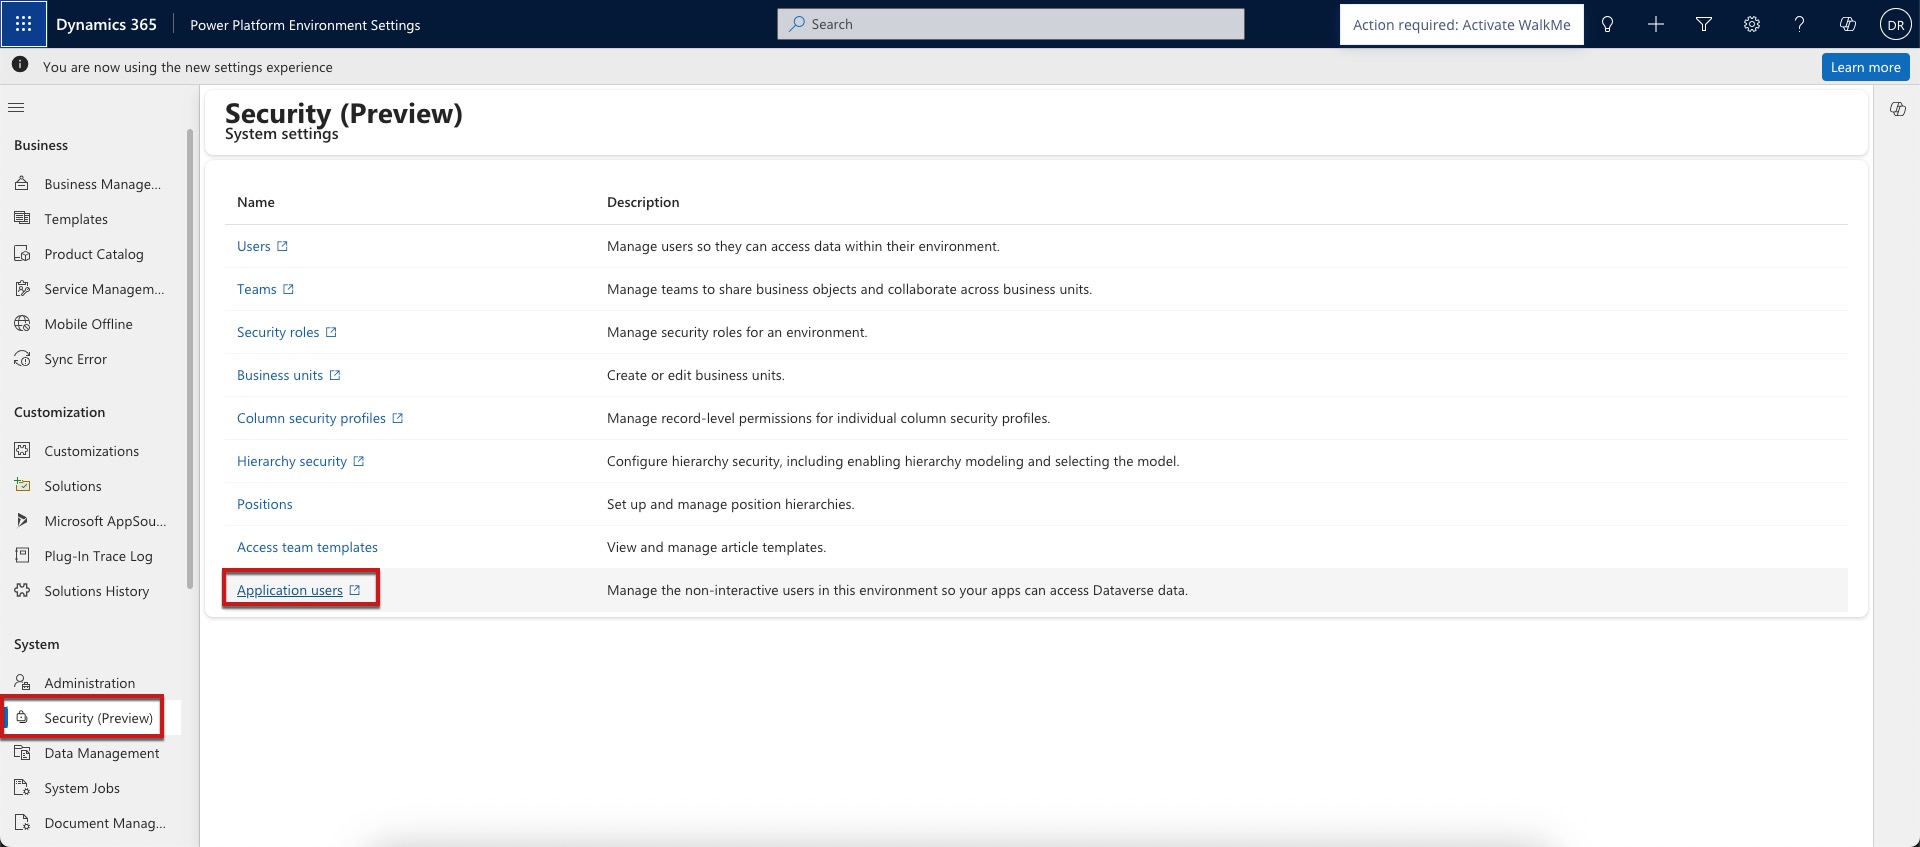
Set the Application ID field to the Application (client) ID of the app you just registered on Azure. Fill in the field for User Name, Full Name, and Primary Email. You should use a brand new name that doesn’t exist in your organization. Remember to assign a security role to this user.
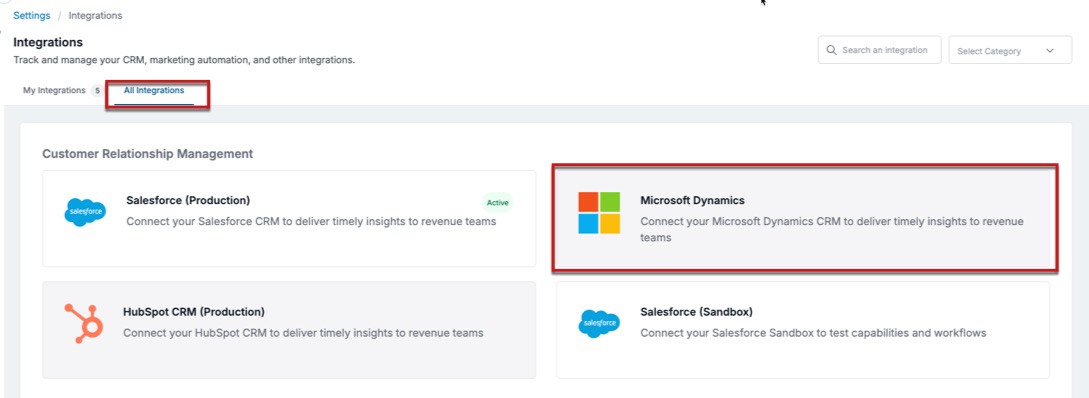
Log into your 6sense instance and navigate to Settings > Integrations > All Integrations.
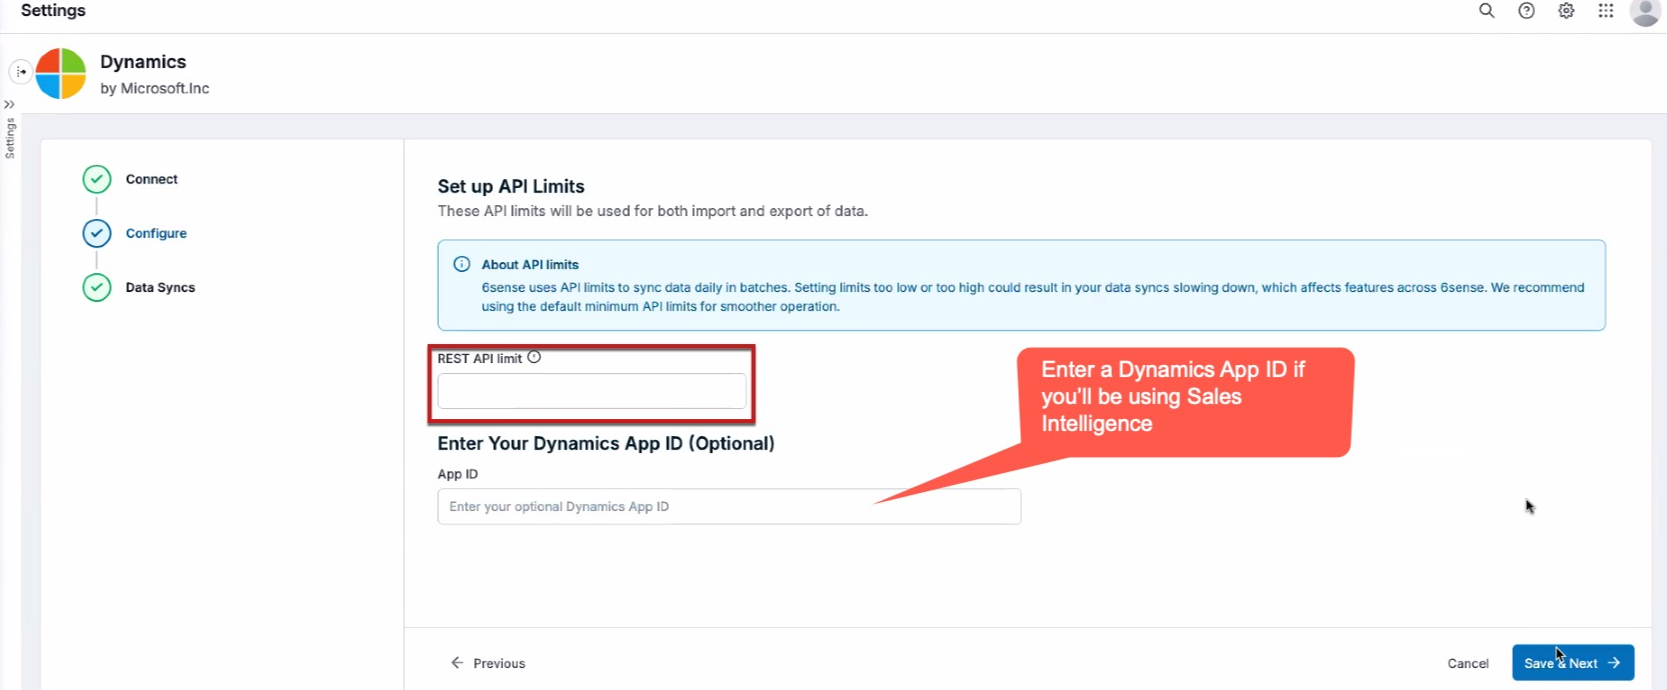
Click the Connect button and you’ll be presented with the screen below:
Enter an API limit and if you plan to use Sales Intelligence, enter a Dynamics APP ID. 10,000 is a good starting limit for API limits.
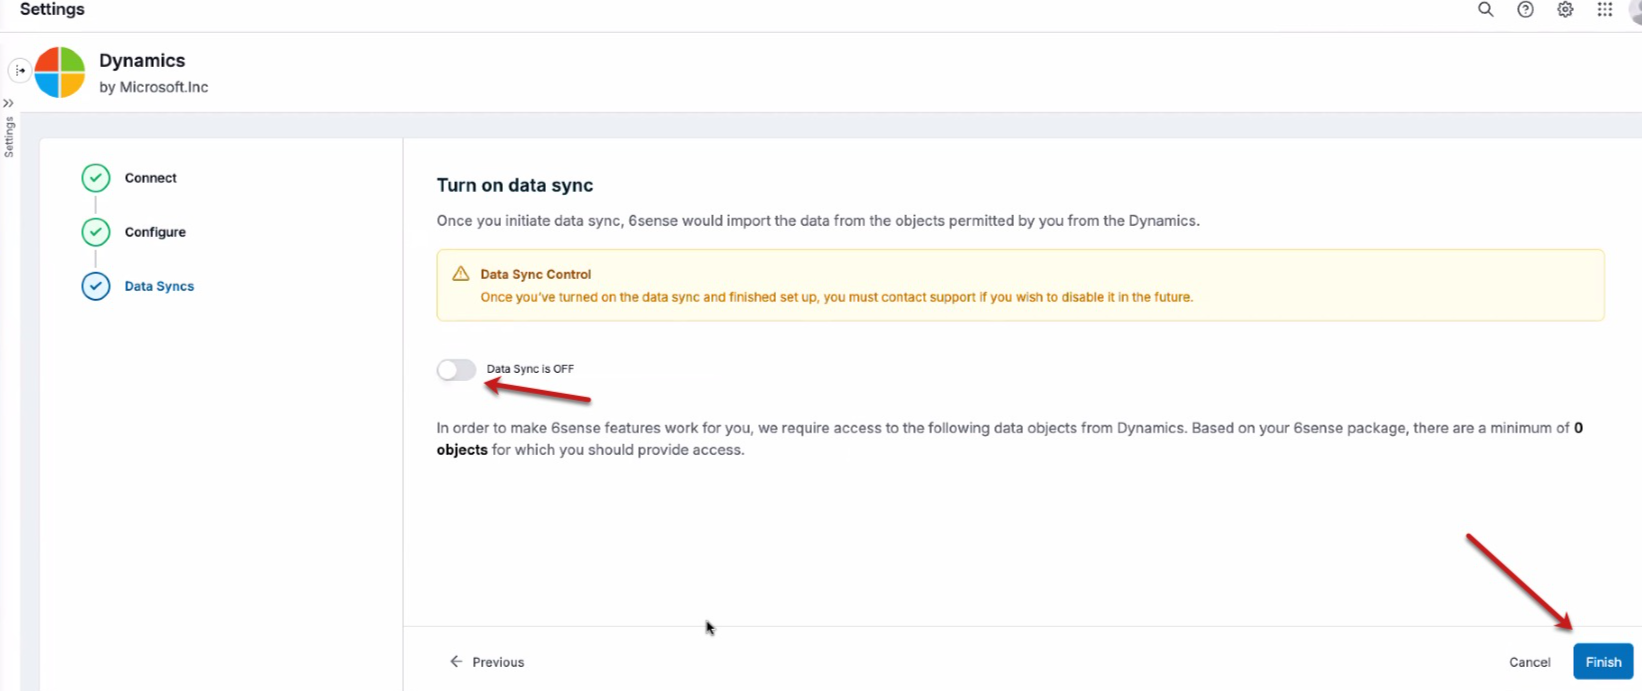
Enable the data sync and click the Finish button.
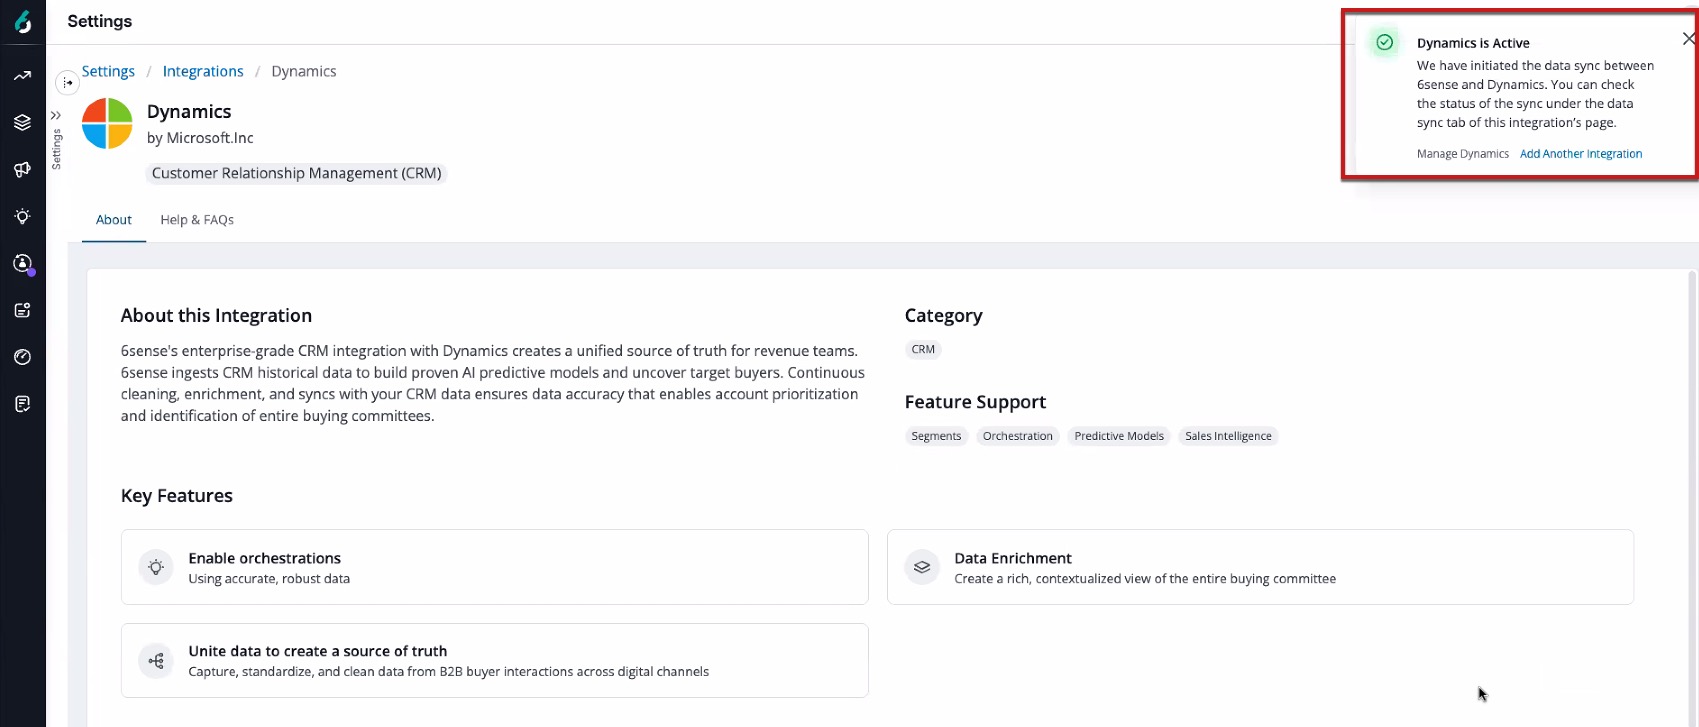
The screen below should display that the integration is active:
Post integration and what to expect
Now that the integration setup is complete, a permission check will run. If successful, Microsoft Dynamics objects will be queued to sync. The sync process should be complete within 24 hours. However, this sync may take longer depending on the number of records to be synced.
FAQ
Can I be notified if there are any issues with exceeding API Limits or if the Salesforce credentials expire?
Yes. Please refer to the article Manage Recipients for System Notifications for additional information on system notifications.