The Purchase Contacts node works with Save to… nodes to purchase contacts from 6sense and export them to your CRM or MAP, or download a CSV file.
Node Name | CRM | MAP | File |
|---|---|---|---|
Purchase Contacts | N/A | N/A | N/A |
Save Purchased Contacts to CRM |
| ||
Save Purchased Contacts to MAP |
| ||
Save Purchased Contacts to CSV | CSV |
Purchase Contacts node
The Purchase Contacts action node purchases contacts from 6sense using 6sense credits.
Dependencies
Following a Purchase Contacts action node, the workflow must connect to a Save Purchased Contacts to [system] node. This ensures that the purchased contacts are saved to your designated system. Supported follow-up nodes include:
Save Purchased Contacts to a CRM
Save Purchased Contacts to a MAP
Save Purchased Contacts to a CSV
6sense credits allocated to the Audience Workflows application. See Distribute Credits Between Applications.
Integration with the relevant CRM or MAP.
Your company must have completed the Contact Data Compliance terms. If you see an alert that says the node is locked, contact your CSM for assistance.
The Predictive add-on is required for:
Using the optional Records match persona map property.
Using certain filter conditions
Properties
Node name: A brief description that displays on the node’s icon.
Description (Optional): A lengthier description of what the node does.
Priority rules and conditions (Optional): You can configure 6sense to purchase contacts based on your persona map configuration and/or “hotspots” – contact locations where the highest number of visitors have come from that go to your website.
Records match persona map (Requires the Predictive add-on): Returns only contacts that match the persona map configuration in Settings > App Settings > Sales Intelligence > Persona > Persona Map. The persona map settings customize what job functions and titles display in the persona map, based on your organization’s needs. Refer to Persona Map. When you select this option, it will be the highest priority filter; any other filters in the conditions come after this.
6sense uses the Product Category (the Predictive model) selected during workflow setup to determine which persona map settings apply.
6sense applies this setting for both previews and published workflows.
Records are near locations with the most website visitors: Contacts from locations that match to locations with the most visitors to your website. (6sense does not have conditions filter for this functionality.)
Either option, if selected, takes precedence over any conditions specified in the Conditions.
If the advanced option Max people per account per run isn't met, then the Conditions apply.
Conditions: Filters on the segment data that specify the types of contacts to purchase.
You must add at least one filter if you don’t use a priority rule.
Filters are categorized as People details (name, job title, etc).
Job Title filters support the following operators:
Equals
Does Not Equal
Contains
Does Not Contain
Starts With
Has Word
Does Not Have Word
Has Word and Does Not Have Word perform whole-word matching. Use these operators when you want to match complete terms in a job title rather than partial text strings.
Example:
Has Word = CTO matches job titles that contain the standalone term CTO.
Contains = CTO may return additional results based on partial text-string matching.
If the Predictive add-on is active then:
You can select the Contact Engagement Grade and/or Account Profile Fit filters. Refer to 6sense AI filters in the Filter Catalog.
When using contact engagement filters, engagement is evaluated at the contact level. Non-engaged contacts at the same account are excluded.
You can select the Persona Importance filter, which is similar to using the persona map and gives you more flexibility in how your filters perform.
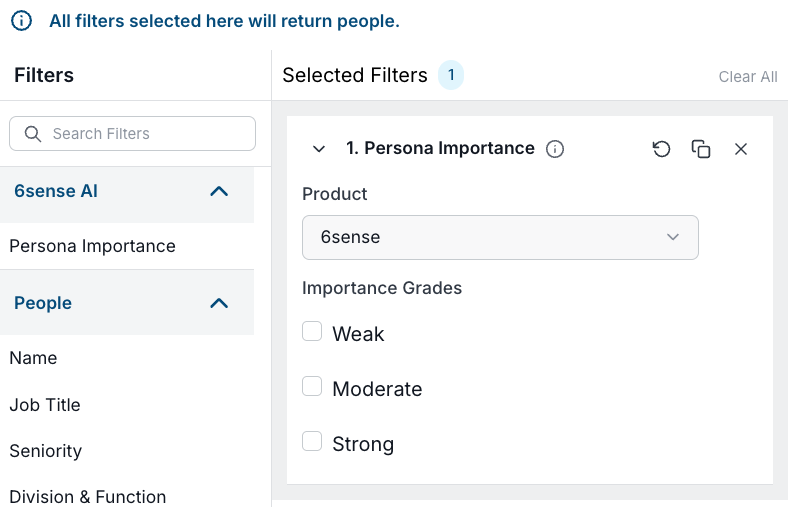
You can rearrange the blocks of specified people as per your priorities and 6sense will select contacts for purchase in that order.
Advanced options
Max people per account per run [5]: The maximum number of contacts or leads from the same account that the workflow can purchase, per run.
Contacts will not be purchased for a given account more than once every [0] days: By default there is no wait time. You can specify a wait period in days.
If Account exits node, do not process again for [0] days: When an account is pushed to a CRM, then the workflow will not process the account again for this number of days. If you set this value to 0, the workflow will process the account and push it to the CRM every time it runs.
Only purchase contacts with: Multi-select what information is required about each purchased record. This is helpful for ensuring that the purchased contacts are usable in your system.
Email: default, required
Company name
Company Phone Number
Direct Dial
First name: default, you can deselect
Last name: default, you can deselect
Country
Do not call (DNC) settings:
Purchase all contacts (default)
Purchase contacts with at least 1 non-DNC phone number
Do not purchase DNC contacts
If configured in administration settings Settings > Data Settings > Do Not Call (DNC), information displays about which countries have their DNC phone numbers hidden.
Save Purchased Contacts to CRM, MAP and/or CSV nodes
The Save Purchased Contacts to… action nodes save contacts purchased from 6sense (using the Purchase Contacts node) to your system.
You can save your purchased contacts to all three systems, but at least one is required.
Dependencies
Integration with the 3rd party systems involved in the workflow.
For CRM or MAP integration, a pre-configured mapping profile.
Your company must have completed the Contact Data Compliance terms. If you see an alert that says the node is locked, contact your CSM for assistance.
Properties
Node name: A brief description that displays on the node’s icon.
Description: A lengthier description of what the node does.
For CSV Fields, click View or Edit Defaults to see or modify the fields to be saved.
For MAP fields:
By default, 6sense saves purchased contacts to the type of object used by the integrated MAP system.
Select the mapping profile.
For Advanced Options, you can set the batch size per API call. Reducing the batch size may inversely affect the number of API calls. For example, decreasing the batch size from 200 to 50 results in 4x more API calls. The smaller the batch size, the longer the processing times. Changes to this setting take effect the next time the action node runs.
For CRM fields:
Select whether to save the purchased contacts as leads or contacts.
Select the mapping profile.
You can pre-configure up to five mapping profiles per object per system.
After you select a mapping profile, you can override specific fields for this node only.
If needed, edit the Custom tie-breaker rules for this node.
If 6sense finds multiple accounts in your CRM that a purchased contact could belong to, it will select one account based on the default tie-breaker rules applied at Settings > App Settings > Workflows > Custom Match Rules > Contact Purchasing Tie-breaker Rules. If you want to change the settings, select Edit existing rules.
However, if you want to specify tie-breaker rules that apply only to this workflow and this node, select Override this node only and set the match logic rules.
For Advanced Options, you can set the batch size per API call. 6sense sets a default that varies depending on the CRM. Reducing the batch size may inversely affect the number of API calls. For example, decreasing the batch size from 200 to 50 results in 4x more API calls. The smaller the batch size, the longer the processing times. Changes to this setting take effect the next time the action node runs.
Save to CSV file location
When you save purchased contacts to a CSV file, any AWF user at your company can find it in the Audience Workflows Dashboard > Inbox tab. The listing shows the date, time, workflow name, and node name and lets you download the file.
Document changelog
Aug 12 2026: Reorganized action node pages