An AI Email (AIE) campaign in 6sense uses AI to write, personalize, and optimize email sequences that engage your target audience. Unlike standard manual campaigns, AI campaigns leverage playbooks, contact data, and supporting documents to deliver tailored content to each recipient at scale.
Step 1: Start a new campaign
Sign in to AI Email.
Go to Campaigns > Create new campaign.
Choose one of the options:
Generate with AI – AI writes and personalizes the emails while you edit and finalize.
Write yourself- You write emails, but you can use AI anytime to enhance what you write.
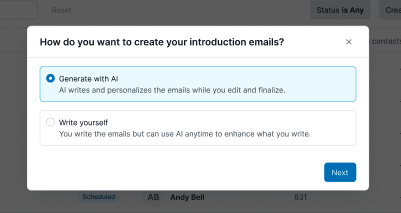
Note: You can switch to Write yourself at any time; however, any changes you made in the AI flow will be lost.
Step 2: Generate with AI
If you choose Generate with AI, choose a playbook or write a new prompt on your own.
.png)
There are two types of playbooks: Conversion playbooks and Progression playbooks.
Conversion playbooks have four options:
Qualify Inbound Leads: Automate lead qualification with personalized follow-up and sales handoff.
Drive Intent-Based Conversion: Convert high-intent accounts into meetings through coordinated multi-stakeholder outreach.
Reconnect with Stalled Opportunities: Revive dormant contacts from stalled opportunities to reignite buying interest.
Expand Existing Customers: Target existing customers with personalized upsell or cross-sell based on usage or intent.
Progression playbooks have two options:
Follow-up on an Event: Create personalized outreach for event attendees to maximize engagement.
Nurture Early-Stage Accounts: Nurture early-stage prospects with educational content until sales-ready.
After you select a playbook, the Introduction email prompt starts generating. Select Next.
.png)
Step 3: Add supporting documents
Choose existing documents or upload up to 5 documents that best support your campaign goal. For example, product or service overviews, relevant case studies, and testimonials.
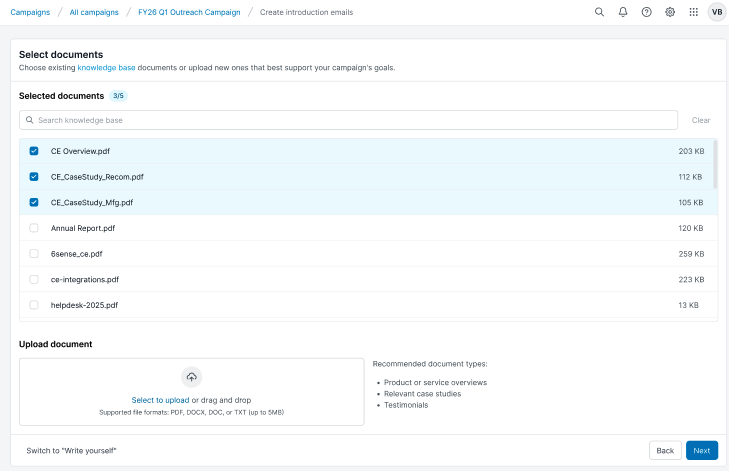
Select Next.
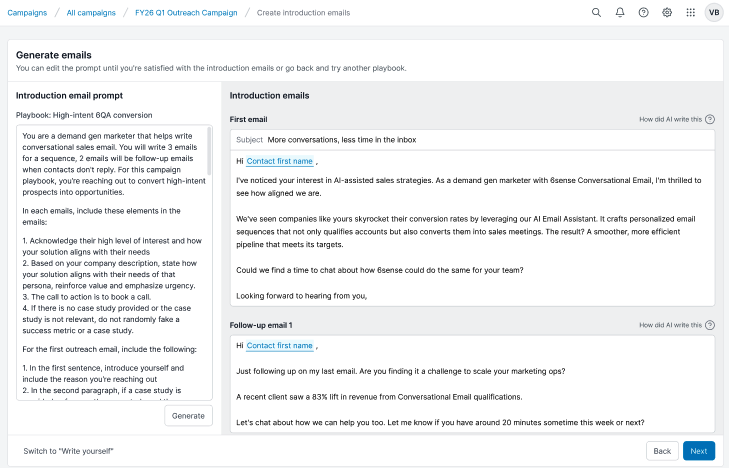
Step 4: Review and edit generated emails
After document selection, the system displays Introduction email prompt on the left panel.
Edit the prompt until you’re satisfied with the introduction emails or go back and try another playbook.
.png)
Select Generate to generate your introduction emails such as First email, Follow up email 1, Follow up email 2, and so on.
You can:
Change the subject title.
Edit the introduction email prompt to suit your use case and include more details you want to add to your campaign, such as the target audience, the product you are talking about, and the key points you want to highlight.
Edit the introduction emails directly on the right panel.
Select Next to continue, or Back to edit the prompt and choose another playbook.
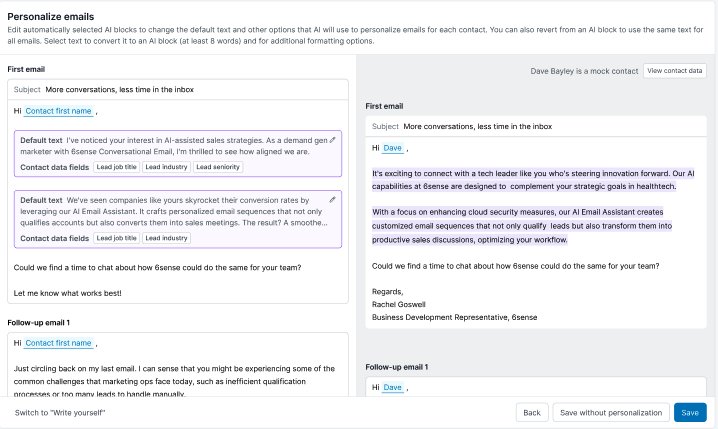
Step 5: Personalize emails with AI blocks
AI Personalization is a feature within 6sense AIE that automatically tailors email content for each individual contact. By default, it generates AI blocks, which are dynamic content sections. These AI blocks use the default text from the base email template and personalize with contact data fields.
.png)
Select Show preview to see how AI personalizes the emails with a mock contact.
.png)
You can do the following to personalize emails:
Revert from an AI block to use the same text for all emails.
Edit AI blocks to change the default content.
Add block instructions - additional instructions for AI to follow while personalizing that block’s default text.
Add or remove contact data fields that AI uses to personalize default text (up to 4 fields).
Select text to convert it to an AI block (at least 8 words) and access additional formatting.
.png)
Save options:
Save as shown: You have the option to save your emails that you have generated with the AI personalization blocks and go to the introduction email panel for further editing and previewing other contacts.
Or
Save without personalization: You can save without personalization, which means the generated email will be saved without the AI blocks.
Step 6: Review conversation flow
The system displays Conversation flow after you save the personalized emails.
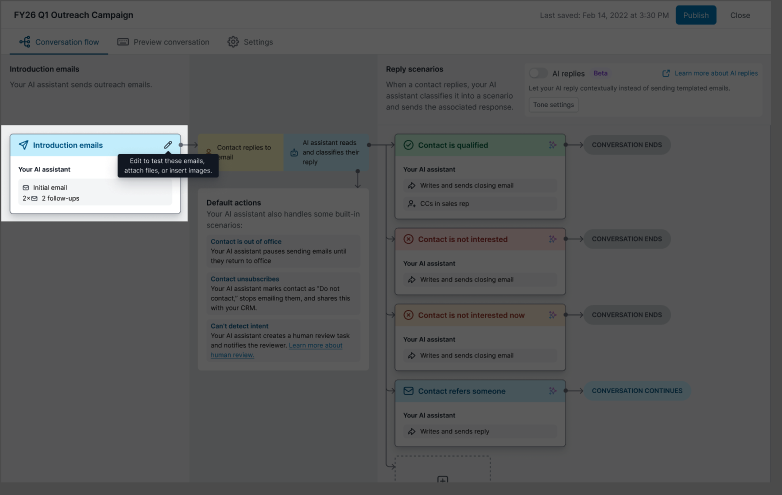
Select the Edit icon to edit emails, test emails, or attach images.
.png)
Edit emails:
Optional: Enable A/B testing to refine emails and optimize their effectiveness. Refer to A/B Test AI Email Campaigns for more details.
Send a test email.
Update email subject.
Revert from an AI block to use the same text for all emails.
Edit AI blocks to change the default content.
Add block instructions, for example, additional instructions for AI to follow while personalizing that block’s default text.
Add or remove contact data fields that AI uses to personalize default text (up to 4 fields).
Select text to convert it to an AI block (at least 8 words) and access additional formatting.
Attach files.
Attach images and additional details such as AI name, AI first name, and so on.
.png)
Preview personalization:
Select the Preview as dropdown and choose contacts to see how each AI block rewrites itself for different leads
View contact data to see more information about the selected contact.
Hover over a purple AI block in the preview to see the data fields used and how AI wrote the text.
.png)
Select Save and close when finished.
You can go back to the Conversation flow and edit Reply scenarios as needed.
When ready, select Publish.
Select Close.
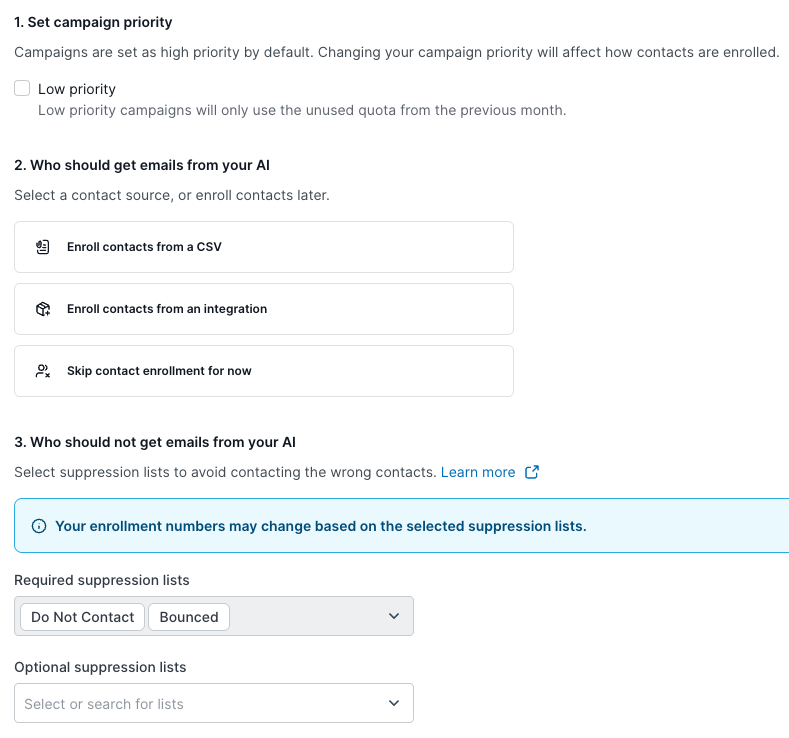
Step 7: Enroll contacts
In Enroll contacts, choose who will receive the campaign emails:
Enroll contacts from a CSV file.
Enroll contacts from an integration such as Salesforce.
Skip contact enrollment for now (enroll contacts later from your AI Email database)
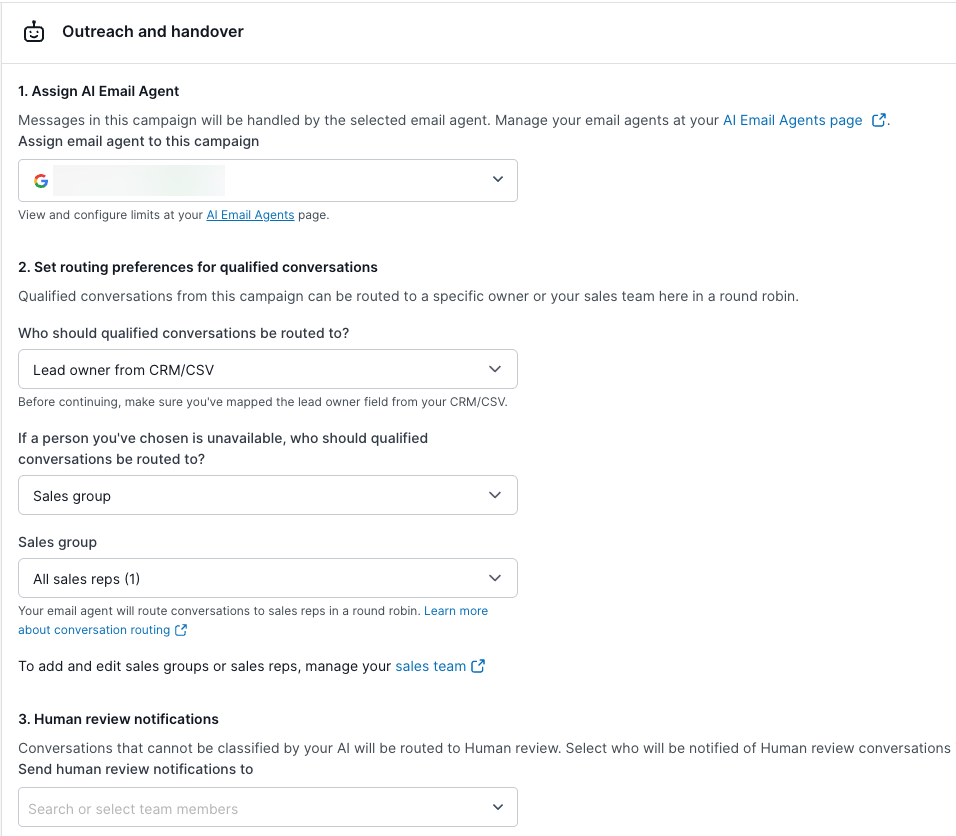
Step 8: Assign AI email agent and human review
Assign an AI email agent and select team members for human review notifications. Refer to Set up Customer Contact Owner Routing in AI Email Campaigns for more information.
Step 9: Schedule your campaign
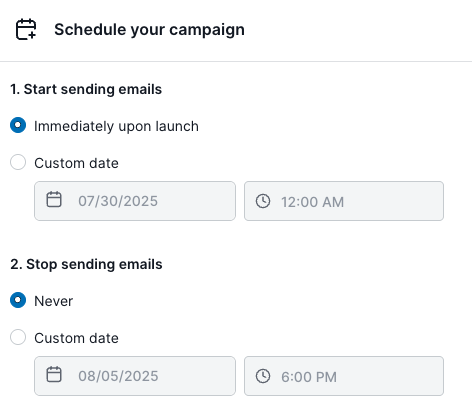
In the Schedule your campaign section, schedule the start date and end date for your campaign.
Step 10: Preview and launch
As the final step before your campaign launch, the system checks that everything is ready. If any steps are remaining that require your attention, follow the prompts on the screen to complete them and prepare for launch. 
After everything is ready, select Preview and launch, and your AI email agent starts scheduling emails to go out to your contacts.