The export feature in 6sense Sales Intelligence enables users to seamlessly move crucial account and contact data into their Customer Relationship Management (CRM) or Sales Engagement Platform (SEP) systems, or to export these records to a CSV file. This process supports your team in accessing up-to-date information for effective outreach and engagement.
This article delves more into exporting records to CRM or SEP, and it does not go into details of exporting to CSV.
Requirements for Exporting
To use the export feature, ensure that:
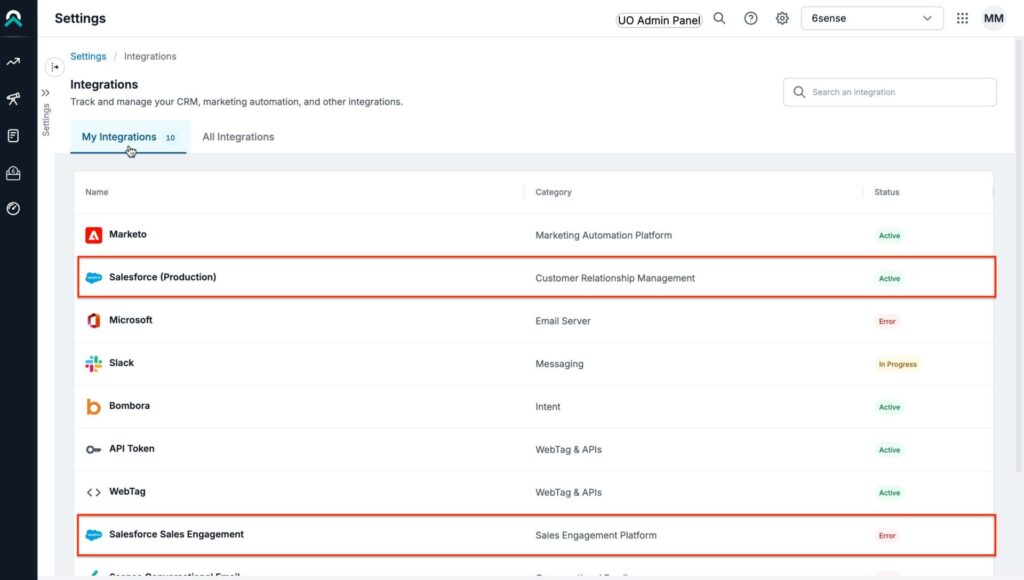
Your CRM or SEP is integrated with 6sense. Read more about Sales Intelligence integration here.
Supported platforms include:
CRM: Salesforce, HubSpot, and MS Dynamics
SEP: Salesloft, Outreach and Salesforce Sales Engagement
You have Administrator/SDR/AE role within 6sense Sales Intelligence.
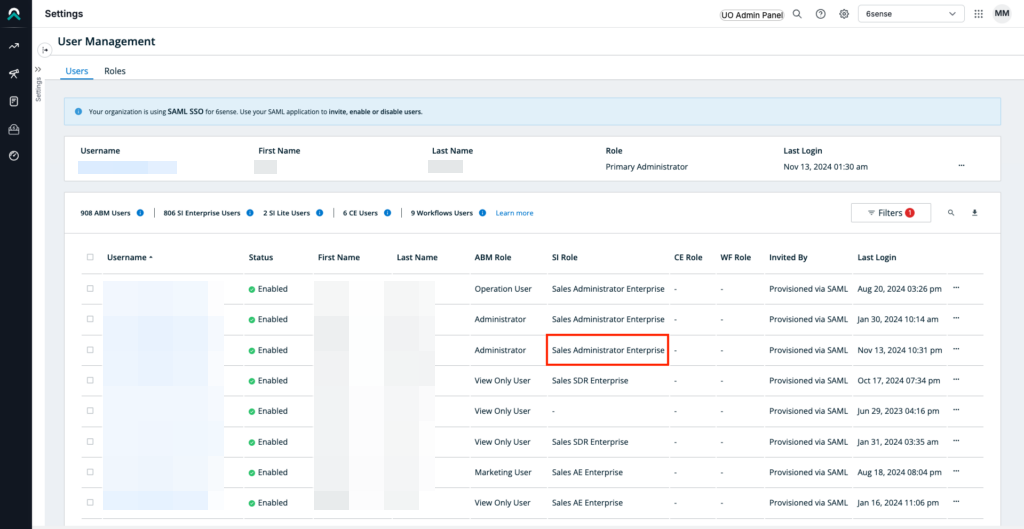
Note: SI export settings and mapping profiles will only be accessible to users with Administrator role, and not to AE or BDR roles. Read more about Sales Intelligence admin setting here.
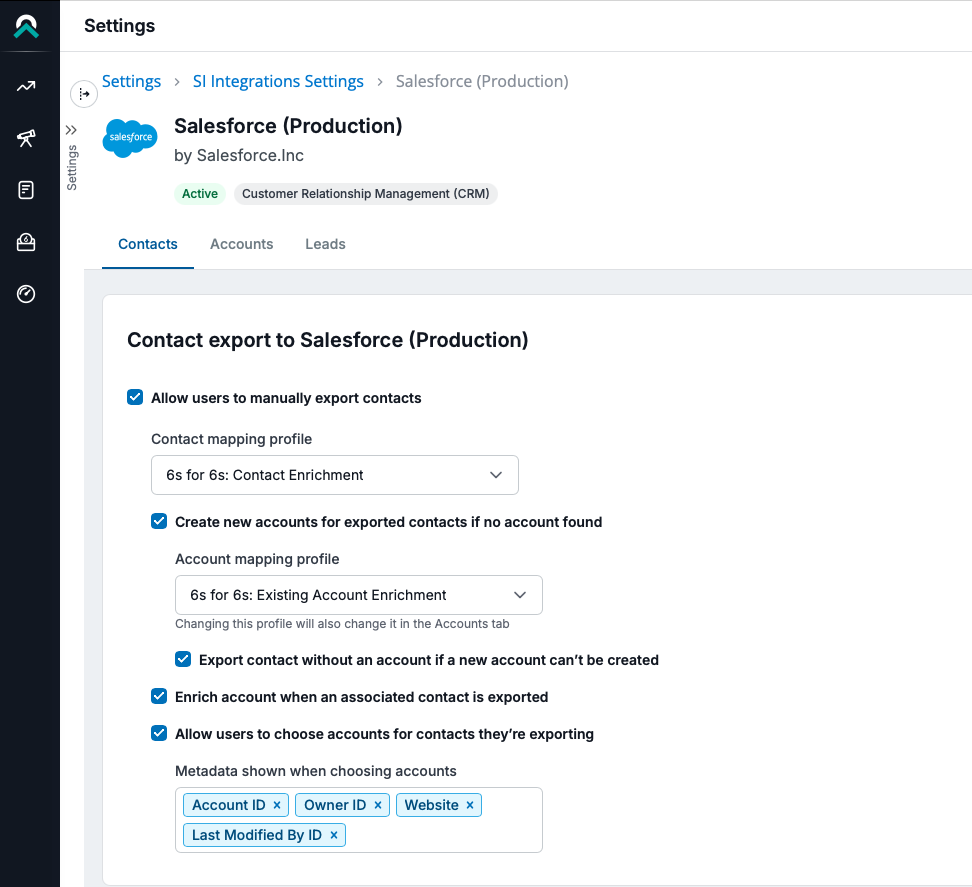
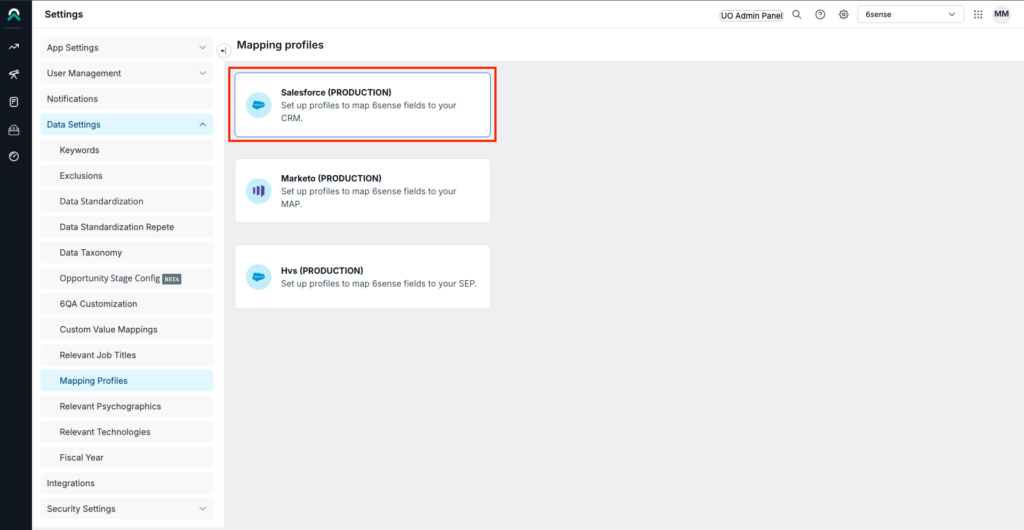
Set Up Mapping Profiles for Export
Mapping Profiles in 6sense allow administrators to customize how fields align between 6sense data (such as industry and revenue ranges) and CRM/SEP fields, ensuring consistency. Read more about mapping profile here.
Steps to Configure Mapping Profiles:
Navigate to Settings > Data Settings > Mapping Profiles.
Select CRM or SEP object for mapping.
Choose 6sense fields (e.g., Industry, Revenue) and align them with corresponding CRM fields.
Save your customized mapping profile to ensure data integrity during exports.
Choose the mapping you would like to apply for the export.

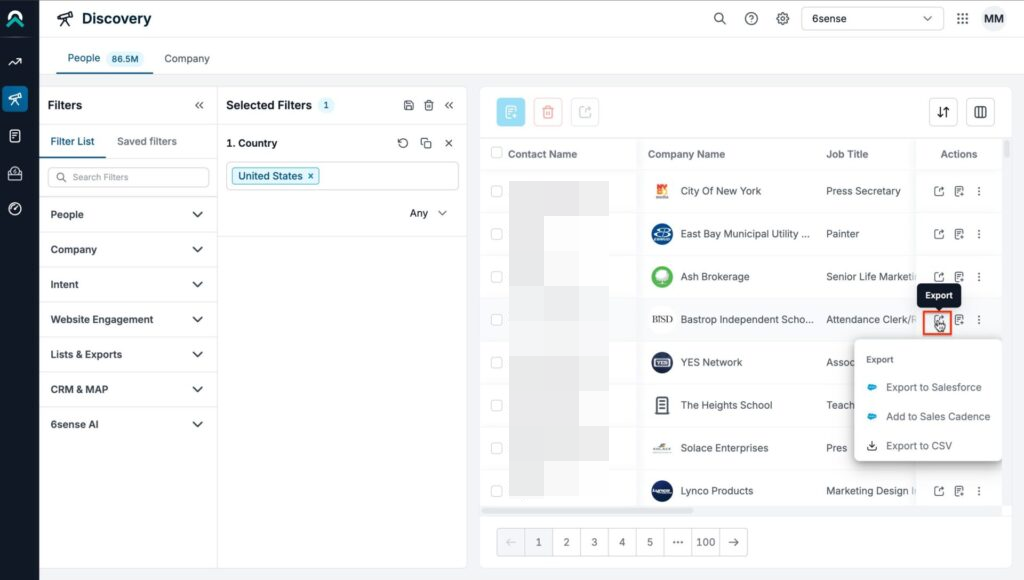
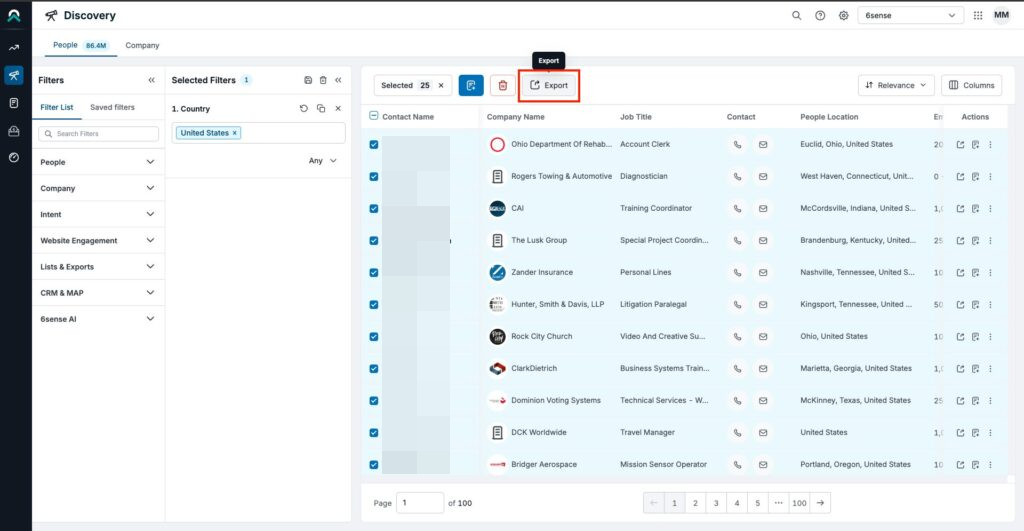
Export Records
Follow these steps to export single or multiple records from 6sense:
Select Records for Export
Go to the Discovery, Dashboard, or Detail Pages sections.
Select individual records or choose the option to export in bulk.
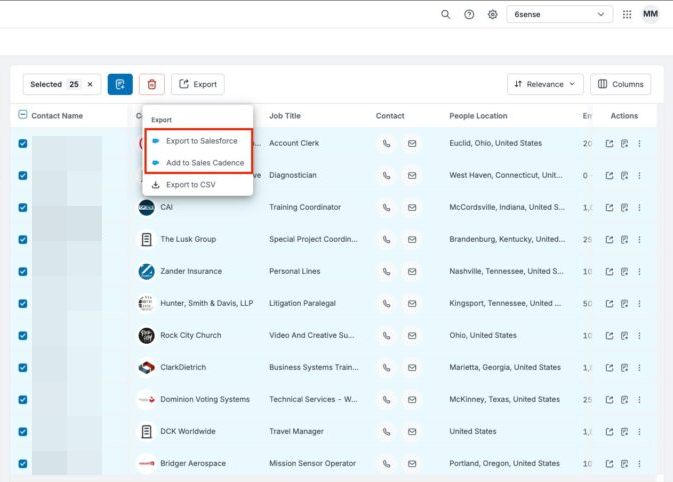
Configure Destination.
Select your CRM or SEP as the export destination.
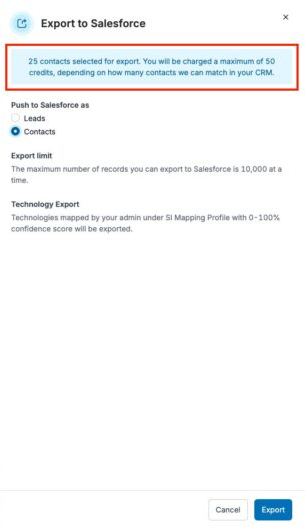
Confirm Export and Review Credit Usage
Confirm the export and review the number of credits required. Ensure you have sufficient credits available to complete the export.
Click Export to initiate the transfer.
NOTE: If Export Tiebreaker is enabled, then the user might also need to select the destination account for contact exports. Read more about Export Tiebreakers here.
Credit Usage During Export
Each export operation deducts credits based on the volume of data and the selected features. Read more about the Credit Usage here.
Here’s how to monitor credit usage effectively:
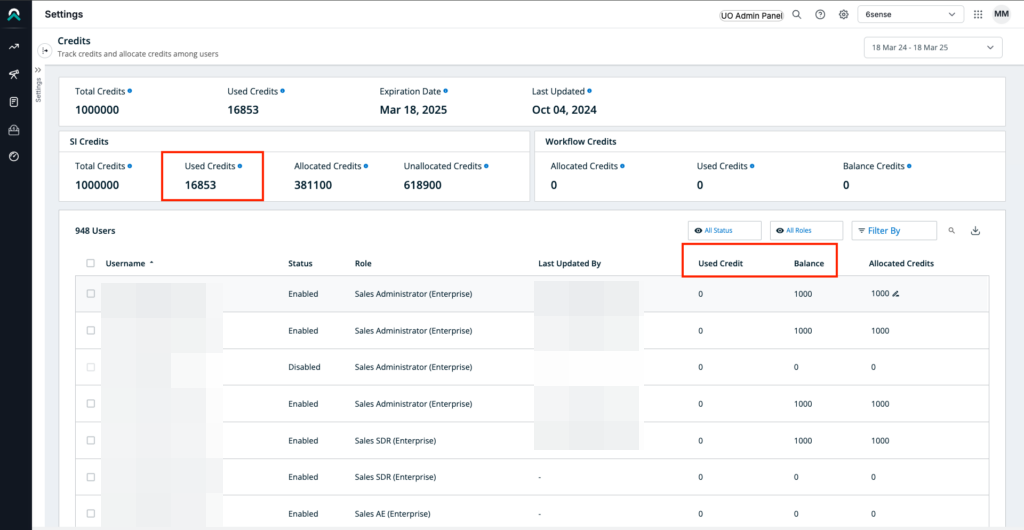
Go to Settings > Credits to view your remaining credits, total credits allocated, and credits used.
Monitor your balance regularly to prevent workflow interruptions due to insufficient credits.
Reviewing Export History and Handling Errors
When exporting records, some may fail to transfer due to account mismatches, missing data, or other issues. Here’s how to find these errors, understand them, and take action. Read more about Unlock History here.
Accessing Your Export History
Navigate to History:
In the Sales Intelligence platform, click on the user profile icon (top-right corner) and select History from the dropdown menu. This will open the Export History tab.
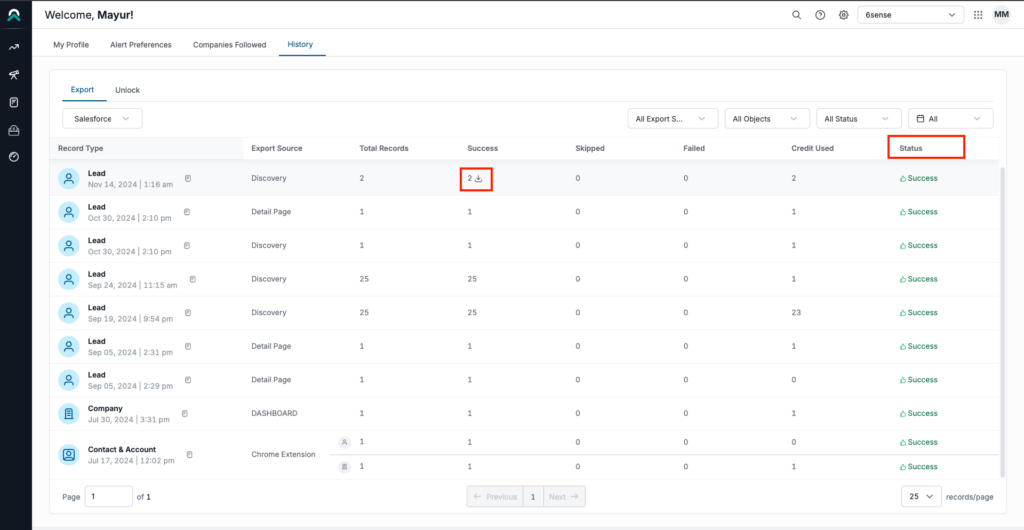
Understanding Export History Entries: Each entry provides details such as:
Record Details: Contact name, company, job title, and export destination (e.g., Salesforce).
Status: Indicates whether each export was successful or failed.
Timestamp: Date and time the export was initiated, helping track export timelines.

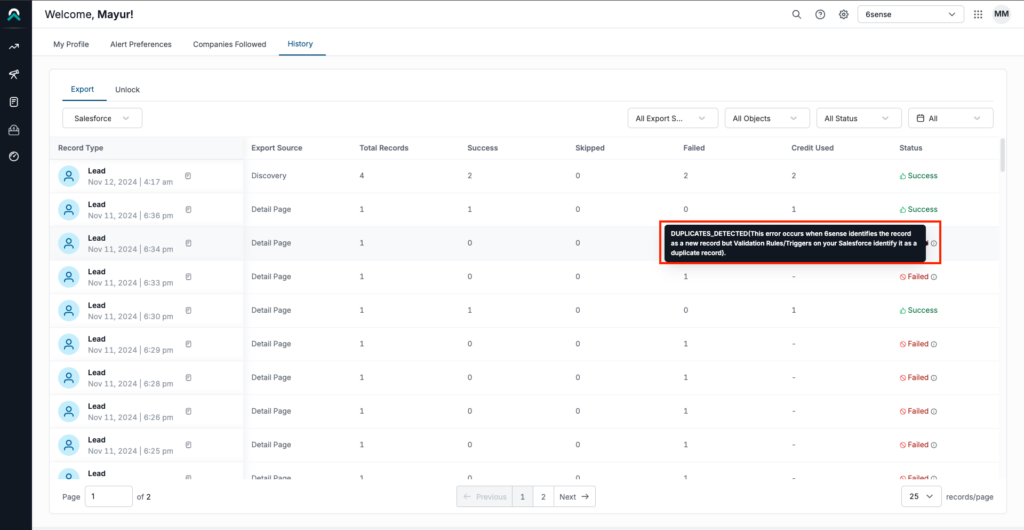
Common Export Errors and Resolutions
Account Match Failures: If a contact does not match an existing account in your CRM, it will fail to export.
Resolution: Enable the “Create New Account” option in Admin Settings to allow unmatched contacts to create new accounts in the CRM.
Insufficient Credits: If your available credits are too low, exports cannot proceed.
Resolution: Review your Credits section to check your balance and allocate more credits if needed.
Data Quality Issues: Missing or incomplete data fields may prevent successful export.
Resolution: Ensure all necessary fields are populated before reattempting the export.
FAQ
Q: What happens if a contact has a duplicate in my CRM?
A: Matching rules help manage duplicates by aligning fields between 6sense and CRM. Duplicate records will either update existing records or create new entries based on matching rules.
Q: Can I track which records were exported successfully?
A: Yes, go to Export History in the main dashboard to see the number of records exported, failed, and credits used.
Q: How can I ensure that only relevant data is exported?
A: Customize your mapping profiles and set fields to export only essential data like high-priority job titles and specific technologies etc.
Q: What is the export limit for records?
A: The maximum number of records you can export to CRM at one time is 10,000. If you need to export more, consider breaking up your records into smaller batches.
Q: How are technologies handled in exports?
A: Only technologies mapped by your Admin under the SI Mapping Profile are exported. Each technology includes a confidence score (from 0% to 100%) indicating how accurately it is used by the target company.