The Sales Intelligence (SI) web application has administrative settings that control access to various functionality from the Settings > App Settings > Sales Intelligence pane.
Additional settings relevant to the data are available from the Settings > Data Settings pane. For details see Sales Intelligence Admin Data Settings.
Requirements
You must be signed in as an Administrator to change the SI administrative settings.
The CRM or SEP platform must be supported. For a list of supported integration platforms and links to integration instructions see Sales Intelligence Integrations.
For Export settings, the mapping profiles need to be established. See Mapping Profiles.
Access the SI settings page
Log in to the Sales Intelligence application as an Administrator. Alternatively, you can log in the the ABM platform directly if you have access to that as an Administrator.
Click the settings icon (the gear) and the 6sense ABM application Settings page opens in a separate tab.
.png)
In the ABM Settings, go to App Settings > Sales Intelligence to see the Sales Intelligence (SI) settings.

The settings include:
SI Integration Settings
Talking points
SI Actions settings
Components & metrics
Activities
Persona
SI Alerts
Credits
Privacy Data Control
SI Integration settings
In the SI Integration settings pane, Administrators control synchronization, manage update dependencies, and configure export settings for integrations between Sales Intelligence and customer relationship management (CRM) and sales enablement (SEP) platforms.
When exporting people’s records as Contacts, 6sense always exports both Contact and Account to be synced (pushed) into your CRM.
Integrations panel
You can further control synchronizations in the integration panels for each specific integration. For example, a Salesforce integration has the following settings.
.png)
Leads/Contact settings
If the toggle Allow Creation of New Account On Contact Push is enabled, users can create a new account for a contact that does not have a matching account in the CRM. If the toggle is enabled, an additional configuration option allows Administrators to push and create the contact in the CRM, even if the account export fails.
Alternatively, if the toggle is disabled, only contacts with matching accounts in the CRM will be pushed to the CRM.
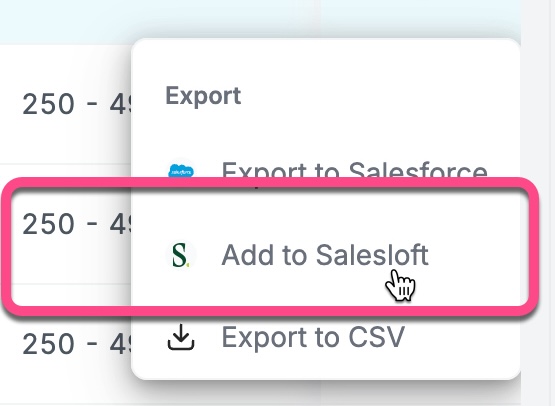
Export settings
The export settings control what export options are available in SI. For example, in the Discovery page Actions > Export menu you can add a record to Salesloft.
In the SI Integration Export Settings section, you choose which objects users are allowed to export from SI and select a mapping profile.
A mapping profile represents a saved set of mappings between a 6sense field, such as Industry, Revenue Range, etc., and a field in your CRM or marketing automation platform (MAP). You create a mapping profile by clicking +New Mapping Profile in the dropdown or go to Settings > Data Settings > Mapping Profiles. See Mapping Profiles.
It is possible to select CRM-only records or all records during SEP exports. You can choose to not enrich CRM records while exporting to a SEP.
The contact export account information is always updated even if the Account object is not selected at Allowed Objects for Export. The best practice is to ensure you have both Contact and Account mapping profiles selected in this box, to avoid confusion.
When you are done editing settings, click Save Changes at the top right of the page.
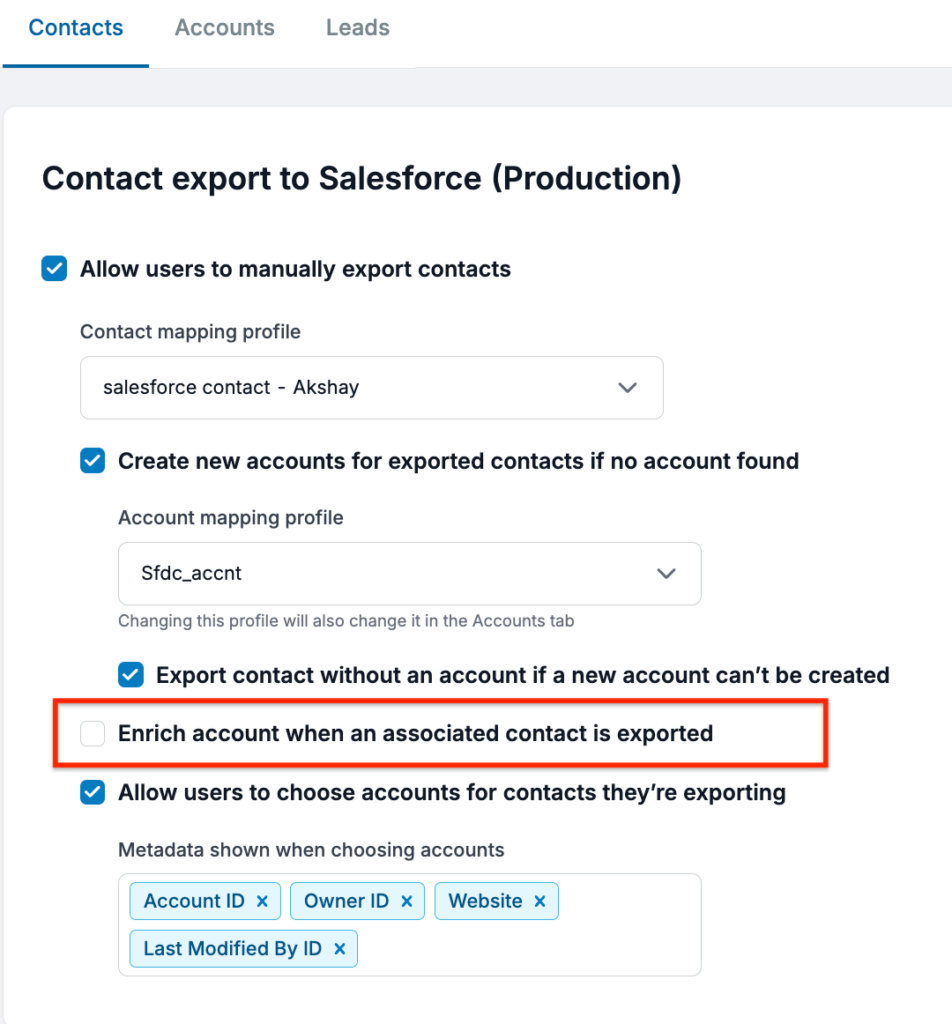
Make account export optional on contact export
Previously, whenever a contact was exported from SI, the corresponding account was also pushed to the CRM, regardless of whether an update was needed. With the new setting, admins can now choose to disable automatic account Enrichment during contact export.
When this setting is disabled, only the contact (person) record is exported—no account-level fields are updated. This helps reduce unnecessary updates to account data, speeds up export processes, and conserves export credits. The export history will reflect whether both contact and account were exported, or only the contact.
Assign correct record while exporting
By default, when a record is exported from SI to a CRM or SEP, the record owner is set to the 6sense Integration User. With the new record owner setting, administrators now have the flexibility to configure ownership based on their business workflows and user roles.
This setting allows admins to choose how record ownership should be assigned during both record creation and enrichment. Admins can select from the following options:
Assign ownership to the user performing the export (default for new customers).
Retain the 6sense Integration User as the record owner (default for existing customers).
Assign ownership to a specific CRM/SEP user via a dropdown of available users.

In the event of a failure (for example, if the exporting user or custom CRM user cannot be matched), ownership will fall back to the Integration User, with the reason for fallback captured in the export history.
Additionally, a separate setting lets administrators control whether record ownership should be updated during enrichment (i.e., when a record already exists in CRM/SEP). Admins can choose to preserve the original ownership or update it using the same logic as used during new record creation.
This feature provides customers with more control over CRM data governance and enables workflows where record assignment is critical (for example, routing records to the appropriate sales rep or team based on export context).
Export settings for Outreach
In Outreach settings additional export settings are available to configure.
.png)
Admins can restrict Outreach sequence dropdowns to only show specific sequence statuses (active, inactive, archived, and paused). It is recommended that admins use this setting to limit sequences to only active, as this helps streamline the sequence selection process and avoids clutter from legacy or archived sequences.
Admins can also choose whether they want to allow contact creation without assigning a sequence. This supports workflows where reps prefer to stage contacts before sequencing.
Talking points settings
In the Talking Points settings, you can add and manage curated or automated custom talking points. Include value propositions or guidelines that your sales teams can use when talking to specific personas.
SI Actions settings
In the SI Actions settings, you can select which actions are available to other users.
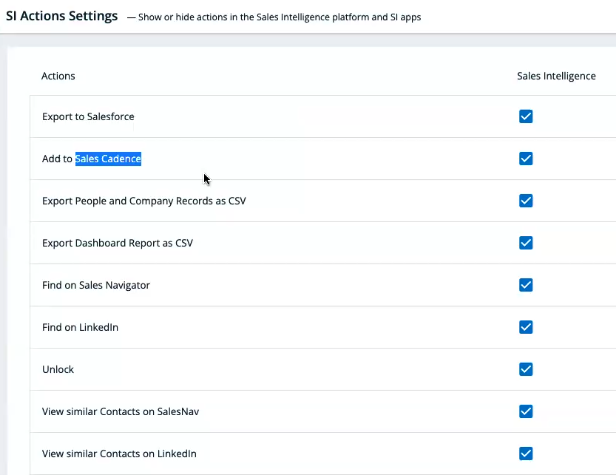
Available actions by integrated products include:
6sense Actions
Unlock
Export to CSV
CRM Actions
Export to Salesforce
Export to Hubspot
Export to Dynamics CRM
Mark – no longer at company
SEP Actions
Export to Salesloft
Export to Outreach
Export to Gong Engage
LinkedIn Actions
Find on LinkedIn
View similar Contacts on LinkedIn
Find on Sales Navigator
View similar Contacts on SalesNav
Components & Metrics settings
In the Components & Metrics Settings, you configure the Sales Intelligence experience to display the insights most relevant to your organization.
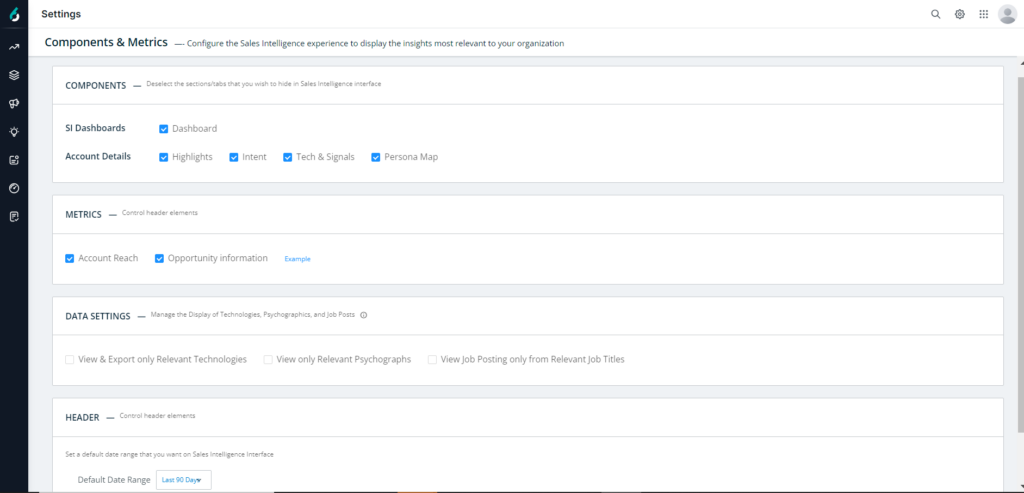
Components settings
Select or deselect the components to displayed in Sales Intelligence.
SI Dashboards: Check to display all dashboards.
Account Details (Company Details Pages): Check to display the components in the company details pages:
Highlights
Intent
Tech & Signals
Persona Map
Metrics settings
Select or deselect the metrics to include in the dashboards, company details, and people details pages.
Account Reach
Opportunity information
Data settings
Manage the technographics, psychographics, and job postings that display in the Tech & Signals tab in company details pages.
View and export only relevant technologies
View only relevant psychographics
View job postings for only relevant titles
By default, SI displays all technographics, psychographics, and job postings.
When you check one of these items, it enables a toggle that allows a user to switch between displaying all technographics, psychographics, and job postings and or only relevant technographics, psychographics, and job postings.
Relevant technographics, psychographics, and job postings are chosen by an Administrator through administrative configurations, based on which is defined as relevant to your sales team and organization’s go-to-market strategy.
For a deeper discussion and to see what it looks like when enabled see Tech & Signals Tab Contents.
Date range settings
Select a default date range to use throughout Sales Intelligence. Users can manually change the date range, and this allows you to set a default. The date range options are:
Last 7 Days
Last 30 Days
Last 60 Days
Last 90 Days
Last 180 Days
Activities settings
In the Activities settings, you can customize how and what kinds of sales- and marketing-related activities are visible in the Activities graph and timeline sections of Sales Intelligence. These selections do not affect your predictive scores.
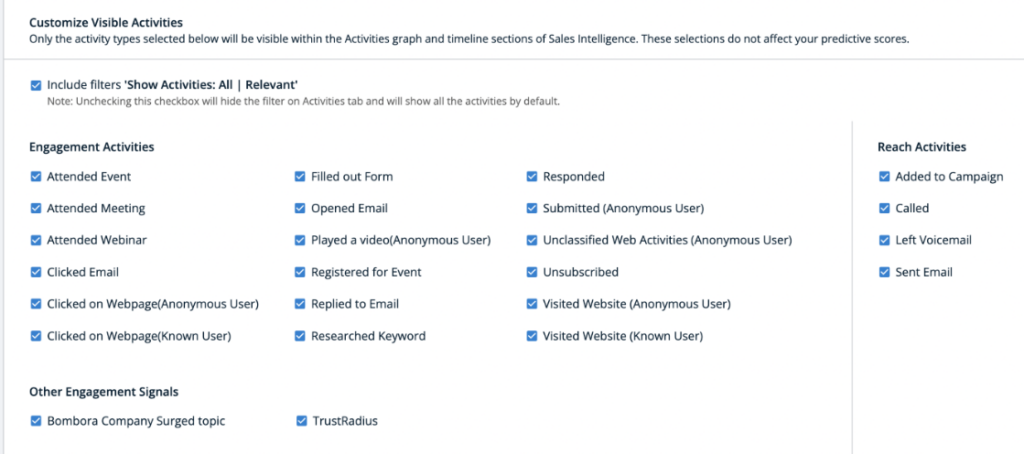
Include filters ‘Show Activities: All | Relevant’: Unchecking this checkbox hides the filter on Activities tab and will show all the activities by default.
Engagement Activities
Attended Event
Attended Meeting
Attended Webinar
Clicked Email
Clicked on Webpage (Anonymous User)
Clicked on Webpage (Known User)
Filled out Form
Opened Email
Played a video (Anonymous User)
Registered for Event
Replied to Email
Researched Keyword
Responded
Submitted (Anonymous User)
Unclassified Web Activities (Anonymous User)
Unsubscribed
Visited Website (Anonymous User)
Visited Website (Known User)
Other Engagement Signals
Bombora Company Surged topic
TrustRadius
Reach Activities
Added to Campaign
Called
Left Voicemail
Sent Email
Persona settings
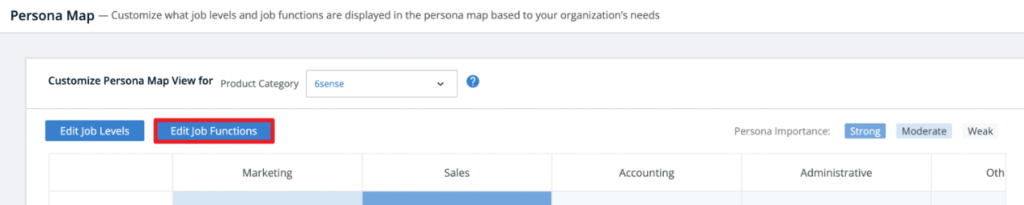
In the Persona settings, you can customize what job levels and job functions are displayed in the persona map on company details pages.
Each cell shows the number of leads and contacts at that account who fall into each engagement type category.
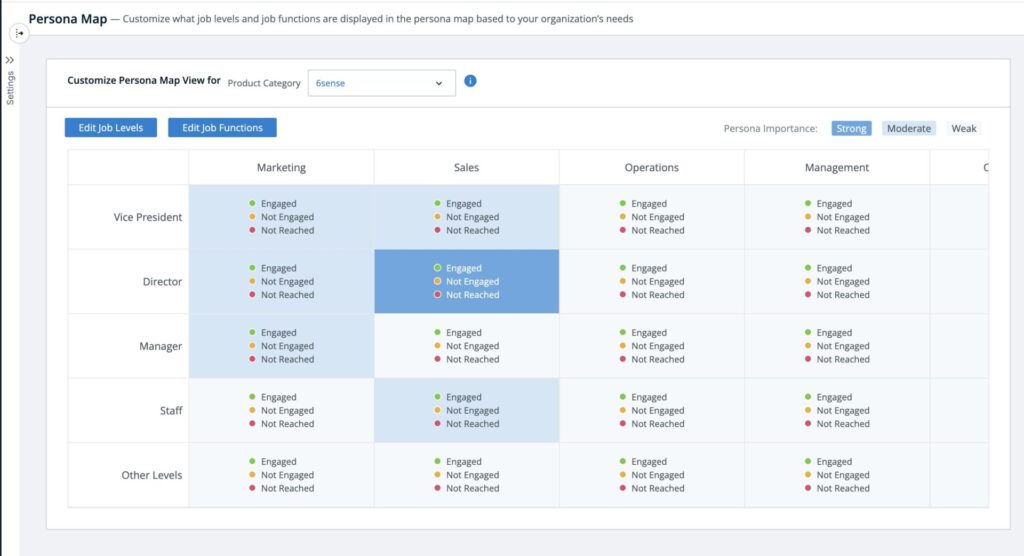
Any users who are not classified into the specified job functions or job levels will instead be included as part of the Other classification.
Any updates to the persona map may take up to 24 hours to be reflected within Sales Intelligence.
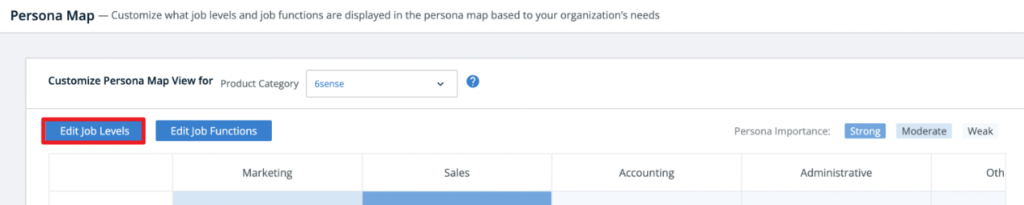
Edit job levels
Click Edit Job Levels at the top of the persona map to choose which job levels to include in the map.
The options are:
Staff
Manager
Senior
Director
Vice President
C-Level
Other
You can move these job levels between the persona map and the Other Levels section by clicking the appropriate option to the right of the job level listed.
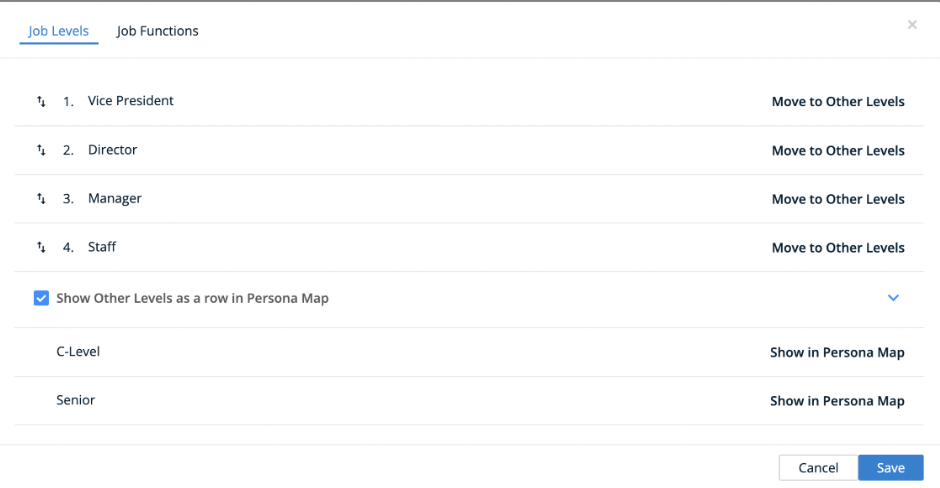
Click the dropdown arrow to show all the job levels listed under Other Levels. You can check or uncheck the box at the top of this list to decide whether to show Other Levels as a row in the persona map.
When you are done editing, click Save.
Edit job functions
Click Edit Job Functions at the top of the persona map to choose which job functions to include in the map.
The options are:
Accounting
Administrative
Arts and Design
Business Development
Consulting
Customer Service & Support
Do Not Contact
Education
Engineering
Finance
Healthcare Services
Human Resources
Information Technology
Legal
Management
Marketing
Media & Communications
Military & Protective Services
Operations
Other
Product Management
Purchasing
Quality Assurance
Real Estate
Sales
You can move these job functions between the persona map and the ‘Other Functions’ section by clicking the appropriate option to the right of the job function listed.
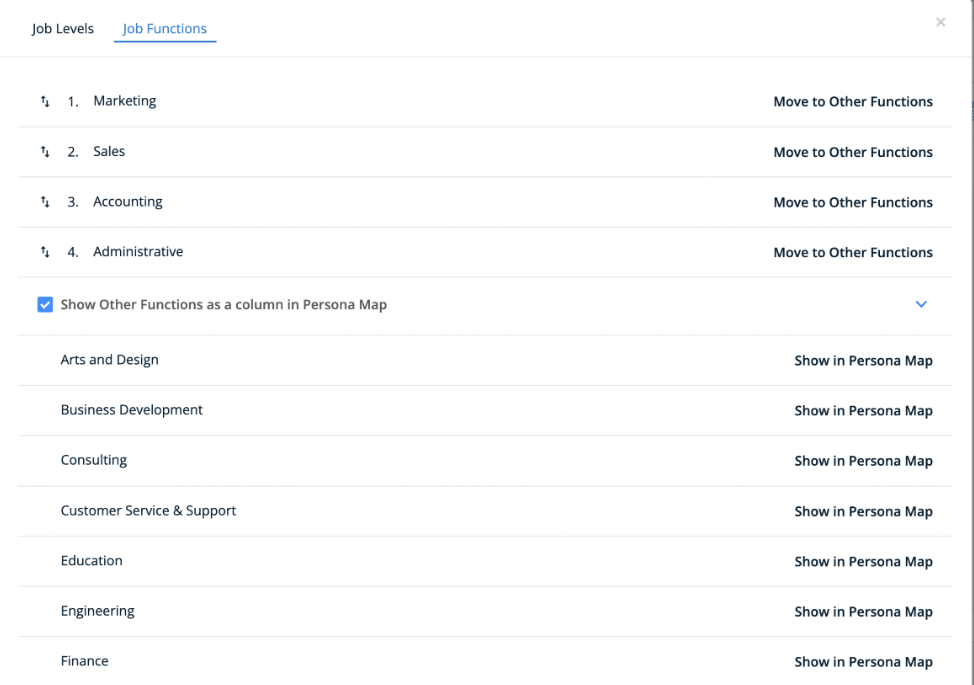
Click the dropdown arrow to show all the job functions listed under Other Functions. You can check or uncheck the box at the top of this list to decide whether to show Other Functions as a row in the persona map, or not.
When you are done editing, click Save.
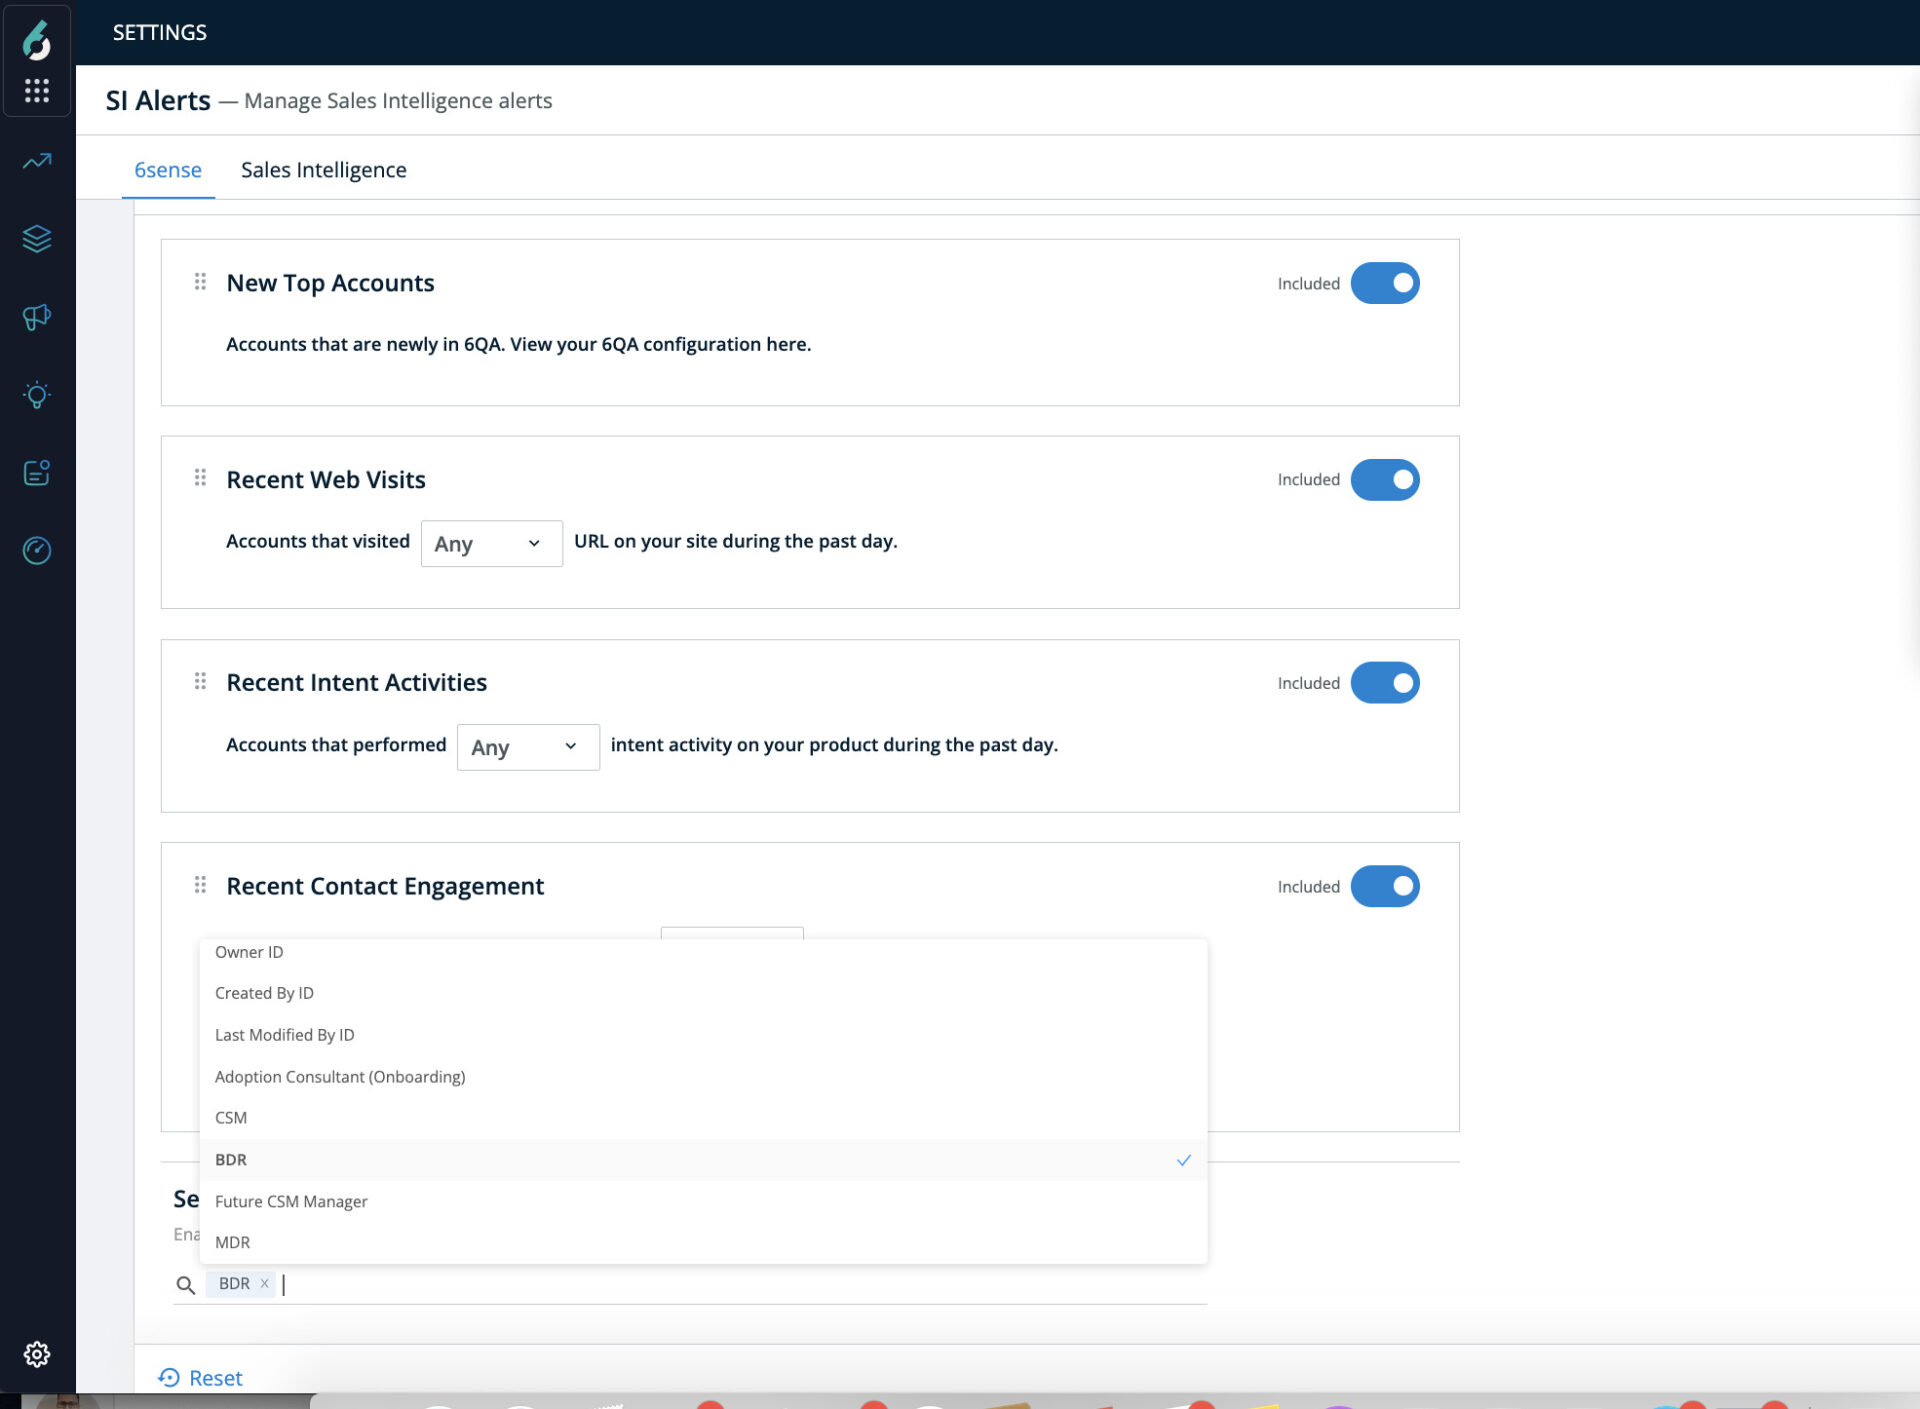
SI Alerts settings
SI Alerts highlight companies (accounts) that your organization wants sales teams, depending on their roles, to focus on. What kinds of accounts are included in an SI alert is controlled by the alert parameters, configured by the Administrator.
In the ABM platform in Settings > SI Alerts, you can toggle on or off what types of data that are used to select the accounts to include in an SI alert. Drag and drop the items to reorder how the items that you select appear in an alert. The parameters will vary based on your SI Subscription.
If your company has set up 6sense for multiple products, you can set up SI alert parameters for each of the products. (Each of those products has its own tab.) If you don’t see multiple tabs, it means that your company purchased 6sense for only one product or configured 6sense to provide insights on all its products as a whole.
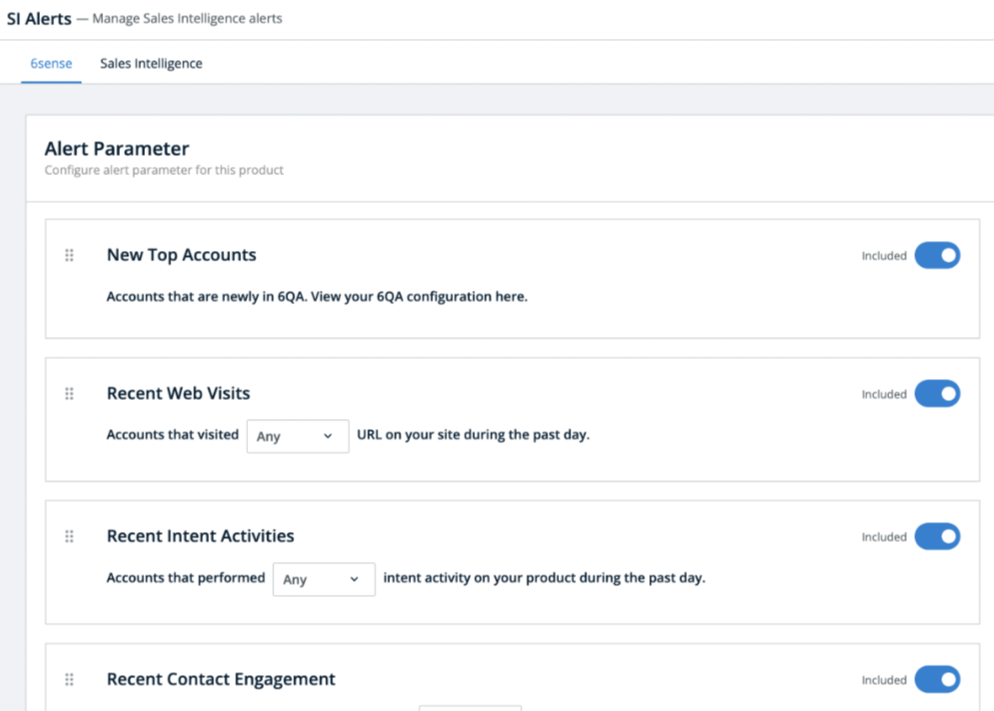
New Top Accounts: Select this to include a prioritized list of accounts that you are most likely to open an opportunity with.
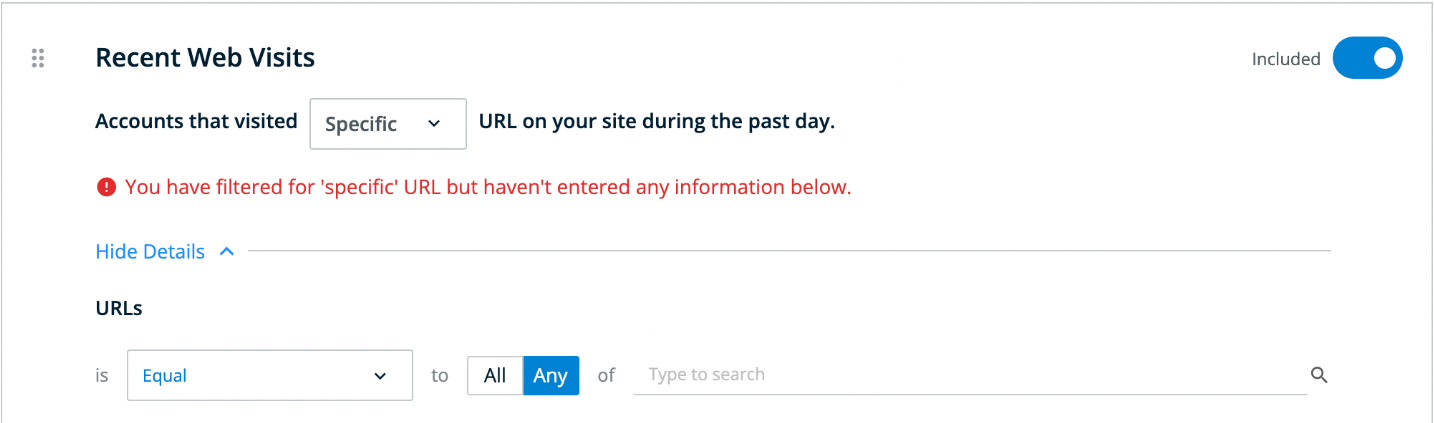
Recent Web Visits: Select this to include accounts that visited a URL on your site during the past day. Select Any or Specific in the dropdown to decide which URLs to target. After selecting Specific, you are prompted to enter one or more of your site’s URLs.
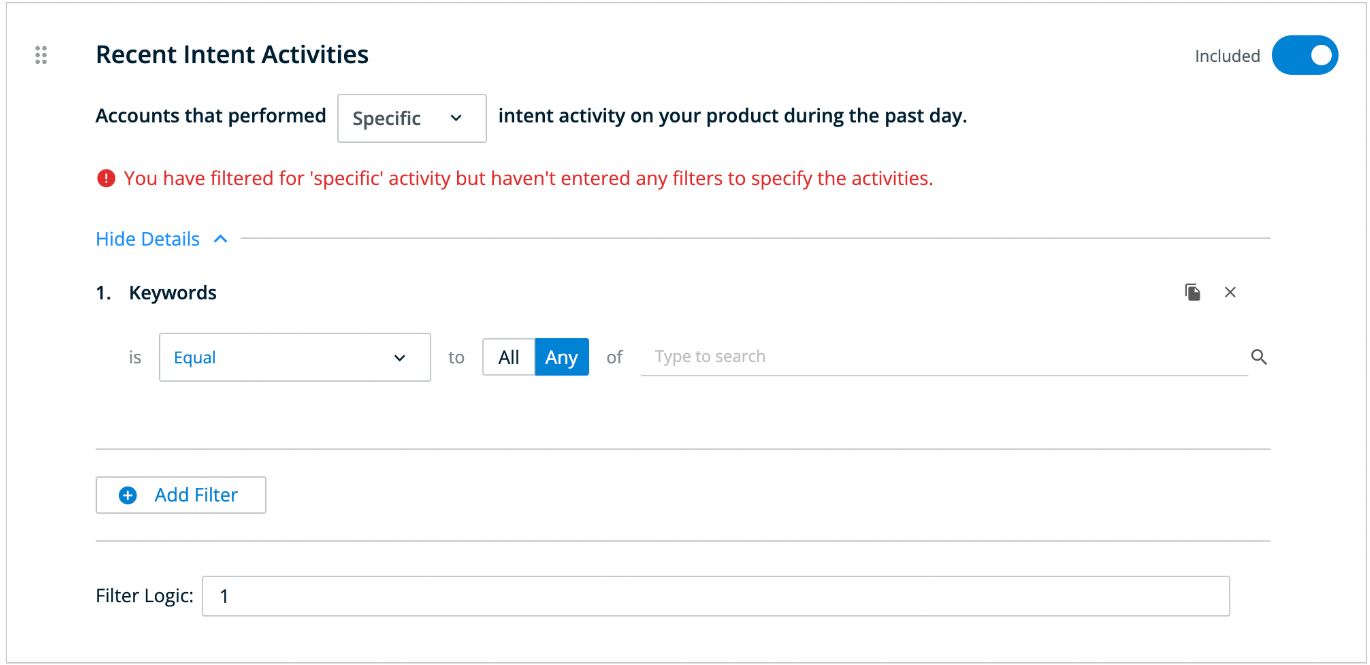
Recent Intent Activities: Select this to include accounts that performed intent activities on your product during the past day. Select either Any or Specific to decide which activities to include. After selecting Specific, you are prompted to enter one or more filters for types of activities performed.
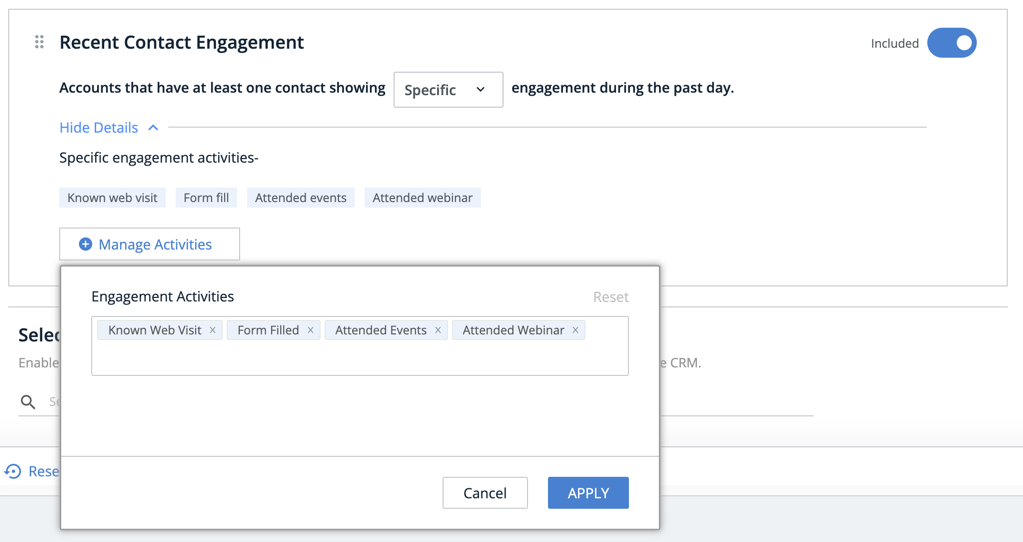
Recent Contact Engagement Activities: Select this to include accounts that have had a trackable engagement activity in the past day. Select Default or Specific to decide which activities to include. The default activities are known web visits, form fills, attended events, and attended a webinar. After selecting Specific, you are prompted to manage the activities by removing some of the default activities or adding other contact activities.
Select Recipients for Default Alerts: Finally, refine what roles will include accounts assigned in your integrated CRM (account owners) as part of accounts included in SI alerts.

If you select no roles, no one will see assigned CRM accounts included in an SI alert.
If you include one or more roles in the searchable list, those roles will include assigned CRM accounts in an SI alert. Roles you can select from are derived from the fields in the account detail page of your CRM (where account ownership is defined).
Use Select Recipients for Default Alerts to screen out CRM account owner roles that you don’t want to receive SI alerts by not including those roles here.
Credits metrics and settings
Credits are used by sales users to unlock contact information and export records into their CRM or SEP.
In the Credits Settings, Admins can track how many credits have been used, and allocate credits to specific users in Sales Intelligence. The following Credits metrics are provided at the top of this page:

Total Credits
Number of Used Credits
Number of Allocated Credits
Number of Unallocated Credits
Expiration Date of Credits: Credits expire 12 months from the first allotment date.
Last Updated Date of Credits Settings
Below the metrics a list of all users is shown, with the following informational columns:
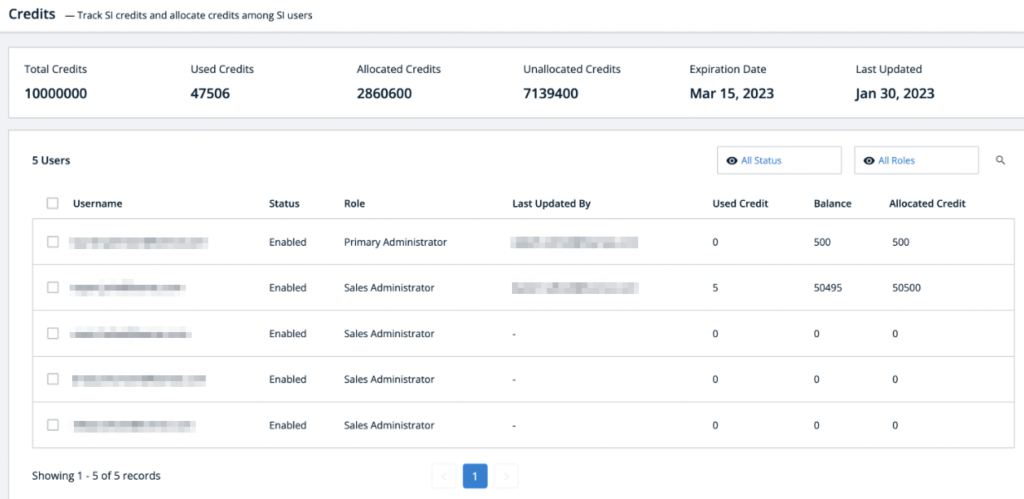
Username
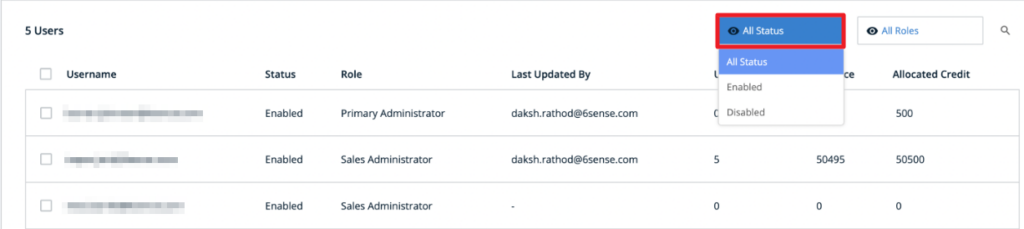
Status: Whether the user is enabled or disabled.
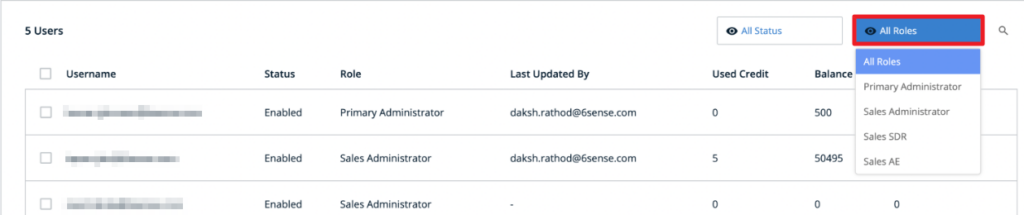
Role
Last Updated By: The last admin to update credits for the user.
Used Credit: The number of credits the user has spent.
Balance: The total remaining balance of credits allocated to the user.
Allocated Credit: The total number of credits the user was allocated.
Filter the list of users by selecting All Status or All Roles to select a specific status or role from the respective dropdowns. Search for a specific user by clicking the magnifying glass icon to the right of the filters.
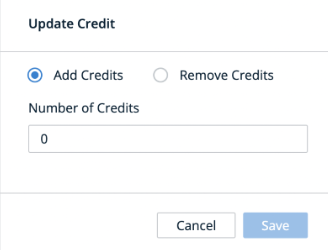
To add credits to multiple users, check one or more users in the list and click the Add Credit button.
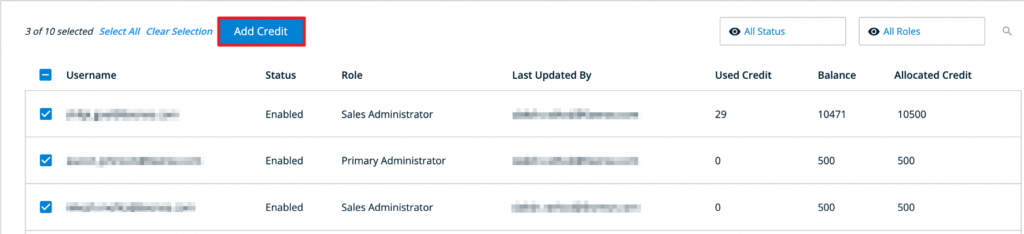
You can also hover over a single user in the list to see and click on the edit icon and add or remove credit for a single user.

You will be prompted to enter a number of credits to either add or remove for each of the selected users. After entering a number, click the Save button.
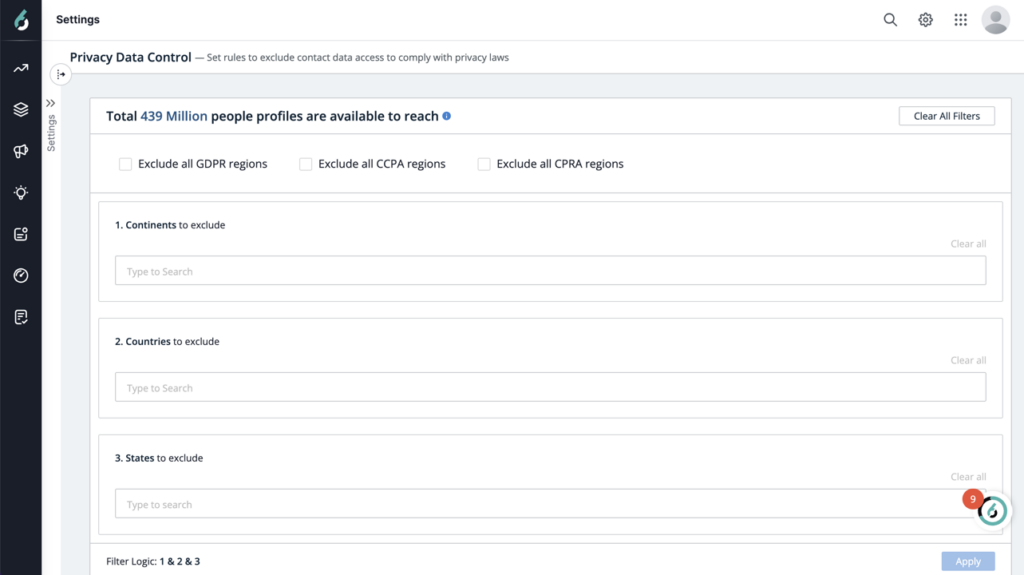
Privacy Data Control
In the Privacy Data Control Settings, admins can set clear rules that restrict which people profile data will be available to the users of your organization, pertaining to any privacy policy laws across the globe.
The following settings are available:
Exclusions: Check or uncheck boxes to exclude data.
Exclude all GDPR region
Exclude all CCPA region
Exclude all CPRA region
Continents: Enter continents to exclude.
Countries: Enter countries to exclude.
States: Enter states to exclude.