This page covers the basic steps for creating a Data Workflow that uses a 6sense segment as its start node.
Use cases for segment-based workflows include:
Acquire contacts and enrich all relevant CRM or MAP records related to a 6sense segment.
Use a combination of 6sense segment filters plus CRM filters to focus on what records to enrich.
Use both CRM account and CRM lead or contacts to focus on what records to enrich.
You can use the following nodes after a segment start node:
T/F Decision nodes
Branching Decision nodes
Enrich CRM Contacts/Leads/Accounts
Update CRM Contacts/Leads/Accounts
Enrich MAP Leads
Update MAP Leads
Acquire Contacts and Push to CRM or MAP or CSV
This example creates new accounts that are exhibiting Competitive Keyword Search and acquire new contacts for them so that the sales team can work these accounts. 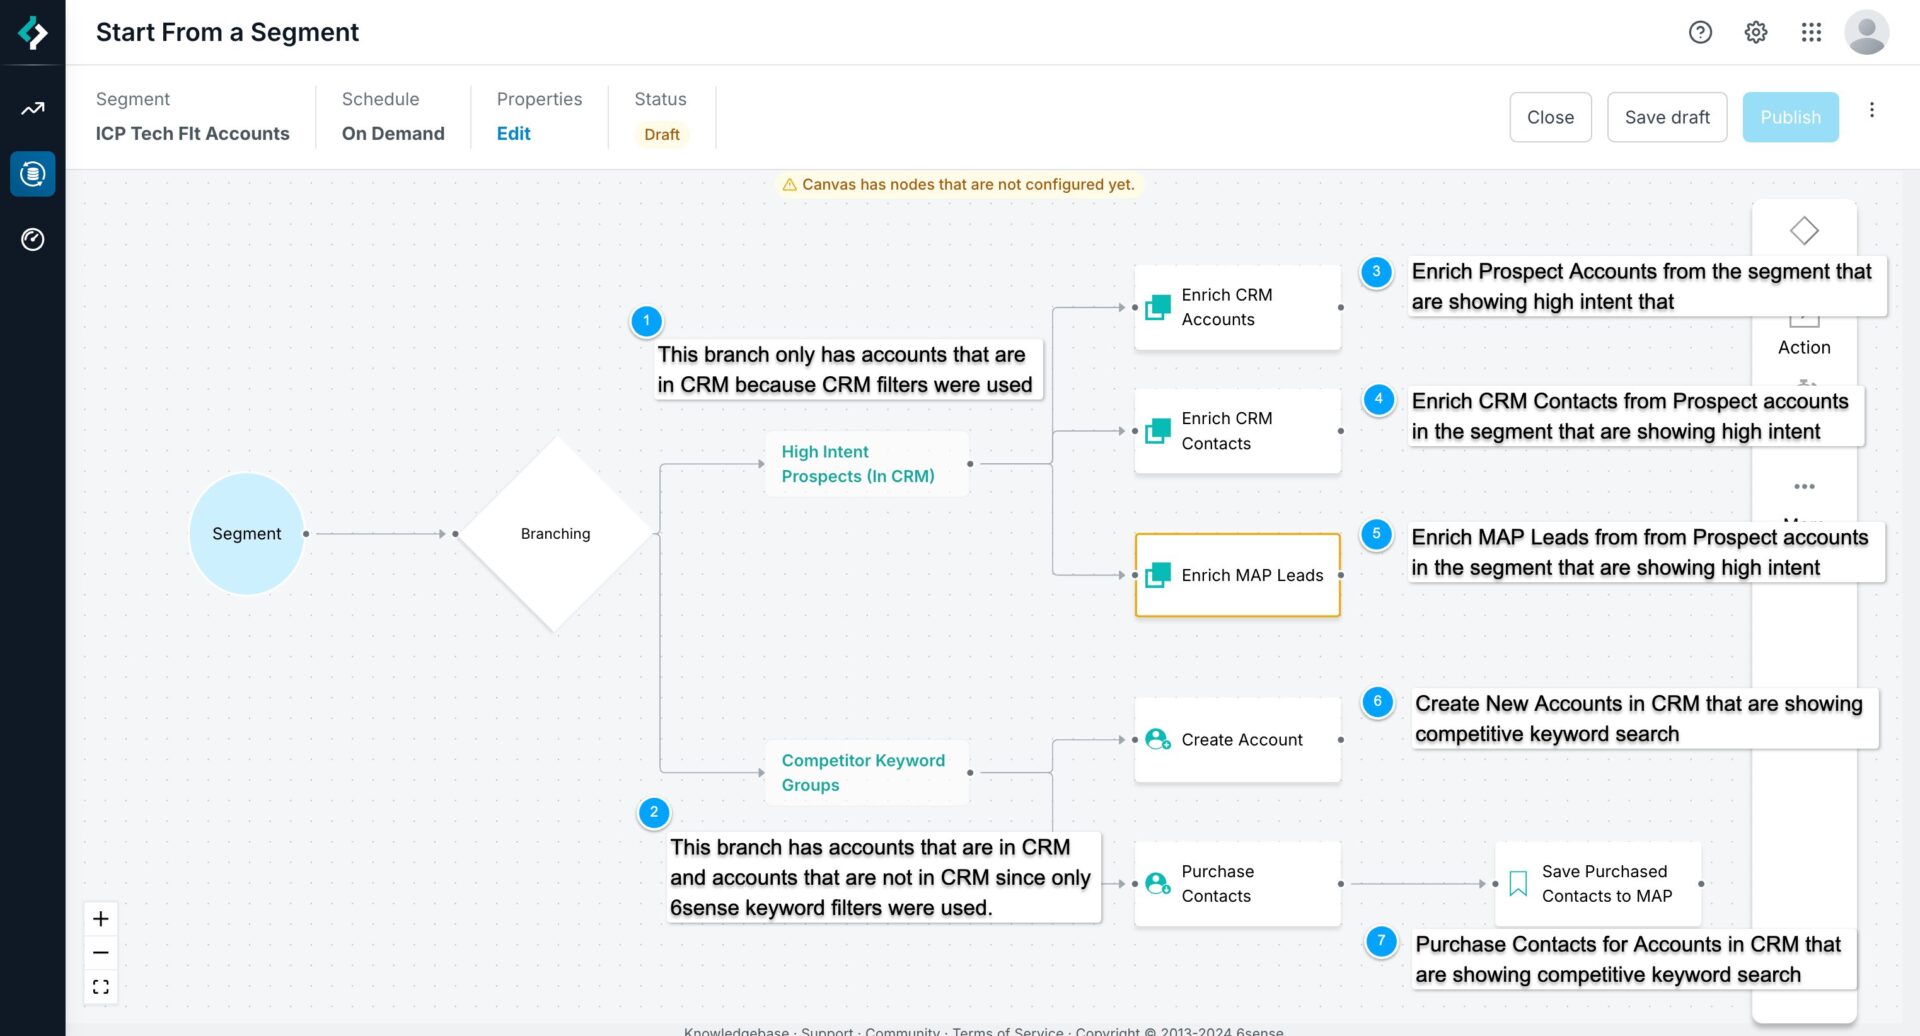
For additional information on configuring nodes used in this example, refer to:
Prerequisites for this example
A 6sense segment. The workflow starts from a set of accounts that you’ve configured using filters. The set of accounts can be a combination of 6sense accounts that are not in your CRM and accounts in your CRM, depending on how you set up the segment. Refer to Segments Overview.
An integrated CRM and MAP. This example uses the Salesforce CRM. Refer to Integrations.
Configured keywords. Refer to Manage Keywords.
Optionally, the 6sense Predictive add-on. Refer to Predictive Modeling.
We recommend that you also refer to Create Data Workflows and Filter Conditions in Segments and Nodes.
Create a segment-based workflow
Go to Data Workflows > Workflows List > Create > Create from scratch. In the Start from Scratch popup enter:
Name: Enter a unique name.
Frequency: For this example, select On-demand.
Start From: Select Segment. The segment menu appears.
Segment: Select the 6sense segment you want to use in the workflow.

Select Create. The new workflow’s canvas opens, showing the segment start node.
(Optional) You can select the start node’s View button to access information about the segment, including its filter settings.
.png)
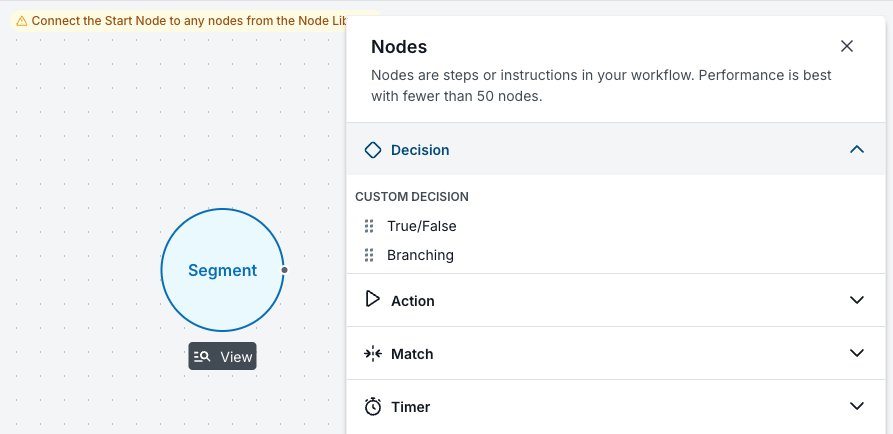
Add a Branching decision node from the Nodes menu.
Go to Nodes > Decision > Branching and drag the dot icons over to the start node.
Define the branching conditions. Select the Branching node’s edit (pencil) icon to open its properties panel.
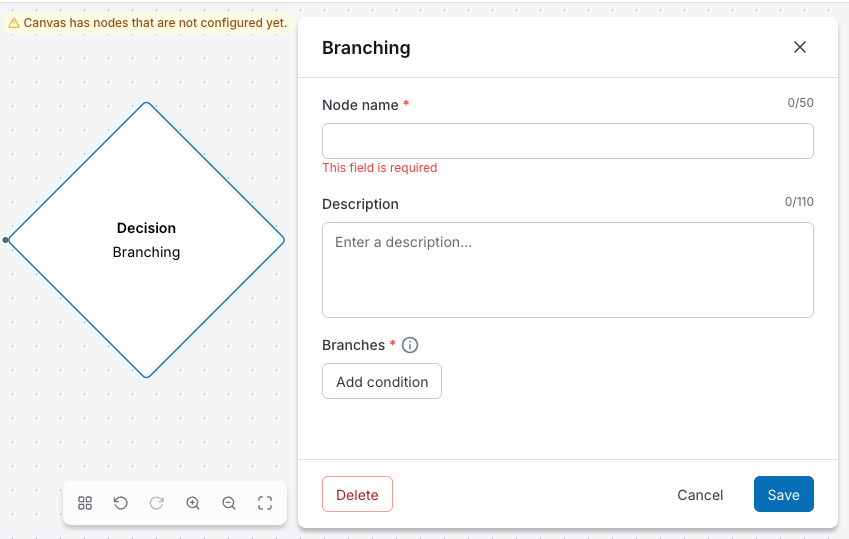
Name the node and select Add Condition. The Edit Conditions panel opens.
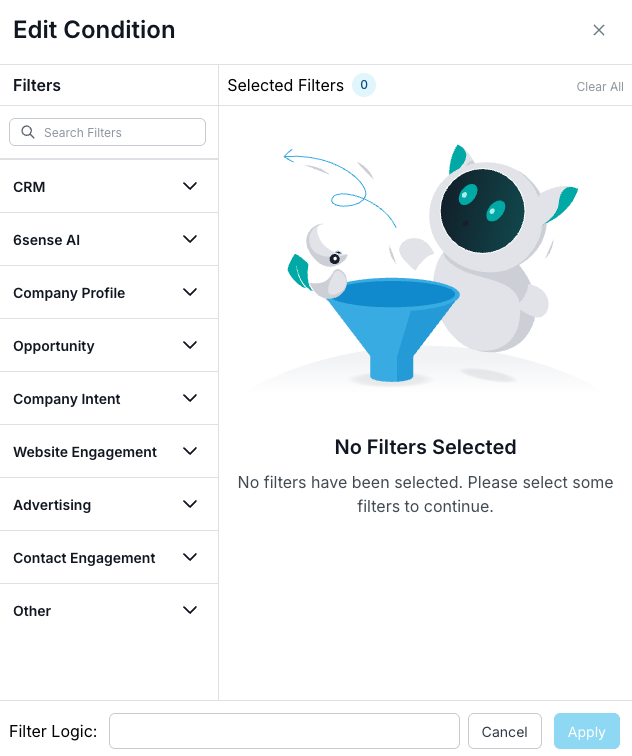
When you start from a 6sense segment, you can use a combination of 6sense keyword, Advertising, AI (requires the Predictive add-on), and other intent data in addition to any CRM filters. Remember that your segment may already have its own filters.
Set up the first branch:
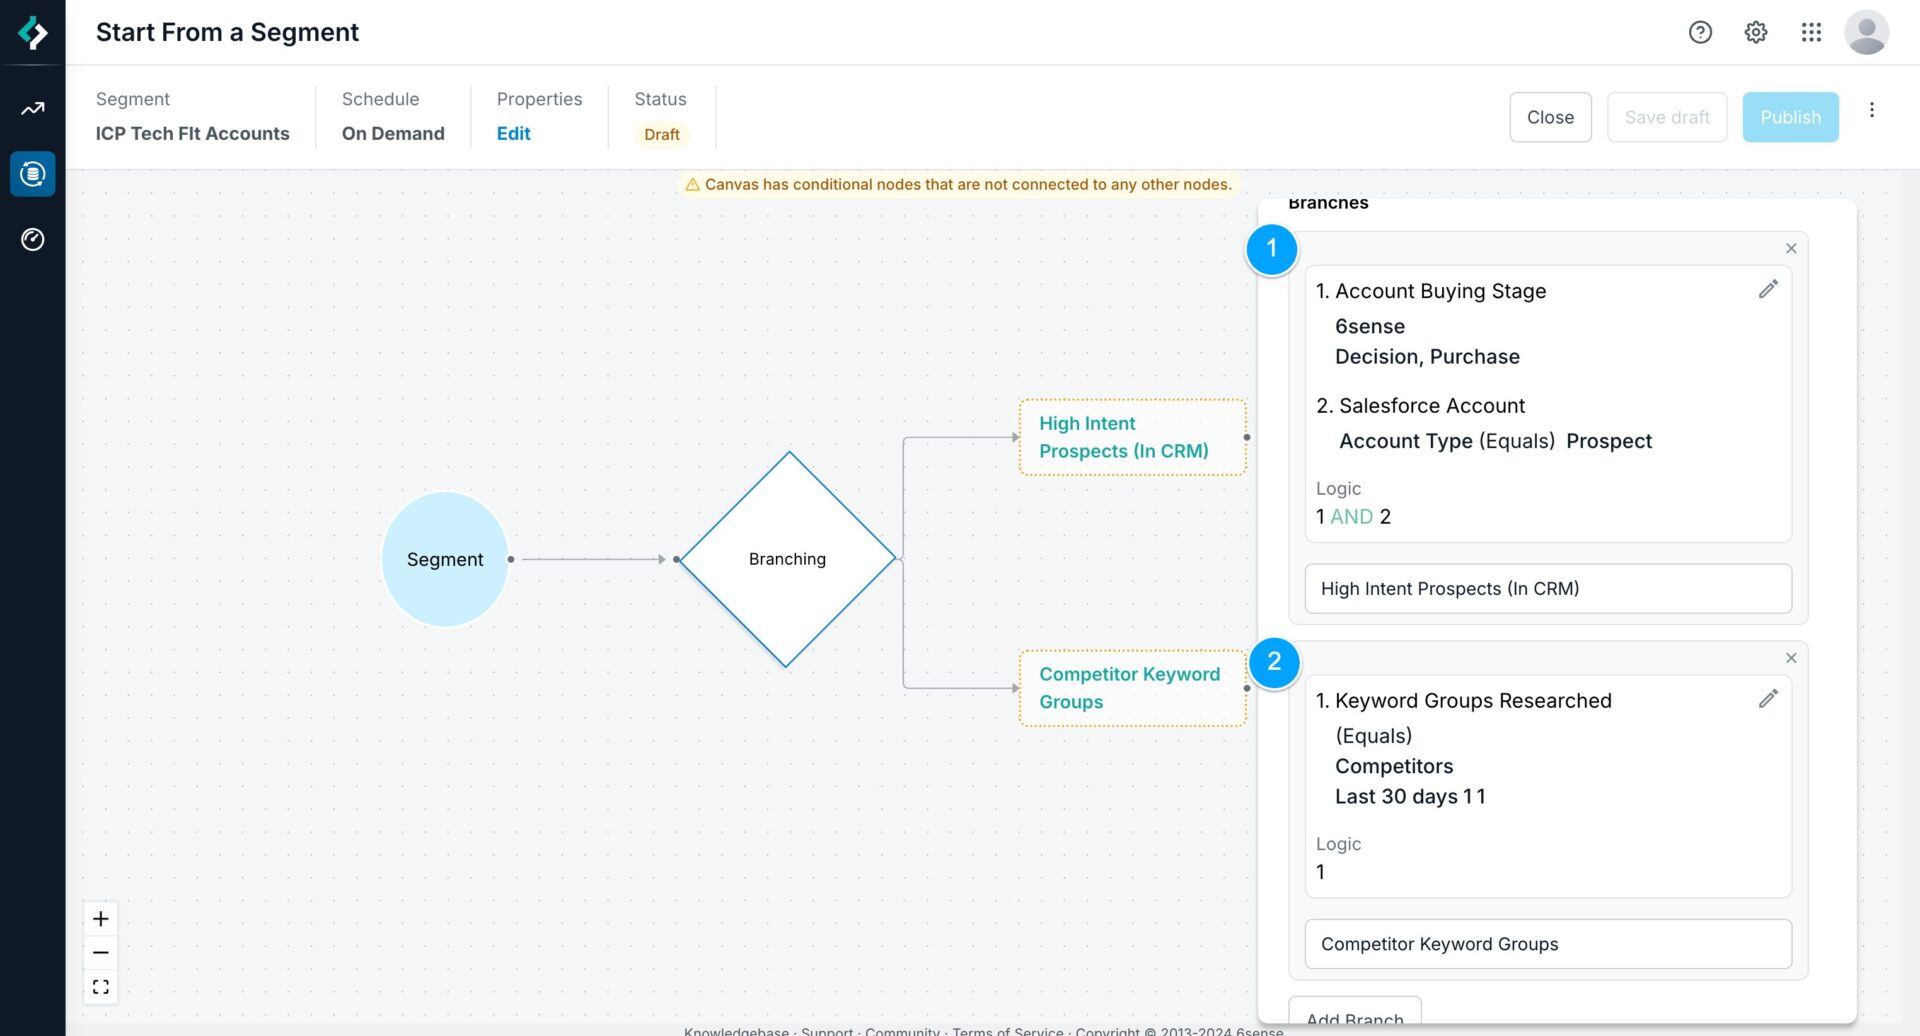
Name the branch “High Intent Prospects (In CRM)”.
Create two filters:
The 6sense Account Buying Stage is Decision or Purchase.
The Salesforce CRM Account type is Prospect.
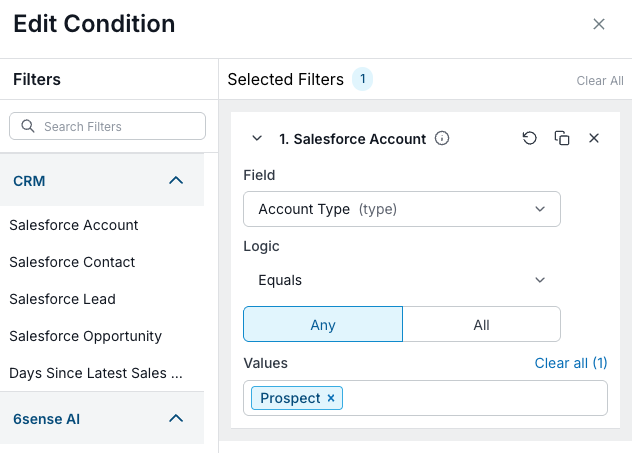
Tip: Because this first branch uses a CRM filter, the output of this branch will only be CRM Accounts.
Select Apply.
Select Add branch.
Set up the second branch:
Name the branch “Competitor Keyword Groups”.
Create a single filter for accounts have exhibited activities for the Keyword Groups Researched equals Competitors, meaning that someone at the account has researched a competitor.
Tip: Because this branch only uses a 6sense keyword filter, the output of this branch can have 6sense accounts AND accounts that are in your CRM.Select Save. The Conditions panel closes and the canvas shows the two new branches.
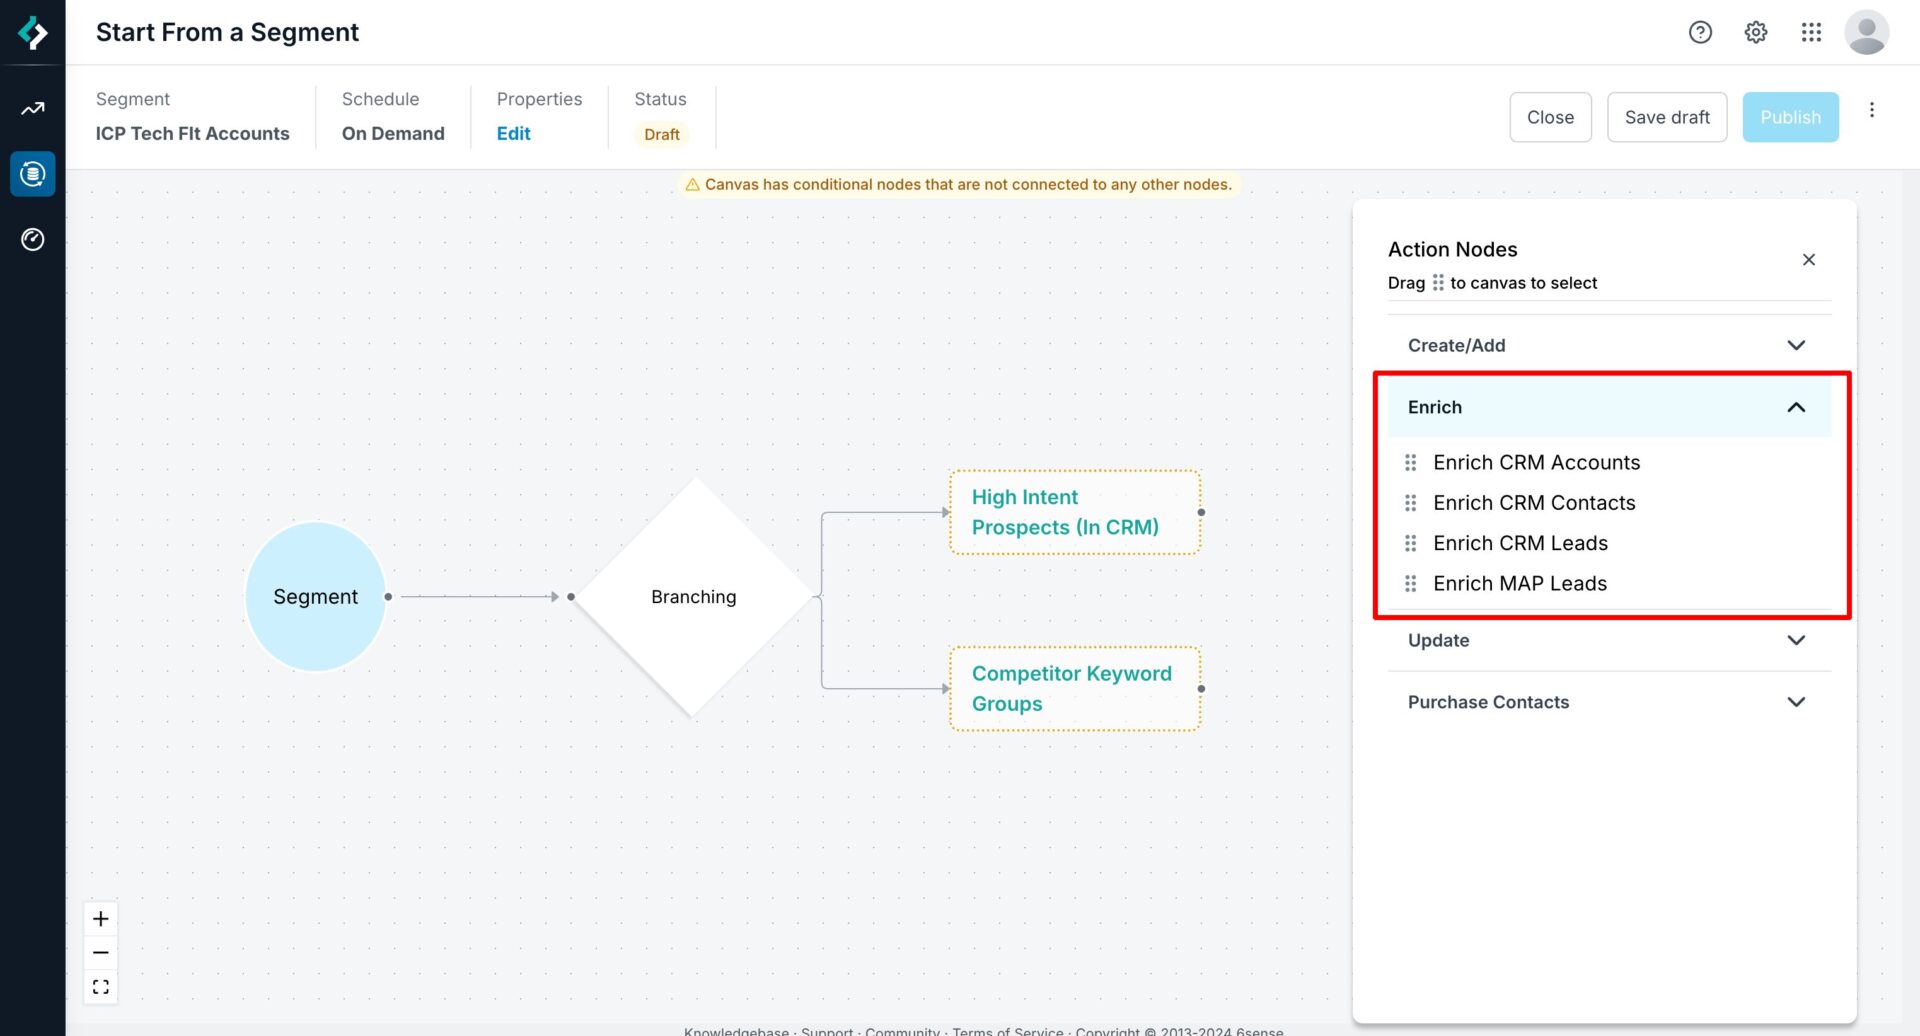
Add multiple enrichment nodes.
Go to Nodes > Action > Enrich in the Node Toolbar. You have the option to Enrich CRM Accounts/Contacts/Leads and MAP Leads.
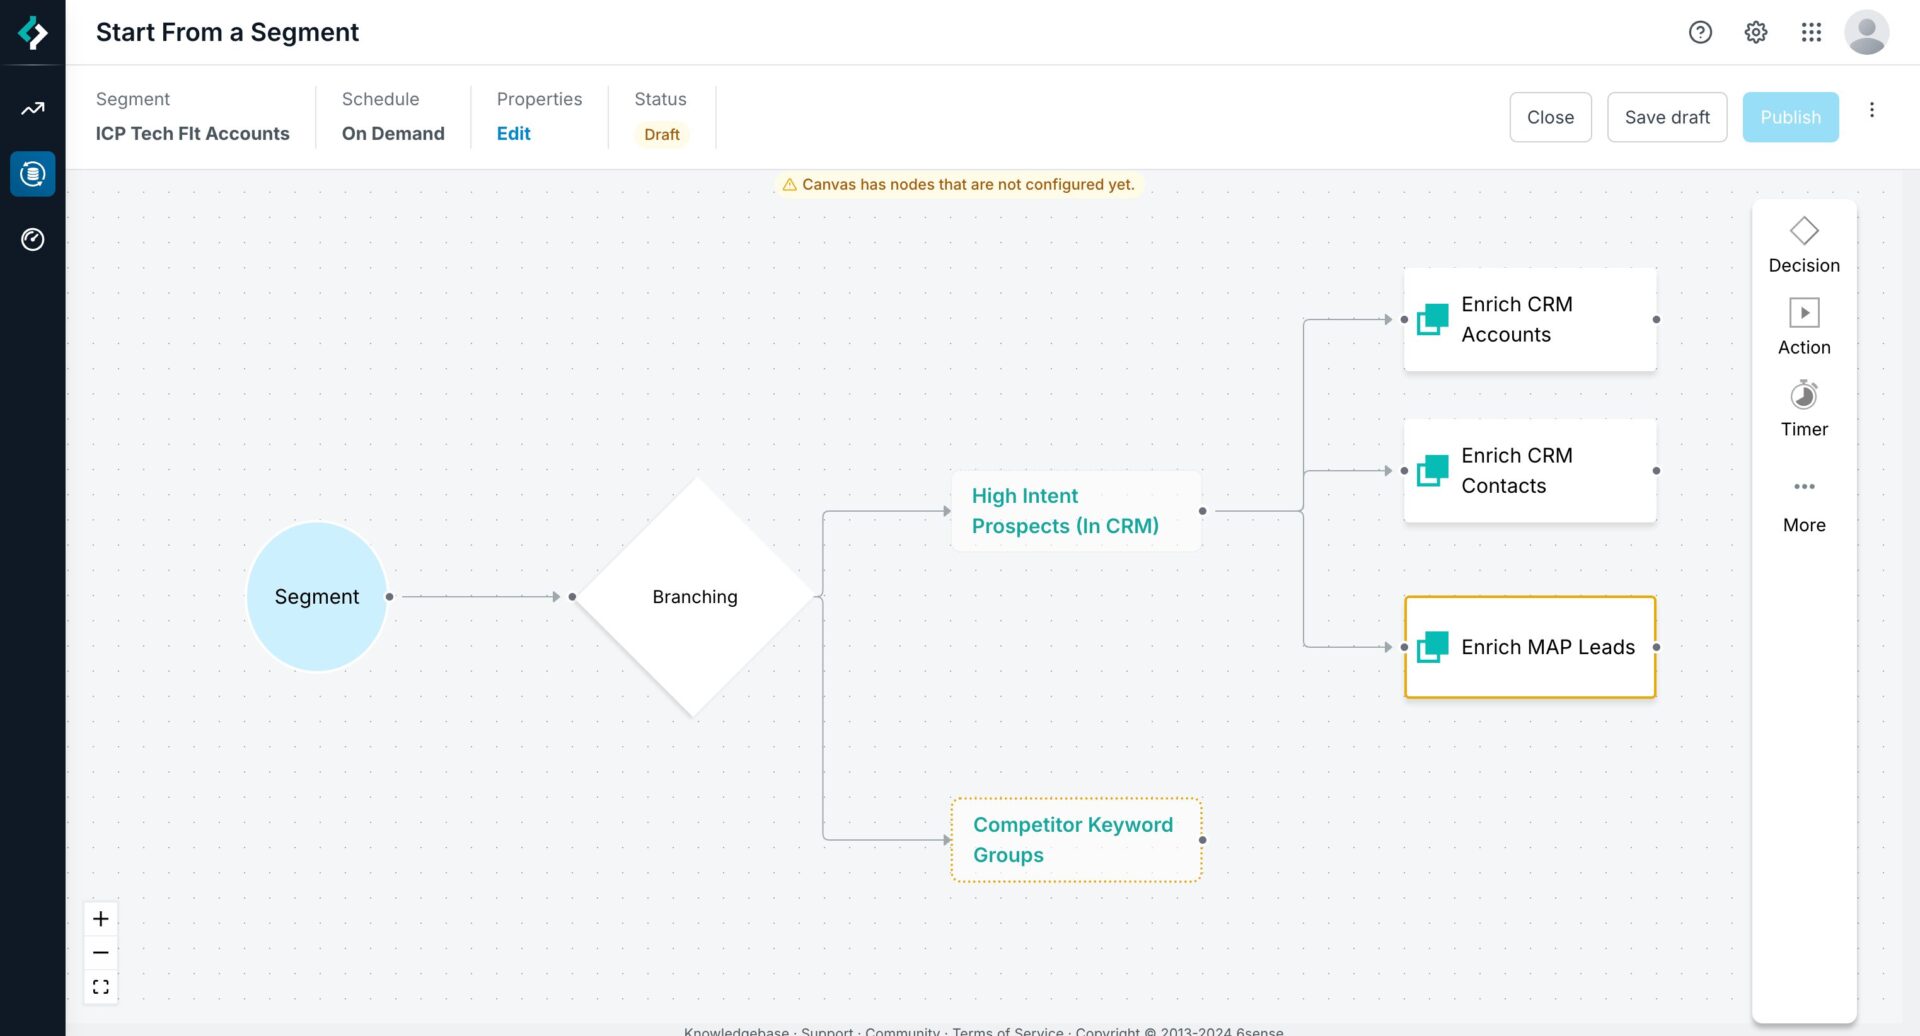
This tutorial uses the first branch of prospect accounts that are showing high intent and enriches all of the accounts, contacts and MAP leads associated to those CRM accounts.
Select the following action nodes and drag them over the High Intents branch:
Enrich CRM Accounts
Enrich CRM Contacts
Enrich MAP Leads
Configure the nodes as needed.
Select the following action nodes and drag them over the High Intents branch:
Create Account
Purchase Contacts
Configure the nodes as needed.
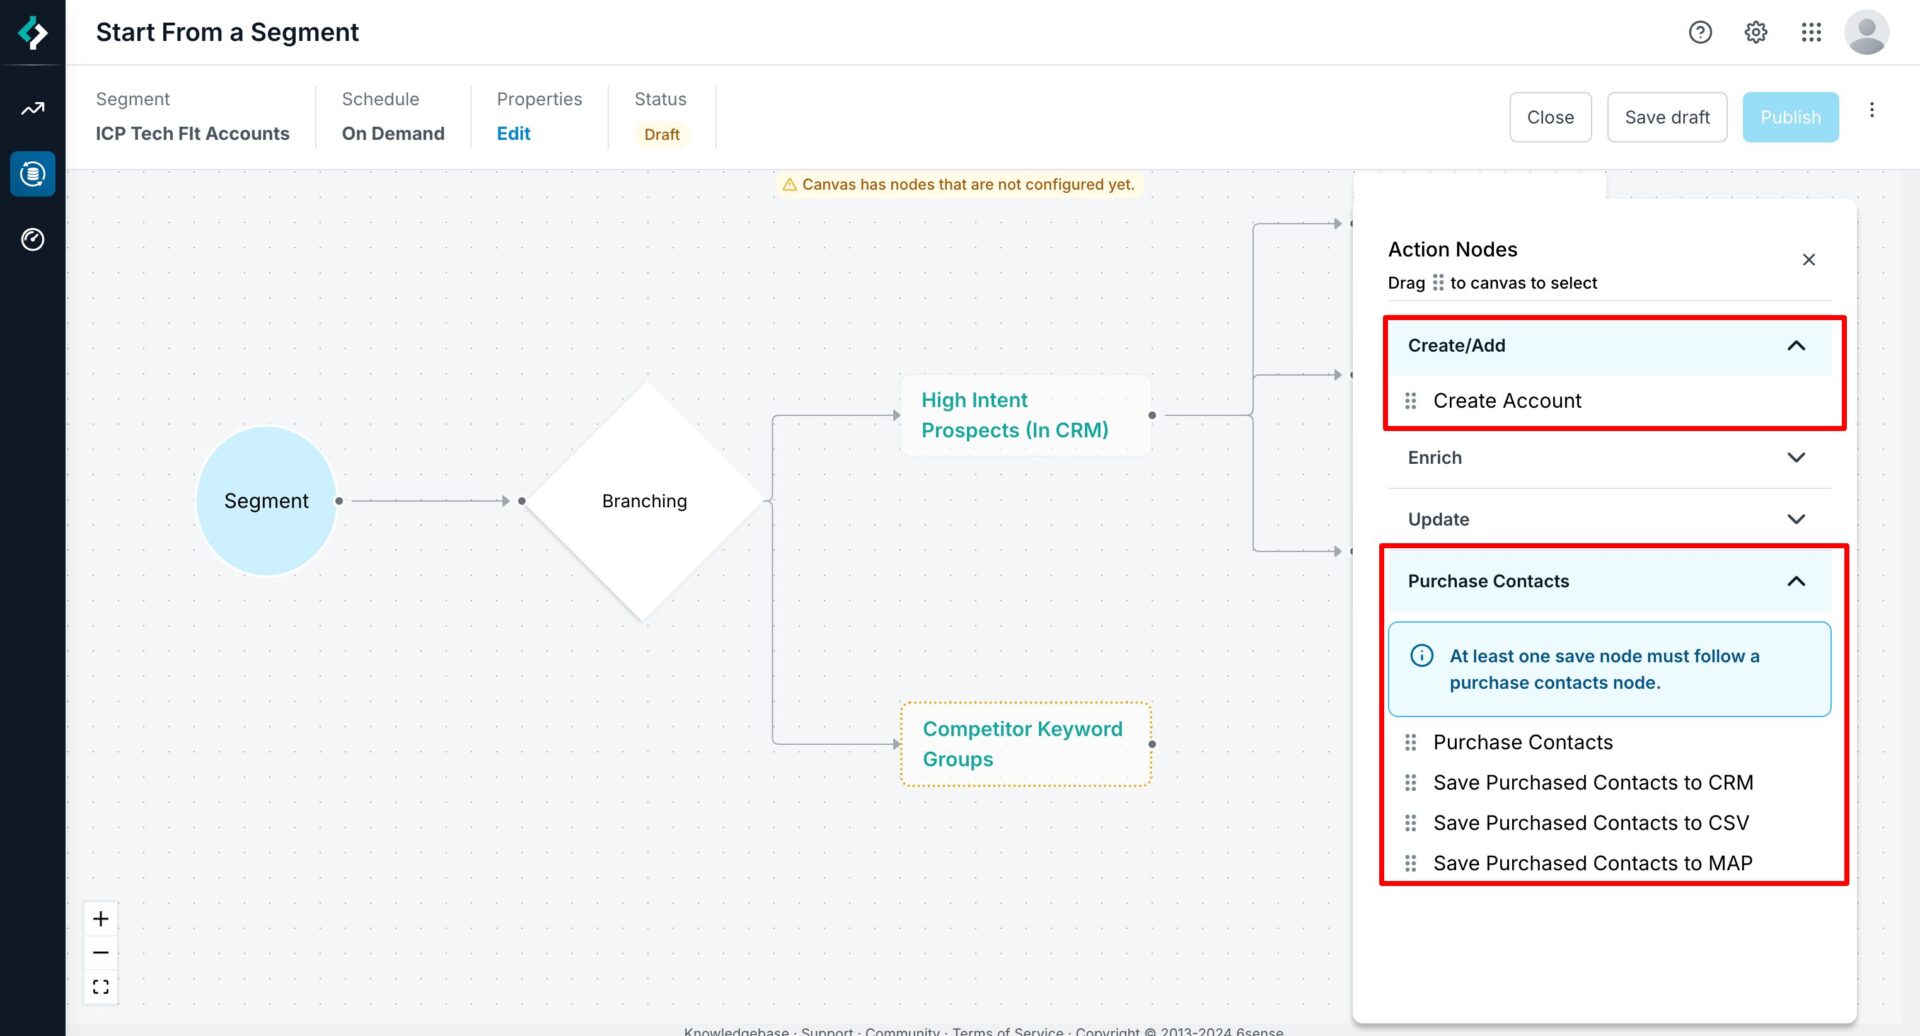
Select the Save Purchased Contacts to MAP node and drag it over the Purchase Contacts node. Configure the node as needed.
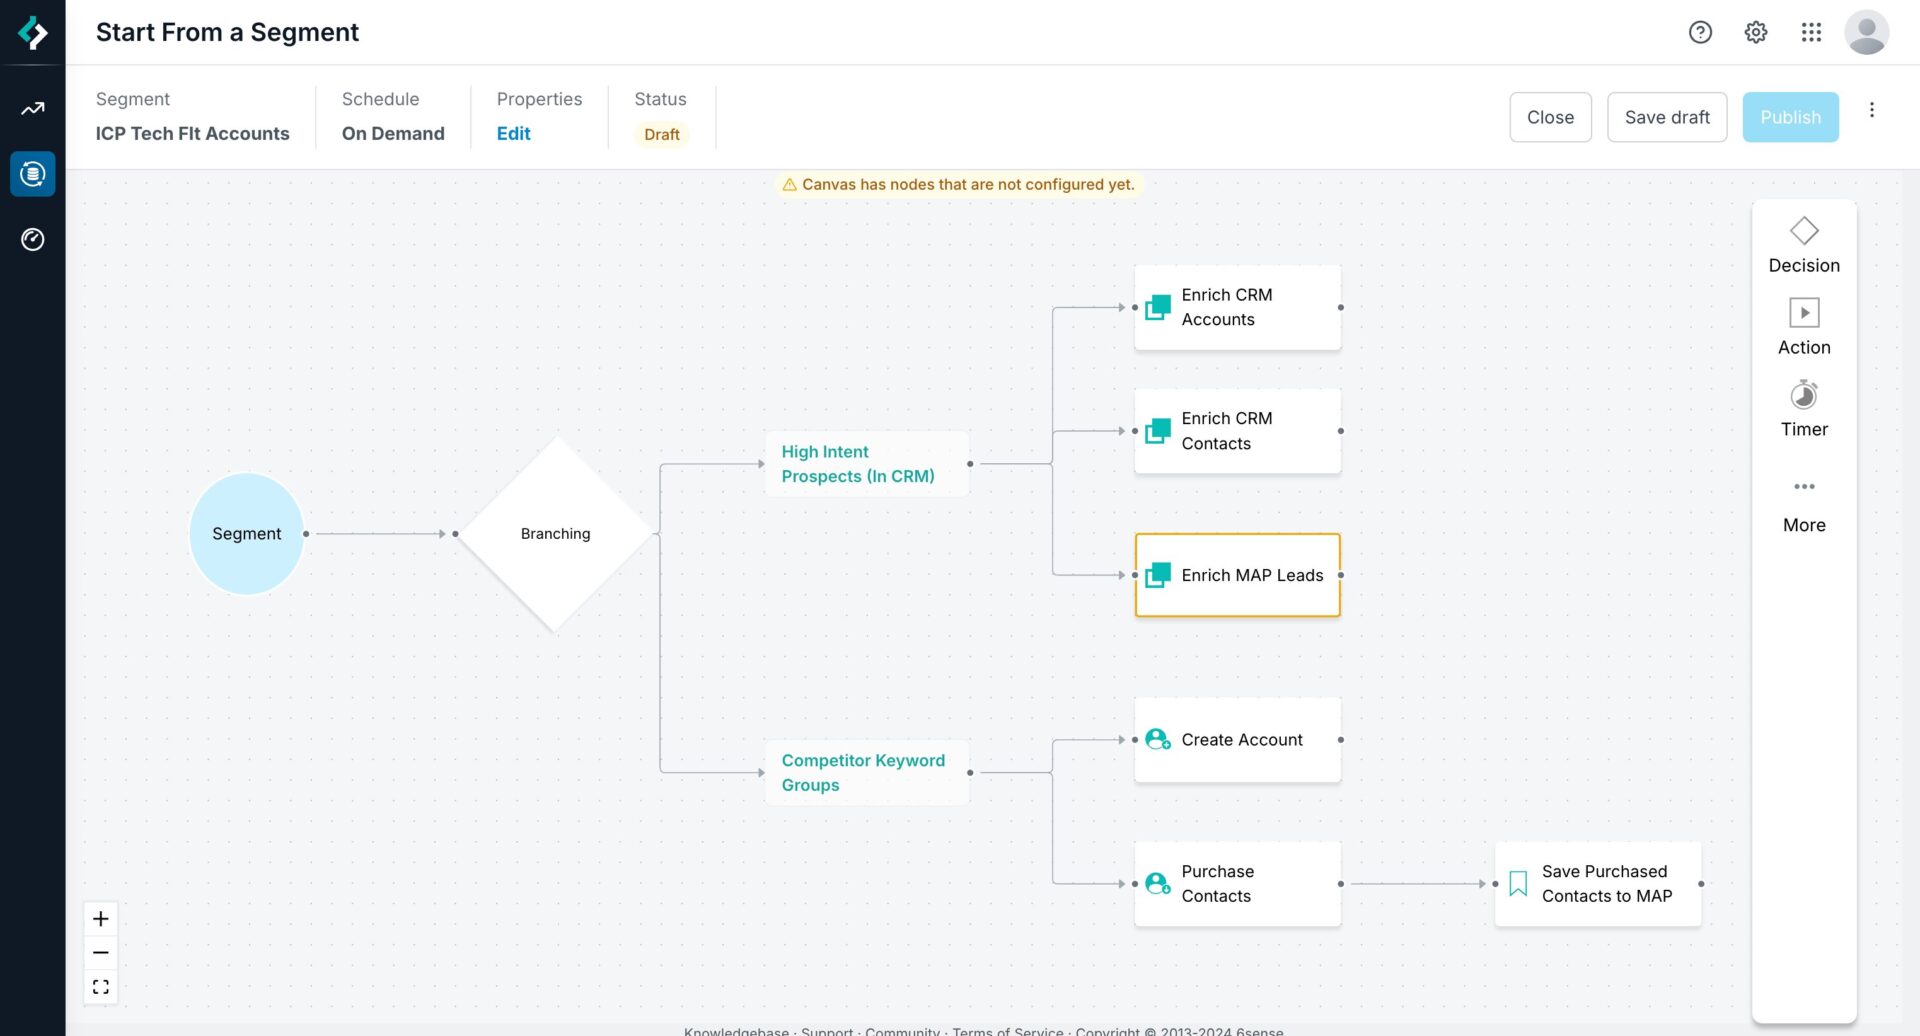
The workflow should now be ready to test.
Save the draft.
Select Preview to see how the workflow operates.