6sense Orchestrations will sunset in 2026. Starting this spring, we’ll begin rolling communications asking you to migrate all Orchestrations to Intelligent Workflows. You'll be notified by email when your migration window begins. Once notified, you will have 12 weeks to complete the migration. We will provide access resources that help make the process smooth and simple. Refer to Migrate Orchestrations to Intelligent Workflows.
This guide is a step-by-step description of how to set up orchestrations to purchase new contacts via 6sense from our integrated contact data providers.
In this orchestration, 6sense identifies contacts that do not exist within your integrated CRM and MAP databases (either as contacts or leads), but that may be available via 6sense contact data providers. 6sense uses email addresses as unique identifiers of contacts. In other words, 6sense will not identify any contacts for purchase that share an email address with a contact or lead currently existing in your integrated CRM and MAP. This orchestration then offers qualifying contacts for purchase manually or in an automated cadence based on additional criteria you set up in your orchestration to qualify relevant contacts.
Note: Due to GDPR and related data privacy regulations, this Orchestration does not support the following regions: UK, Brazil, Switzerland, and Canada. For more information, see Enabling European Union (EU) Contact Data in 6sense Orchestrations.
This orchestration capability is available for Orchestrations subscribers for any of the CRMs and MAPs that integrate with 6sense.
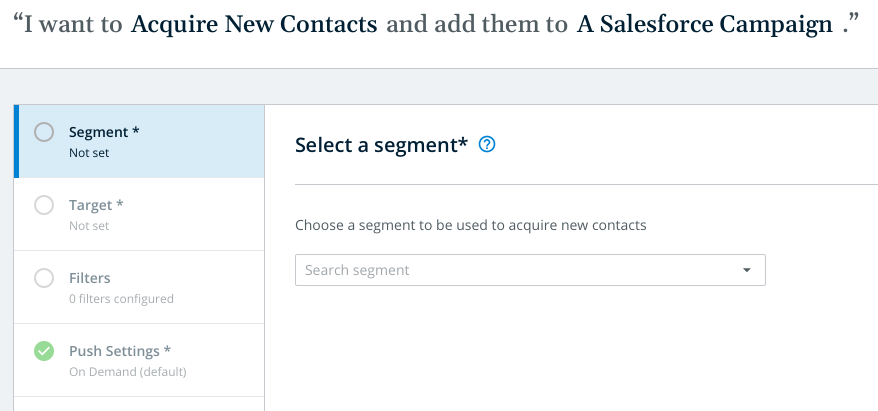
Note that the Orchestration described below targets a Salesforce campaign, but this process is the same for other CRM/MAP objects.
Orchestration Setup
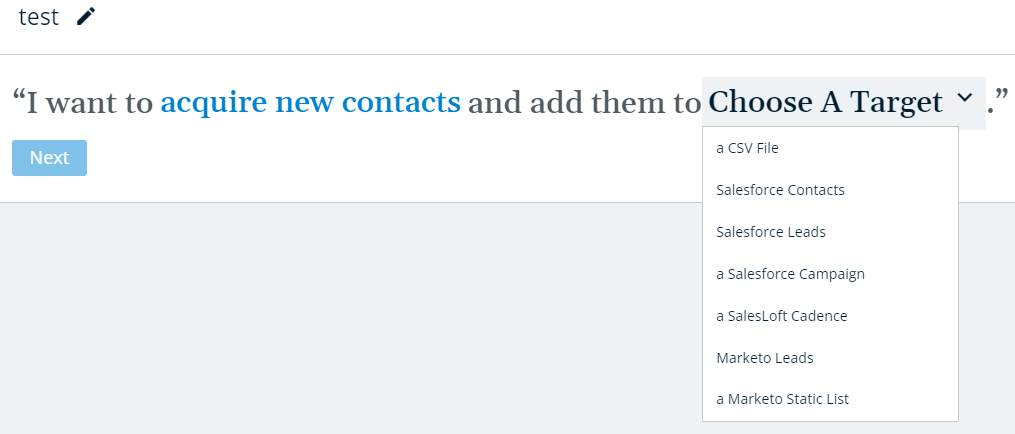
First, select the orchestration goal related to acquiring new contacts, and name your orchestration. Select from the list of available targets where you would like to send the purchased contact audience which depends on your CRM and MAP system. You can also select CSV download which would put the purchased contacts in a file and make it downloadable via the orchestration interface.
Click Next.
Segment
Select a 6sense segment whose accounts would be considered when picking new contacts for purchase.
Target
Select a campaign to target and choose whether you want to create leads or contacts with the new contacts purchased.
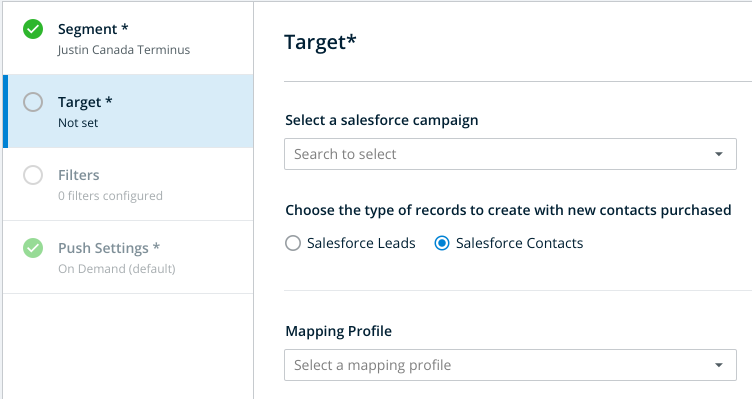
Select a Mapping Profile. When configuring the Mapping Profile for Leads/Contacts, consider mapping the Lead/Contact Source and Lead/Contact Source Type 6sense values to corresponding fields in your CRM/MAP.
Doing so ensures that the preset value of “6sense” is pushed for Lead/Contact Source every time a contact is purchased and added to your CRM/MAP. Mapping Lead/Contact Source Type to a corresponding field ensures that the preset value of “Orchestration” is pushed every time a contact is purchased through Orchestrations and added to your CRM/MAP.
If a contact is purchased through the 6sense Sales Intelligence iFrame in your CRM, then the preset value of “Sales Intelligence” is pushed instead of “Orchestration” (see the FAQ on Sales Intelligence here).
For information on how to configure your Mapping Profile, view Setting Up Orchestration Mapping Profiles.
Filters
Apply any supported filters to constrain the new contacts that get selected.
Users with the Advanced package have access to the “6sense Contact Profile” filter. If you have multiple product models with 6sense, you will need to select a Product Category.
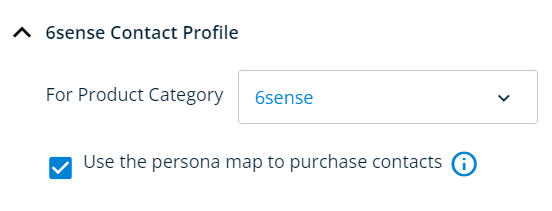
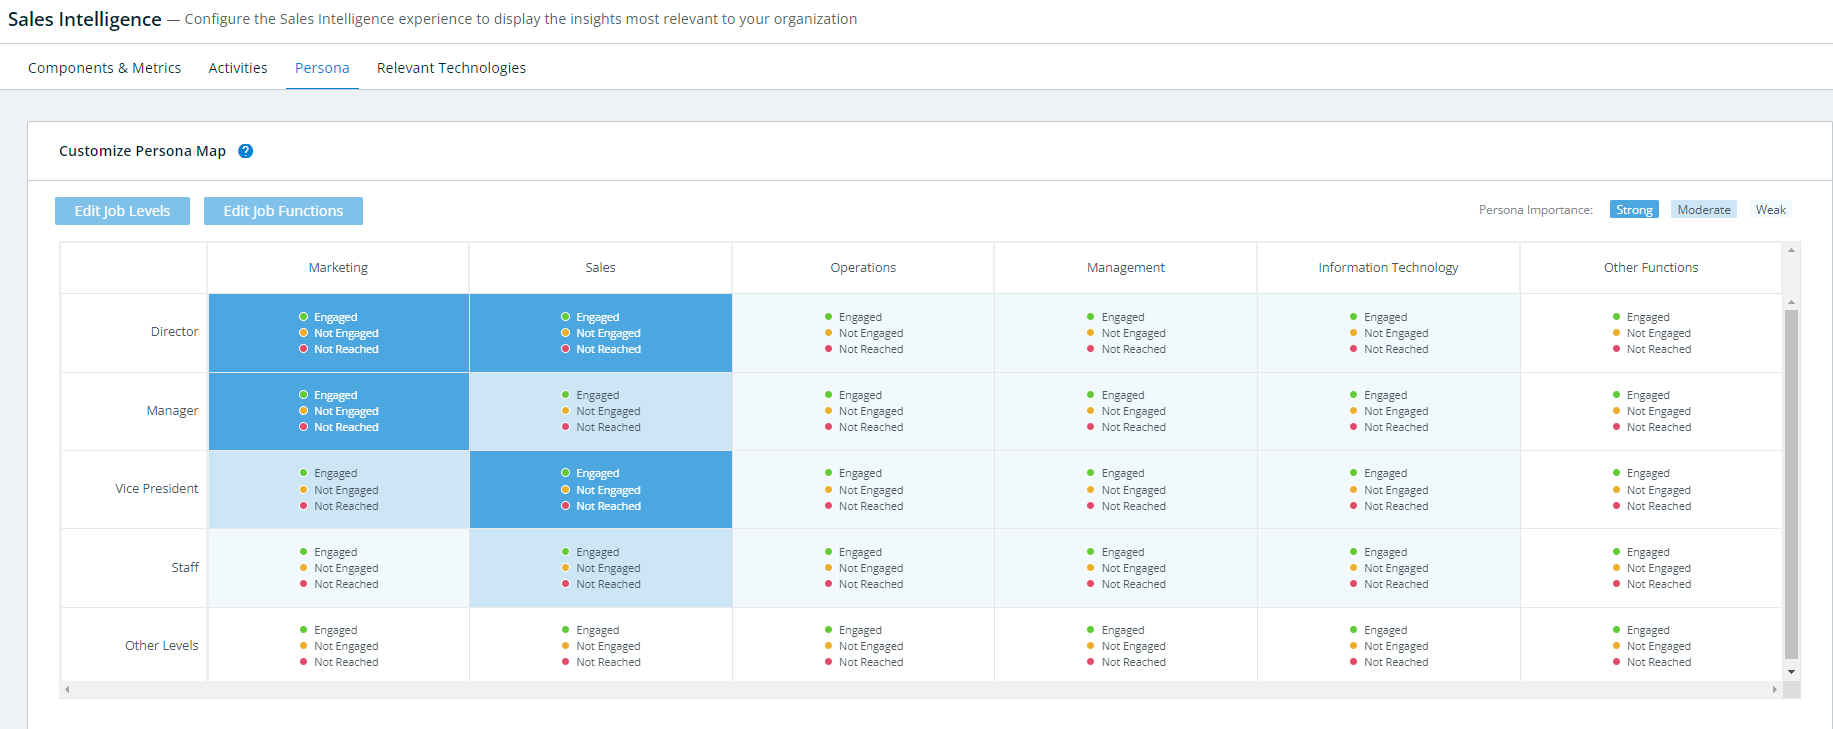
If you want to use the persona map to purchase contacts, check the box at the top of this section. Checking this box ensures the purchase of contacts in the order of priority specified in the Persona Map, which you can configure in Settings > Sales Intelligence > Persona.
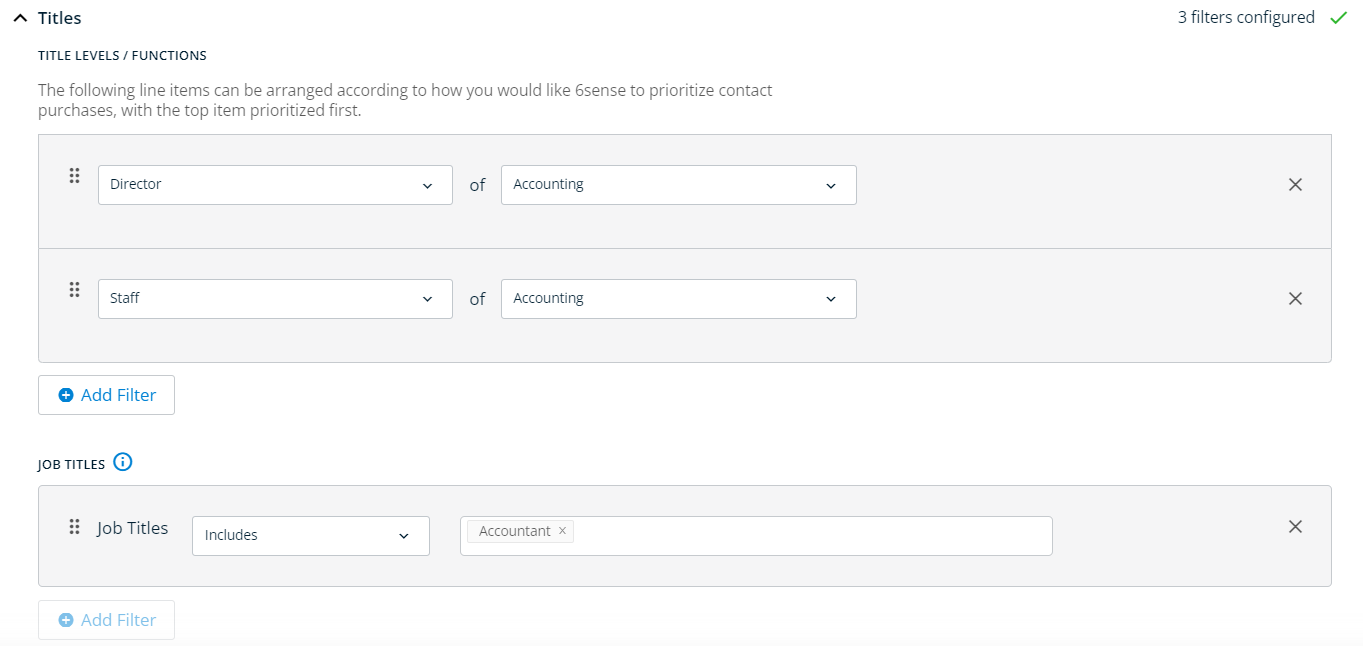
Under Titles, you can select filters for specific Job Titles/Levels/Functions for the audience you want to add. You can add as many filters as you like and arrange them in order of priority.
The Job Titles selection can either include or exclude the specified Job Titles. If you specify Job Titles to include, 6sense only adds contacts with those Levels/Functions that contain the title words specified.
For instance, in the screenshot below, 6sense would only purchase those Directors of Accounting and Staff of Accounting who have the word “Accountant” in their Job Title.
Under Geography, you can enter filters for specific locations to limit audience to. Enter as many filters as you want and arrange them in order of priority. You can choose to either include or exclude specific locations.
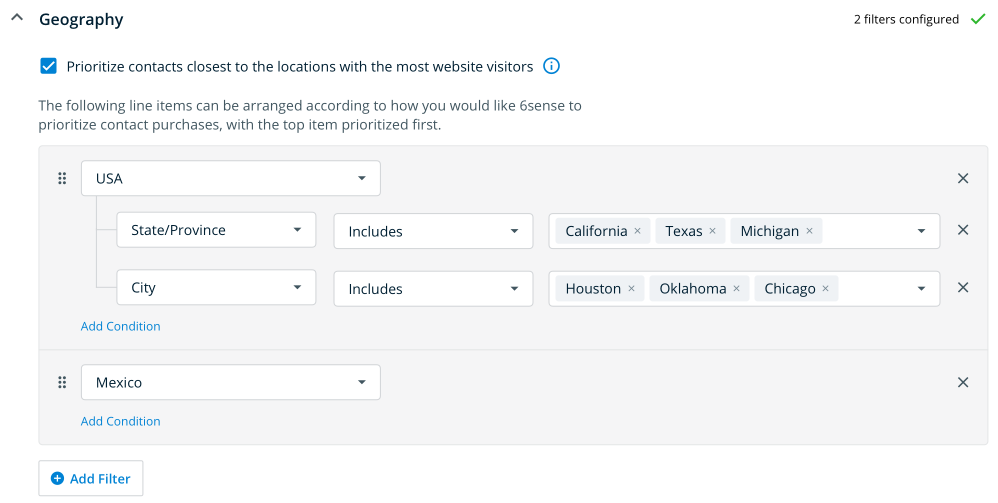
You can also choose to prioritize contacts which are closest to the locations with the most visits to your website by checking that box.
Under Other Options you can select additional limitations to the contacts you want to purchase, including email confidence grades.

At this stage you can also pick how many contacts you would like to consider per account within an orchestration run so that you do not end up with a number of contacts all for just one account and of not so much relevance.
Push Settings
In these settings you can select how often to run the orchestration. By default, the orchestration do NOT run on a regular basis. In this default setting, new contacts are only ever be purchased by 6sense when a user navigates to the Orchestration’s Preview and explicitly initiates a run.
Otherwise, you can choose to schedule the Orchestration to run every day, or on a certain day each week.
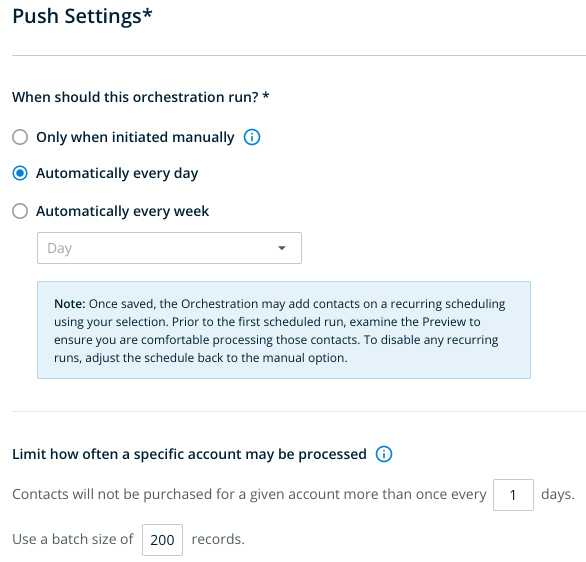
Additionally, you can configure how often the orchestration includes new contacts from an account. This is useful when you want to ensure some time gap before additional purchases at any given account. You can configure this by entering the number of days you want an account to not be selected for purchasing new contacts.
Click Review and Save once you have finished configuring the orchestration.
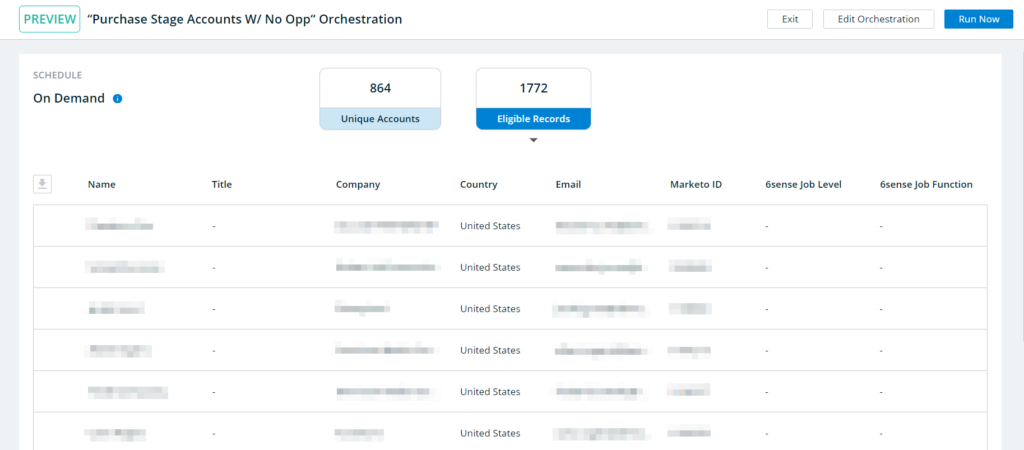
Preview & Run Orchestration
The Preview shows a sample of up to 100 records that match the Goal and Type configurations for the Orchestration. The full list of account records that would be considered can be downloaded using the icon to the left of the Salesforce ID column.
Clicking Run Now triggers the Orchestration to begin running within the next hour. This option is always available, whether the Orchestration is schedule to run on a daily or weekly basis, or if it is configured to run only when a user clicks on Run Now.
There are costs associated with each contact purchase. Check the allowance that you have purchased from 6sense in your contract. Credits do not rollover, and purchases are subject to overage charges beyond your subscribed allowance. The orchestrations operate based on contract purchase limits described in FAQ: Contract Purchase Limits.
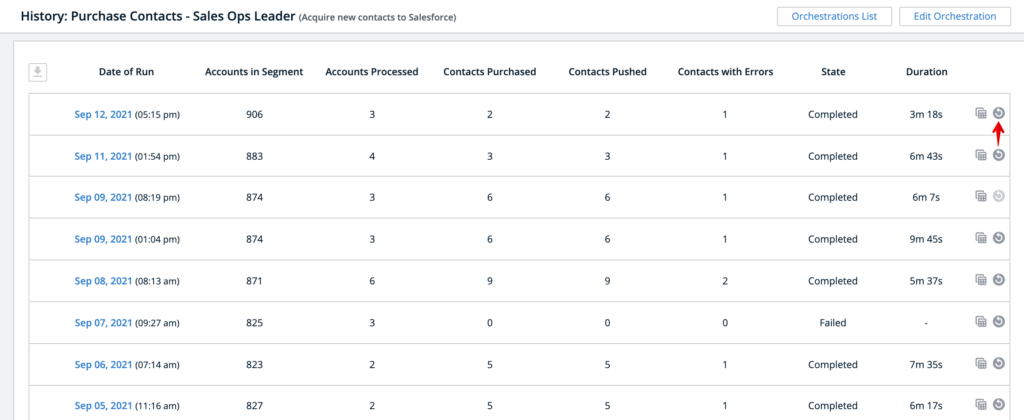
Once the orchestration runs successfully, you can check back to see the results of the run. Click on the specific run date on the History page to see the details of the run
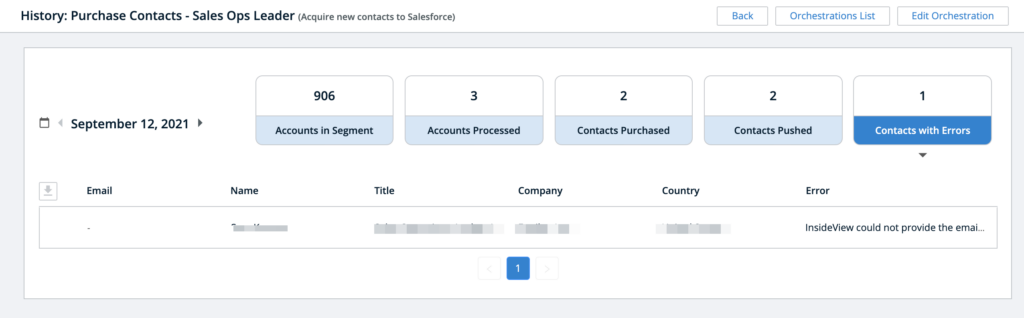
Clicking on the error shows you the write details for the contact in question. We do not purchase a contact if their email address is not available.
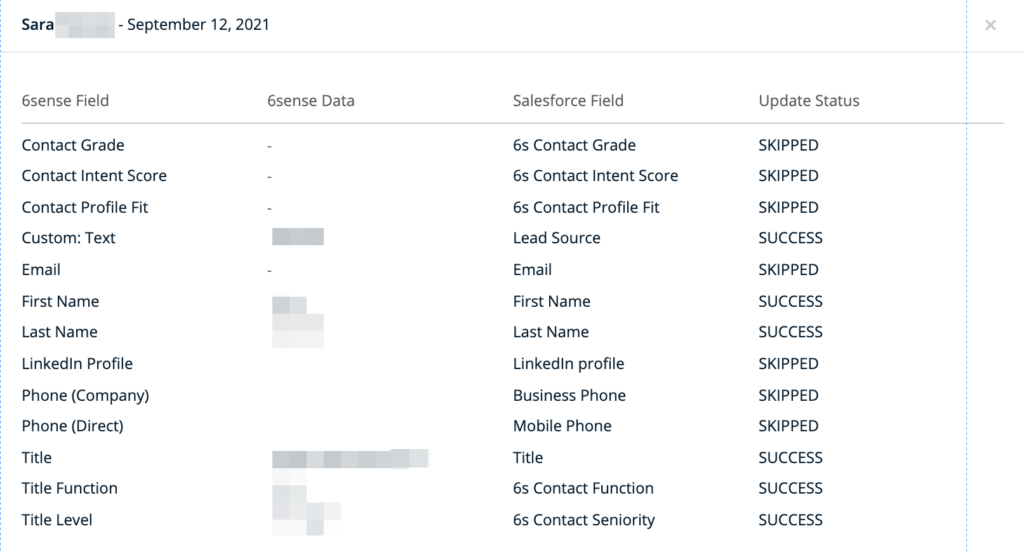
If a contact was successfully purchased, but was NOT pushed because of write complications to the designated fields, you can push those purchased contacts again (re-push). To do so, follow the steps below:
Make sure to assess the details of the push failure by clicking on the error like above.
Address any obstacles. For instance, it could be that a key field could not be written to because of a validation error. Make sure to change that before re-pushing.
Go to the history page of the orchestration in question and click the re-push button on the right-hand side of the screen (see screenshot below). Clicking the re-push button not only pushes those contacts that were purchased and not pushed, but also purchases and pushes any contacts that we were not able to purchase at the time of the original run. For instance, say at the time of the original run, we could not find an email address for a recommended contact from our vendors, but at the time of the re-push that email address has become available.